Free Shipping on Domestic Orders $75+

Cooler Master Laptop Fan Replacement

What you need

    1. Cooler Master Laptop Fan Replacement, Fan: step 1, image 1 of 1
      • Set your laptop cooler on the table and make sure it is not plugged into a laptop or powered on.

      • Never try to open the cooler while plugged in.

      Ask FixBot

      Add Comment

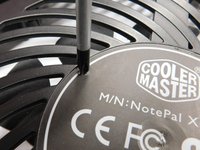
    2. Cooler Master Laptop Fan Replacement: step 2, image 1 of 1
      • Flip the Device over and find ten folded metal slots holding the metal cover onto the base.

      Ask FixBot

      Add Comment

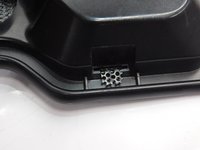
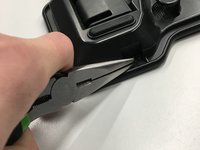
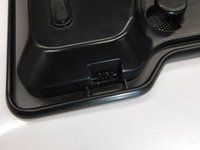
    3. Cooler Master Laptop Fan Replacement: step 3, image 1 of 3 Cooler Master Laptop Fan Replacement: step 3, image 2 of 3 Cooler Master Laptop Fan Replacement: step 3, image 3 of 3
      • Bend each metal flap straight up with the pliers to allow the metal cover to slide off.

      Ask FixBot

      Add Comment

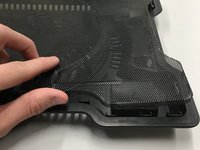
    4. Cooler Master Laptop Fan Replacement: step 4, image 1 of 2 Cooler Master Laptop Fan Replacement: step 4, image 2 of 2
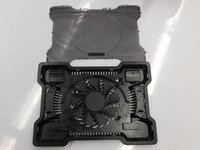
      • Remove the cover and expose the inside of the Cooler.

      Ask FixBot

      Add Comment

    5. Cooler Master Laptop Fan Replacement: step 5, image 1 of 2 Cooler Master Laptop Fan Replacement: step 5, image 2 of 2
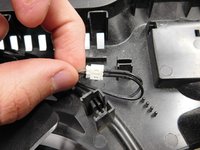
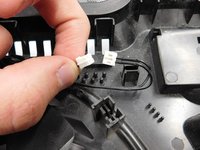
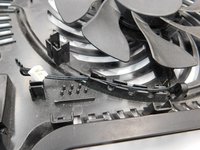
      • Unplug the power cable to the fan.

      • Make sure not to apply too much force and disconnect the wires to the device.

      Ask FixBot

      Add Comment

    6. Cooler Master Laptop Fan Replacement: step 6, image 1 of 2 Cooler Master Laptop Fan Replacement: step 6, image 2 of 2
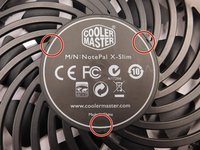
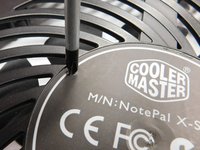
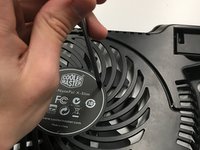
      • On the bottom of the base locate the screw holes under the sticker on the base.

      • Unscrew the three fan screws.

      Ask FixBot

      Add Comment

    7. Cooler Master Laptop Fan Replacement: step 7, image 1 of 1
      • Once all the pieces are taken apart, set aside the old fan and prep the new one for installation.

      Ask FixBot

      Add Comment

    8. Cooler Master Laptop Fan Replacement: step 8, image 1 of 1
      • Apply a small amount of thermal compound to the base where the fan sets.

      • Make sure to apply thermal compound to keep the fan from overheating and damaging the base.

      Ask FixBot

      Add Comment

    9. Cooler Master Laptop Fan Replacement: step 9, image 1 of 2 Cooler Master Laptop Fan Replacement: step 9, image 2 of 2
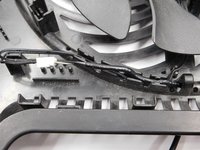
      • Connect power cable for the fan and place the cables back in their slots.

      Ask FixBot

      Add Comment

    10. Cooler Master Laptop Fan Replacement: step 10, image 1 of 2 Cooler Master Laptop Fan Replacement: step 10, image 2 of 2
      • Screw fan back onto base.

      Ask FixBot

      Add Comment

    11. Cooler Master Laptop Fan Replacement: step 11, image 1 of 1
      • Place cover back on base.

      Ask FixBot

      Add Comment

    12. Cooler Master Laptop Fan Replacement: step 12, image 1 of 1
      • Fold all metal flaps back to hold cover on base.

      Ask FixBot

      Add Comment

    13. Cooler Master Laptop Fan Replacement: step 13, image 1 of 1
      • Flip it over and it's finished.

      Ask FixBot

      Add Comment

Conclusion

Plug in the USB to insure proper working condition. And the cooling pad fan replacement is done.

Cancel: I did not complete this guide.

3 other people completed this guide.

2 Guide Comments

Hi there,

I’ve got a Targus Lap Chill Matt (Laptop Cooling Pad 15 - 17" Laptops) but the USB port had worn out and require a new replacement. Does anyone have any examples on how to replace the UBS port from a Laptop Cooler Pad?

Thanks!

rolly - Reply Share

Hi,

Just wanted to say huge thanks to you for this guideline! I have a Cooler Master Notepal L1 and the fan kept making noises. But now it works totally fine after I was able to open the cover.

Thanks again!

//Parisa

Parisa - Reply Share

Add Comment

View Statistics:

Past 24 Hours: 7

Past 7 Days: 29

Past 30 Days: 96

All Time: 7,826