Cobra SPX 5300 Audio Dial Replacement

What you need

  1. Cobra SPX 5300 Audio Dial Replacement, Windshield Bracket Mount: step 1, image 1 of 2 Cobra SPX 5300 Audio Dial Replacement, Windshield Bracket Mount: step 1, image 2 of 2
    • Remove the four 9.5 mm Phillips #0 screws from the back of the device.

  2. Cobra SPX 5300 Audio Dial Replacement: step 2, image 1 of 2 Cobra SPX 5300 Audio Dial Replacement: step 2, image 2 of 2
    • Pull the black plastic back case off of the device.

  3. Cobra SPX 5300 Audio Dial Replacement: step 3, image 1 of 1
    • Lift up the motherboard and lay it flat next to the device.

    • Be careful not to sever the wires. The buttonboard is connected to the motherboard by the wires.

  4. Cobra SPX 5300 Audio Dial Replacement: step 4, image 1 of 1
    • Remove the windshield bracket mount.

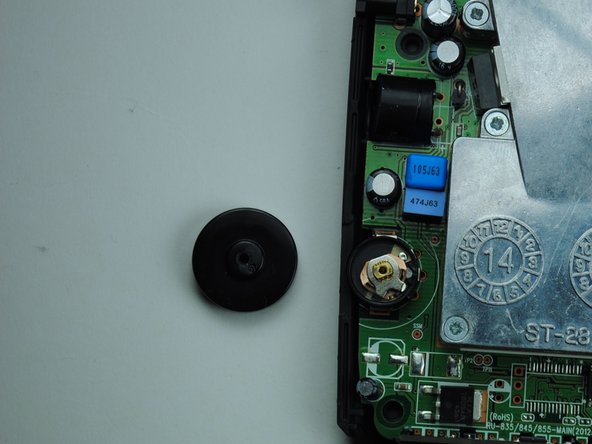
  5. Cobra SPX 5300 Audio Dial Replacement, Audio Dial: step 5, image 1 of 1
    • Remove the one 4.8 mm Phillips #00 screw from the center of the audio dial.

  6. Cobra SPX 5300 Audio Dial Replacement: step 6, image 1 of 2 Cobra SPX 5300 Audio Dial Replacement: step 6, image 2 of 2
    • Remove audio dial.

Conclusion

To reassemble your device, follow these instructions in reverse order.

One other person completed this guide.

Samantha Delle

Member since: 09/25/15

122 Reputation

1 Guide authored

0 Comments

Add Comment

View Statistics:

Past 24 Hours: 0

Past 7 Days: 3

Past 30 Days: 5

All Time: 633