Introduction
Let's suppose that one of your garments has lost a button. This would normally not be a matter of major concern, except for the fact that this particular button was not like other buttons: this button was sewn on with a ribbon. Luckily, a ribbon button such as yours can in fact be replaced, and this is how.
In this guide we are using contrasting thread for visibility. When it comes time to do your actual project, you will want to use thread and that matches the color of your ribbon.
If you don't have a sewing machine, you can still complete this guide by hand sewing.
For replacement parts or further assistance, contact Patagonia Customer Service.
What you need
-
-
Examine the garment where your ribbon button came off. There should be a little pocket where the ribbon came out.
-
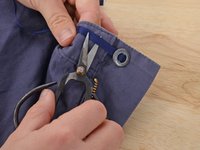
Stitch rip the seam around the little pocket until it is large enough to easily slide the ribbon in.
 Ask FixBot
-
-
-
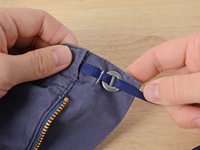
Tuck one end of the ribbon into the pocket, inserting the ribbon past the missing seam.
-
-
-
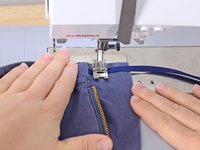
Holding the ribbon in place, slide the garment into the sewing machine, aligning the presser foot with the place you want the button to sit.
-
Sew the ribbon in place.
-
-
-
-
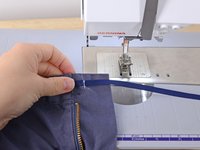
Backstitch to hold the stitches in place.
-
Lift the presser foot and remove the garment from the sewing machine.
-
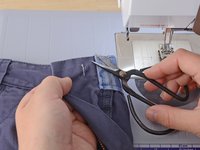
Clip any threads.
-
-
-
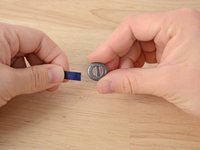
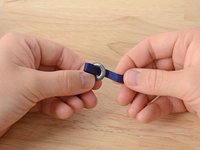
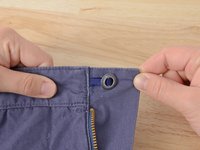
Thread the ribbon through the button coming up from behind, over the spoke in the middle, and back down through the second hole.
-
-
-
Pull the ribbon taught.
-
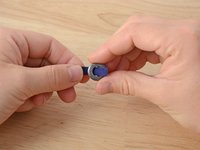
Fold the button and ribbon back over, so that the other side of the button is facing out.
-
Leave just enough ribbon to tuck into the little pocket. Clip all excess ribbon.
-
-
-
Fold the free end of the ribbon, tucking it into the little pocket, in the same manner as the first.
-
Overlap the two ends of the ribbon so that they sit directly on top of one another.
-
Sew directly over the seam, closing the little pocket.
-
-
-
Backstitch to hold the seam in place.
-
Remove the garment from the sewing machine.
-


Cancel: I did not complete this guide.
One other person completed this guide.

