Introduction
Step-by-step guide to take apart and clean absorber and bellows assembly for an ULCO Integrus PSV ventilator.
To begin, make sure the ventilator is turned off and unplugged.
These should be cleaned each day that the ventilator is in use (usually at the end of the day).
NOTE: Screw types and lengths are not specified in manuals
-
-
Loosen the knurled screws and remove the clear lid.
 Ask FixBot
-
-
-
Remove the silicone shutters by gently lifting from the base, NOT from the flaps.
-
-
-
To release and remove the canister(s), undo the handle latch by turning sideways.
-
-
-
Push canister(s) down then out of the cradle. Then dispose of the used soda lime (see suppliers recommended procedure for disposal of soda lime).
-
-
-
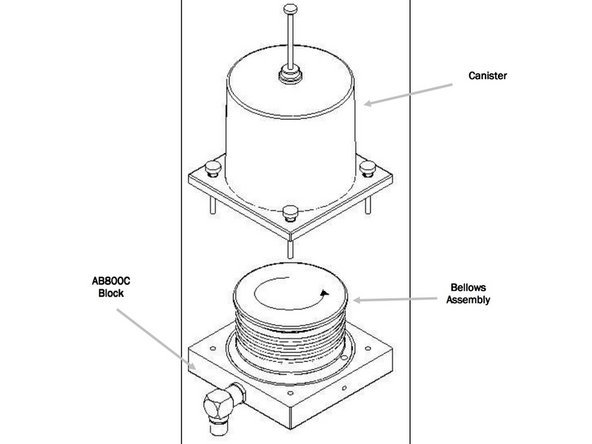
Remove the bellows assembly by rotating counter-clockwise. The bellows canister may be washed or autoclaved.
-
-
-
The base disk (mushroom) should be removed from the bellows assembly before washing. Pull the latex-free rubber bag from the delrin base disk. The bellows may be washed or autoclaved. The base component (mushroom) should not be autoclaved but can be put through a washer at 80°C.
-


To reassemble your device, follow these instructions in reverse order.
Cancel: I did not complete this guide.
One other person completed this guide.
Team

Cal Poly, Team S7-G13, Paton Spring 2020 Member of Cal Poly, Team S7-G13, Paton Spring 2020
CPSU-PATON-S20S7G13
3 Members
8 Guides authored