Free Shipping on Domestic Orders $75+

Charging Port Installation

Prerequisite Only
This is a prerequisite-only guide! This guide is part of another procedure and isn’t meant to be used alone.

What you need

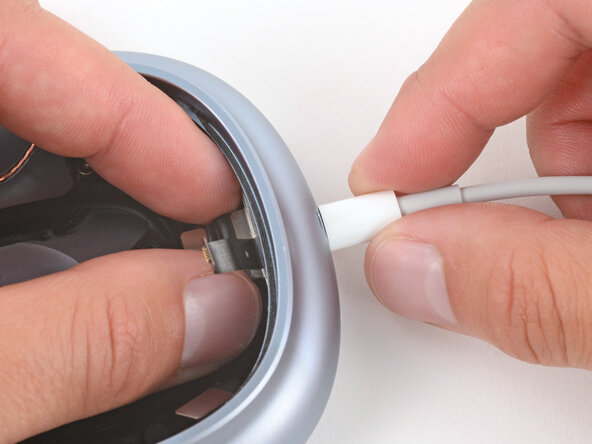
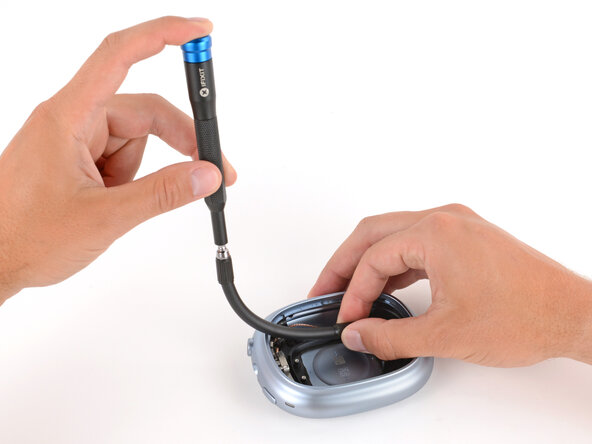
    1. Charging Port Installation, Connect a charging cable: step 1, image 1 of 2 Charging Port Installation, Connect a charging cable: step 1, image 2 of 2
      • Plugging in a charging cable helps ensure the port is properly aligned, as well as making it significantly easier to install the screws. Make sure the cable is not plugged into a power source.

      • Align the charging port with its screw holes and plug in a charging cable, making sure the microphone cable goes over the top of the port.

      Ask FixBot

      Add Comment

    2. Charging Port Installation, Install the charging port screws: step 2, image 1 of 3 Charging Port Installation, Install the charging port screws: step 2, image 2 of 3 Charging Port Installation, Install the charging port screws: step 2, image 3 of 3
      Tool used on this step:
      Magnetizer / Demagnetizer
      $8.99
      Buy
      • Install the four screws securing the charging port:

      • Two 3.7 mm‑long Torx Plus 3IP screws

      • Two 2.2 mm‑long Torx Plus 1IP screws

      • If you're using the nut driver method, you may need to use a magnetizer to get the screws to stick to the bit.

      Ask FixBot

      Add Comment

    3. Charging Port Installation, Unplug the charging cable: step 3, image 1 of 1
      • Unplug the charging cable.

      Ask FixBot

      Add Comment

    4. Charging Port Installation, Secure the microphone cable: step 4, image 1 of 3 Charging Port Installation, Secure the microphone cable: step 4, image 2 of 3 Charging Port Installation, Secure the microphone cable: step 4, image 3 of 3
      • Flip the microphone cable down over the top of the charging port so the alignment peg goes through its cutout.

      Ask FixBot

      Add Comment

    5. Charging Port Installation: step 5, image 1 of 2 Charging Port Installation: step 5, image 2 of 2
      • Use the point of a spudger to gently press the microphone cable onto the port, securing it with the leftover adhesive on the cable.

      Ask FixBot

      Add Comment

Finish Line

Cancel: I did not complete this guide.

Spencer Day

Member since: 09/14/22

205,896 Reputation

1,267 Guides authored

0 Guide Comments

Add Comment

View Statistics:

Past 24 Hours: 1

Past 7 Days: 3

Past 30 Days: 12

All Time: 79