
Casio Exilim EX-Z850 Flash Assembly Replacement

What you need

  1. Casio Exilim EX-Z850 Flash Assembly Replacement, Flash Assembly: step 1, image 1 of 1
    • Remove the four screws on the side of the speaker.

  2. Casio Exilim EX-Z850 Flash Assembly Replacement: step 2, image 1 of 1
    • Remove the two back screws on the bottom of the camera.

    • Note: Bottom screws are longer than the top ones, so label accordingly for easy reassembly.

  3. Casio Exilim EX-Z850 Flash Assembly Replacement: step 3, image 1 of 1
    • Remove the four screws on the side opposite of the speaker.

  4. Casio Exilim EX-Z850 Flash Assembly Replacement: step 4, image 1 of 2 Casio Exilim EX-Z850 Flash Assembly Replacement: step 4, image 2 of 2
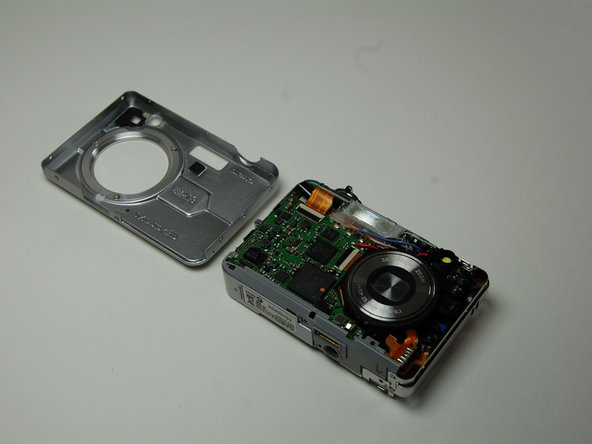
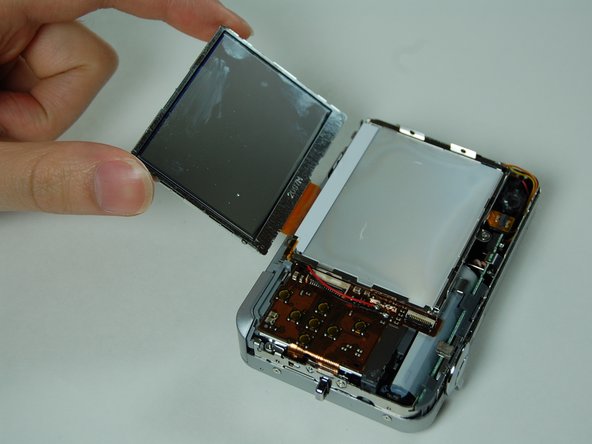
    • Once all screws have been removed, gently pry open bottom casing.

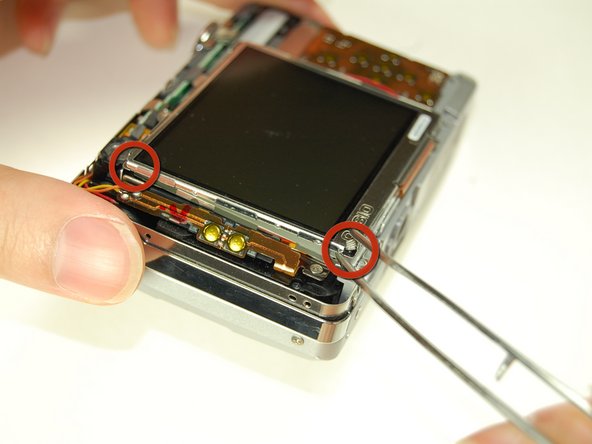
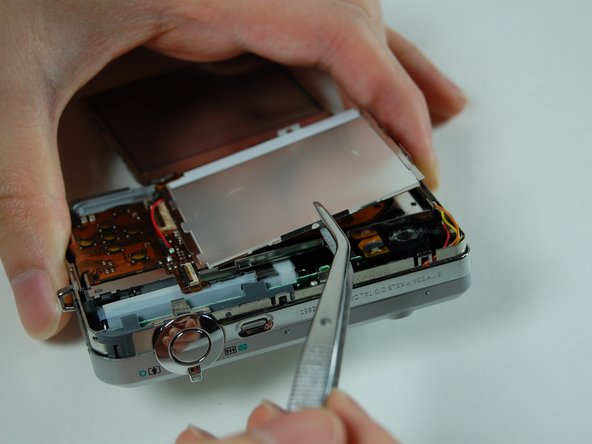
    • With tweezers, carefully remove ribbon from LCD screen.

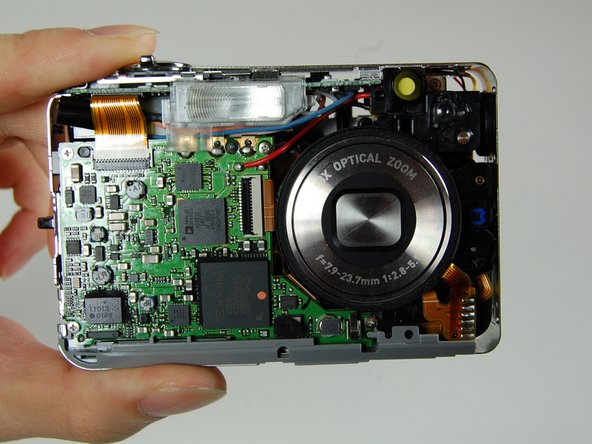
    • Set bottom casing aside.

  5. Casio Exilim EX-Z850 Flash Assembly Replacement: step 5, image 1 of 3 Casio Exilim EX-Z850 Flash Assembly Replacement: step 5, image 2 of 3 Casio Exilim EX-Z850 Flash Assembly Replacement: step 5, image 3 of 3
    • Gently pry apart the top casing using tweezers.

    • Set the top casing aside.

  6. Casio Exilim EX-Z850 Flash Assembly Replacement: step 6, image 1 of 2 Casio Exilim EX-Z850 Flash Assembly Replacement: step 6, image 2 of 2
    • Use tweezers or prongs to pry the LCD screen off from the opening.

    • Note: The bottom of the LCD screen is attached to the frame by a few pieces of black tape.

  7. Casio Exilim EX-Z850 Flash Assembly Replacement: step 7, image 1 of 2 Casio Exilim EX-Z850 Flash Assembly Replacement: step 7, image 2 of 2
    • Lift up the LCD screen, slowly move it to the other side.

  8. Casio Exilim EX-Z850 Flash Assembly Replacement: step 8, image 1 of 2 Casio Exilim EX-Z850 Flash Assembly Replacement: step 8, image 2 of 2
    • Pry off the LCD casing.

  9. Casio Exilim EX-Z850 Flash Assembly Replacement: step 9, image 1 of 3 Casio Exilim EX-Z850 Flash Assembly Replacement: step 9, image 2 of 3 Casio Exilim EX-Z850 Flash Assembly Replacement: step 9, image 3 of 3
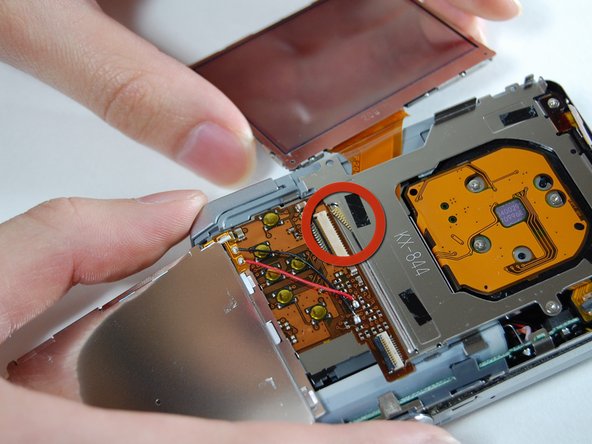
    • Flip open the connector holding the ribbon.

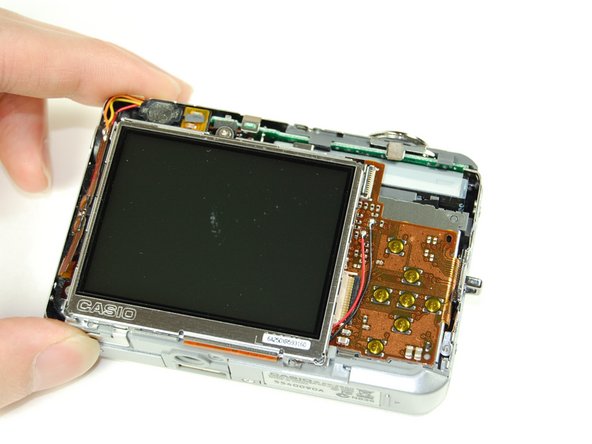
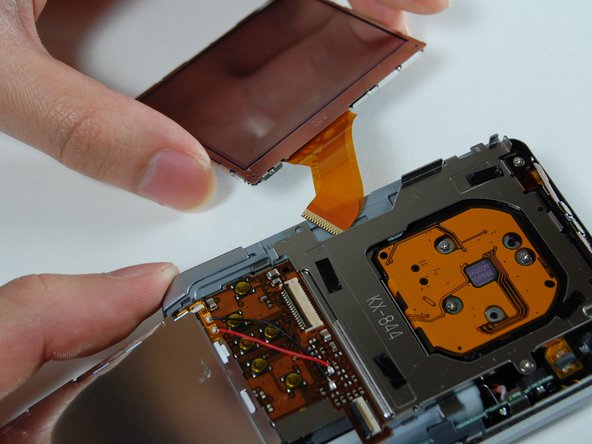
    • Pull out the LCD screen with the ribbon from the camera.

  10. Casio Exilim EX-Z850 Flash Assembly Replacement: step 10, image 1 of 2 Casio Exilim EX-Z850 Flash Assembly Replacement: step 10, image 2 of 2
    • Remove two screws on the side where the battery is located.

    • Remove the lanyard loop after the screws come off.

    • Slowly pull the side casing so it becomes dislocated from the top of the camera frame.

  11. Casio Exilim EX-Z850 Flash Assembly Replacement: step 11, image 1 of 2 Casio Exilim EX-Z850 Flash Assembly Replacement: step 11, image 2 of 2
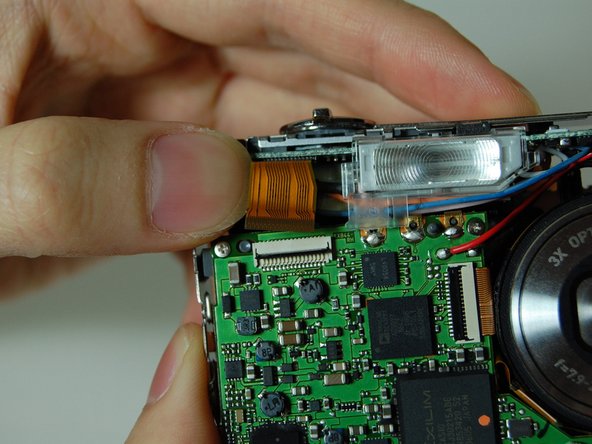
    • On the front of the camera near the flash flip the connector holding the ribbon.

    • Remove the ribbon from the connector.

  12. Casio Exilim EX-Z850 Flash Assembly Replacement: step 12, image 1 of 3 Casio Exilim EX-Z850 Flash Assembly Replacement: step 12, image 2 of 3 Casio Exilim EX-Z850 Flash Assembly Replacement: step 12, image 3 of 3
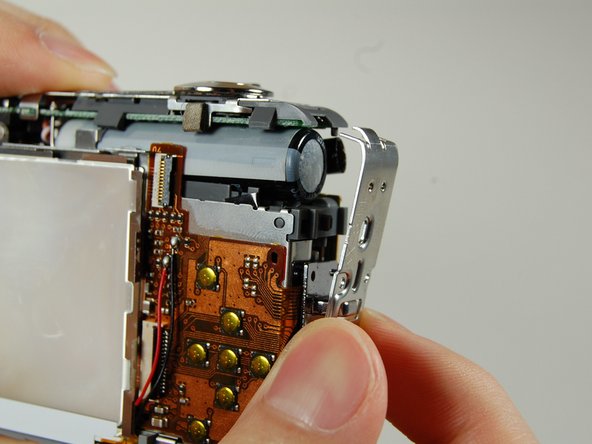
    • Carefully remove the L shaped frame from the camera.

    • At the bottom of the camera the L shaped frame is being held in by two plastic bumps and a metal tab.

    • Pop the frame off the bumps and tabs.

    • Note: There is a yellow and orange wire soldered onto the camera. Be careful not to pull them off.

  13. Casio Exilim EX-Z850 Flash Assembly Replacement: step 13, image 1 of 2 Casio Exilim EX-Z850 Flash Assembly Replacement: step 13, image 2 of 2
    • This is the flash assembly.

    • It needs to be removed with soldering points circled.

Christian

Member since: 01/28/11

320 Reputation

3 Guides authored

Team

Cal Poly, Team 4-38, Regan Winter 2011 Member of Cal Poly, Team 4-38, Regan Winter 2011

CPSU-REGAN-W11S4G38

4 Members

13 Guides authored

View Statistics:

Past 24 Hours: 0

Past 7 Days: 2

Past 30 Days: 14

All Time: 2,791