
Carburetor Cleaning

What you need

  1. Carburetor Cleaning, Air Filter: step 1, image 1 of 3 Carburetor Cleaning, Air Filter: step 1, image 2 of 3 Carburetor Cleaning, Air Filter: step 1, image 3 of 3
    • Before starting, ensure that the engine is not running and is not hot.

    • Pull the tab until the filter cover opens. Remove the filter cover.

    • Note that the bottom of the cover is hinged.

  2. Carburetor Cleaning: step 2, image 1 of 1
    • Remove the air filter.

    • The air filter will be either an oily sponge, or an accordion-folded fabric.

    • Note that the air filter is saturated with oil. Wear gloves and use paper towels to avoid creating a mess.

  3. Carburetor Cleaning, Carburetor Cleaning: step 3, image 1 of 3 Carburetor Cleaning, Carburetor Cleaning: step 3, image 2 of 3 Carburetor Cleaning, Carburetor Cleaning: step 3, image 3 of 3
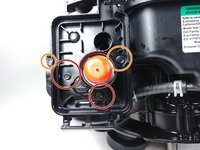
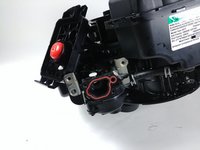
    • Locate the four bolts holding the air filter housing to the engine. Remove these bolts using the ratchet driver and the appropriately sized socket.

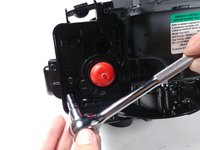
    • Remove the 1/4" bolts.

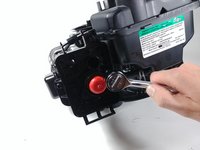
    • Remove the 5/16" bolts.

  4. Carburetor Cleaning: step 4, image 1 of 2 Carburetor Cleaning: step 4, image 2 of 2
    • Lift away the air filter housing.

    • Note that the housing is still attached to the engine via a bendable plastic rod.

  5. Carburetor Cleaning: step 5, image 1 of 1
    • Spray carburetor cleaner into the open carburetor.

    • You may want to wear gloves for this step, as carburetor cleaner is harmful if applied to the skin.

Conclusion

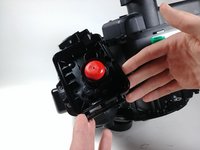
To reassemble your device, follow these instructions in reverse order.

2 other people completed this guide.

Ethan Narad

Member since: 04/19/18

529 Reputation

3 Guides authored

Team

Cal Poly, Team S25-G15, Maness Spring 2018 Member of Cal Poly, Team S25-G15, Maness Spring 2018

CPSU-MANESS-S18S25G15

4 Members

7 Guides authored

0 Comments

Add Comment

View Statistics:

Past 24 Hours: 0

Past 7 Days: 2

Past 30 Days: 9

All Time: 1,554