
Car Maintenance Tips

What you need

  1. Car Maintenance Tips, Opening the Hood: step 1, image 1 of 3 Car Maintenance Tips, Opening the Hood: step 1, image 2 of 3 Car Maintenance Tips, Opening the Hood: step 1, image 3 of 3
    • Pull on the hood release lever just inside the driver-side door to pop the hood.

    • Locate the hood release latch under the hood. Use one hand to press up on the latch while you lift the hood.

    • Insert the hood prop rod into the hole in the hood marked with an arrow.

  2. Car Maintenance Tips, Battery Terminal Corrosion: step 2, image 1 of 1
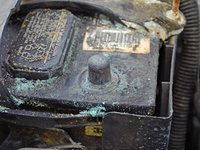
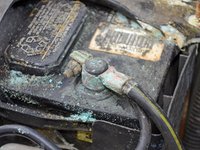
    • Locate the battery on the left side of the engine bay.

    • If your battery has a cover on it, remove it and set it aside.

    • Before proceeding, identify the positive and negative leads coming off the battery. The negative lead is generally black and may be marked with a "-". The positive lead is often red and may be marked with a "+".

    • Never bridge the terminals on the battery with your hands or tools. Shorting the battery can severely injure you.

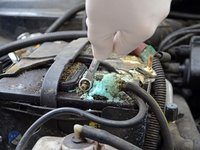
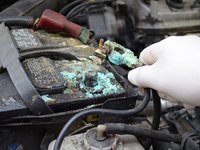
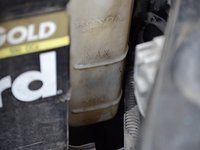
    • Look for corrosion on the battery terminals. Corrosion can be either white, grey, or blue and will generally be quite noticeable.

  3. Car Maintenance Tips: step 3, image 1 of 2 Car Maintenance Tips: step 3, image 2 of 2
    • When working with batteries, you must always remove the negative lead from the battery first, even if the corrosion is only on the positive lead.

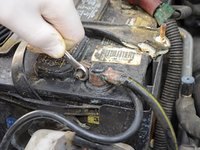
    • Using a 10mm hex wrench, loosen the nut on the screw holding the negative terminal in place.

    • If the corrosion is preventing you from accessing the nut, use the other (open) end of the wrench or a wire brush to scrape some of the corrosion away.

    • Pull the negative battery cable off of the negative lead.

    • For this guide, we only show the removal and cleaning of the negative terminal. If you are going to clean the positive terminal, first remove the negative terminal and then remove the positive terminal. The process for removing both leads is the same; it is only the order that is important.

  4. Car Maintenance Tips: step 4, image 1 of 2 Car Maintenance Tips: step 4, image 2 of 2
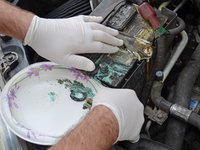
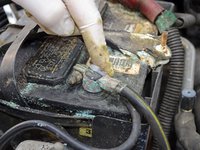
    • Scrape the corrosion off of the battery terminal using a wire battery brush or some other scraping/brushing tool.

    • You may want to avoid getting the corrosion all over the inside of the engine bay. Sweeping the corrosion onto a paper plate or rag is a simple way to get the corrosion out of the engine bay without making a mess.

  5. Car Maintenance Tips: step 5, image 1 of 2 Car Maintenance Tips: step 5, image 2 of 2
    • Re-seat the cable on the negative battery terminal.

    • Tighten the nut on the battery clamp.

    • When working with batteries, it is important that you always re-install the negative lead last.

  6. Car Maintenance Tips: step 6, image 1 of 2 Car Maintenance Tips: step 6, image 2 of 2
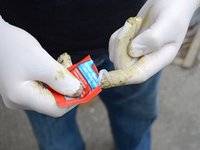
    • Open a packet of battery terminal protector, and, using your finger, coat the (now assembled) battery terminal in a thin layer. Be sure to cover the outside of both the lead and post, but not to allow any protector between the post and lead.

  7. Car Maintenance Tips, Radiator Fluid Check: step 7, image 1 of 3 Car Maintenance Tips, Radiator Fluid Check: step 7, image 2 of 3 Car Maintenance Tips, Radiator Fluid Check: step 7, image 3 of 3
    • Before opening your radiator cap, be sure to let the car cool completely. This may take up to an hour.

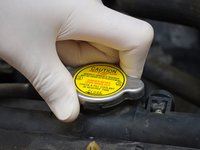
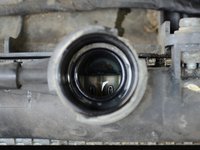
    • Twist the radiator cap counterclockwise and remove it from the radiator.

  8. Car Maintenance Tips: step 8, image 1 of 3 Car Maintenance Tips: step 8, image 2 of 3 Car Maintenance Tips: step 8, image 3 of 3
    • Fill the radiator with water until you can see the level of water rising in the radiator opening.

    • A 50/50 mixture of water and coolant is preferable, but plain water is better than nothing. Refer to your owners manual for more instructions.

    • Replace the cap on the radiator.

  9. Car Maintenance Tips: step 9, image 1 of 3 Car Maintenance Tips: step 9, image 2 of 3 Car Maintenance Tips: step 9, image 3 of 3
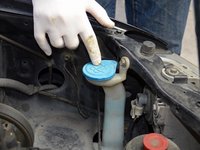
    • Unscrew the cap from the radiator overflow reservoir located to the left of the radiator, in front of the battery.

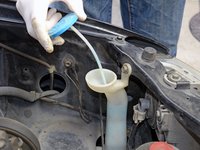
    • Fill the reservoir with water until the water level is just below the "max" fill line marked on the left side.

    • Replace the cap on the reservoir.

  10. Car Maintenance Tips, Power Steering Fluid: step 10, image 1 of 2 Car Maintenance Tips, Power Steering Fluid: step 10, image 2 of 2
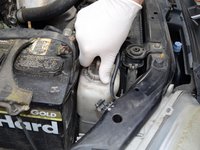
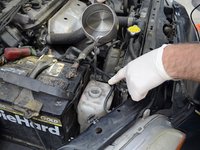
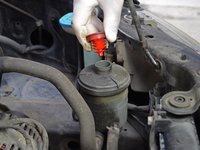
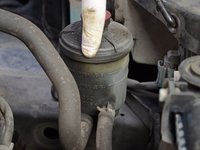
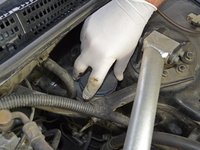
    • Locate the power steering reservoir near the front right corner of the engine bay.

    • If the fluid level is below the "Lower Level" fill line, remove the cap and refill the reservoir with power steering fluid.

    • Don't fill the reservoir so much that the fluid level goes above the "Upper Level" fill line.

  11. Car Maintenance Tips, Checking the Oil: step 11, image 1 of 3 Car Maintenance Tips, Checking the Oil: step 11, image 2 of 3 Car Maintenance Tips, Checking the Oil: step 11, image 3 of 3
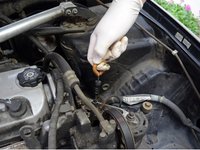
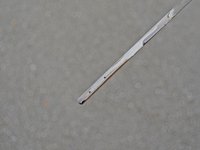
    • Locate the dipstick on the right side of the engine.

    • Remove the dipstick from its housing and wipe it off with a rag.

    • Re-insert the dipstick, and then remove it. This will give an accurate reading for the level of oil in the engine.

    • The oil level should be between the two dots marked on the dipstick. If the oil level is below the bottom dot, or there is not any oil on the dipstick at all, you will need to add oil.

  12. Car Maintenance Tips: step 12, image 1 of 3 Car Maintenance Tips: step 12, image 2 of 3 Car Maintenance Tips: step 12, image 3 of 3
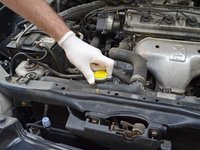
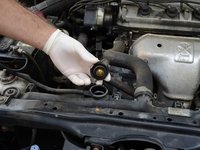
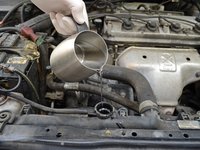
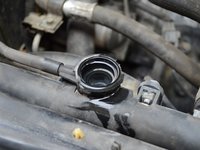
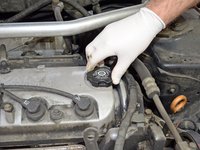
    • Twist the oil filler cap counterclockwise, and remove it from the top of the engine.

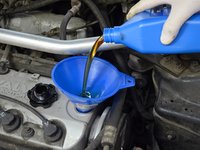
    • Using a funnel, pour one quart of manufacturer specified oil into the engine.

    • Your engine may take different oil depending on the manufacturer specification. Check your owner's manual.

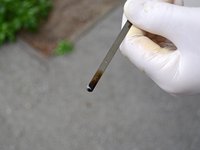
    • Remove the dipstick and check the oil level.

    • If the oil level is still low, add more oil.

    • Be sure to not overfill the engine. After adding the first quart, check the oil level every half-quart.

    • When the oil has reached the proper level, replace the dipstick and oil filler cap.

  13. Car Maintenance Tips, Window Washer Fluid: step 13, image 1 of 2 Car Maintenance Tips, Window Washer Fluid: step 13, image 2 of 2
    • Locate the window washer fluid reservoir in the front right corner of the engine bay.

    • If the fluid level appears to be low, refill the reservoir with window washer fluid.

    • You can also use a mixture of water and generic window cleaner, such as Windex. Use a ratio of 5 parts water to 1 part window cleaner.

  14. Car Maintenance Tips, Brake Fluid: step 14, image 1 of 2 Car Maintenance Tips, Brake Fluid: step 14, image 2 of 2
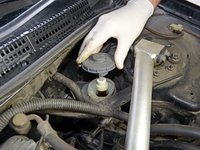
    • Locate the brake fluid reservoir at the rear right corner of the engine bay.

    • If necessary, unscrew the cap and refill the brake fluid reservoir.

  15. Car Maintenance Tips, Tire Pressure: step 15, image 1 of 3 Car Maintenance Tips, Tire Pressure: step 15, image 2 of 3 Car Maintenance Tips, Tire Pressure: step 15, image 3 of 3
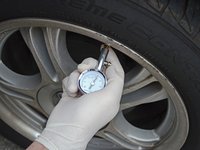
    • Unscrew the valve stem cap from the valve stem on the tire.

    • Using a handheld pressure gauge, check the pressure in the tires. The tires should be inflated to approximately 30 psi.

    • Check your owners manual for the proper tire inflation pressure specific to your vehicle's make, model, and year.

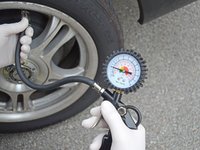
    • Using an air compressor, re-inflate the tires to the desired air pressure.

    • Although many air compressors have built-in tire pressure gauges, they are often inaccurate. Use a handheld gauge to accurately measure the pressure.

Finish Line

61 other people completed this guide.

9 Comments

Great tips. Awareness is the key. Hopefully most people are aware of these simple tasks that are often overlooked.

Thurman - Reply

Forgot to put the new oil filter in the motor and skipped that and added oit the said done hope you didnt do my car....lol

elwoods05641 - Reply

These are all wonderful tips. Could you tell me How do I shut off the car alarm after replacing a battery on a 2001 Honda Accord EX SEDAN with VTECH Engine? I don't have a remote control for my vehicle.

CARLA - Reply

awesome ,thanks for sharing

UMAIR - Reply

Repairs water pump 2000 Honda Accord CA 4 cylinder

romello51 - Reply

Add Comment

View Statistics:

Past 24 Hours: 2

Past 7 Days: 9

Past 30 Days: 37

All Time: 41,457