
Capresso Infinity Bottom Conical Burr Replacement

What you need

  1. Capresso Infinity Bottom Conical Burr Replacement, Metal Outside Casing: step 1, image 1 of 2 Capresso Infinity Bottom Conical Burr Replacement, Metal Outside Casing: step 1, image 2 of 2
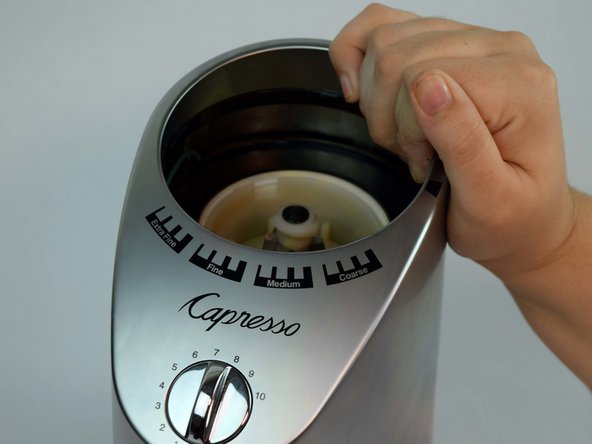
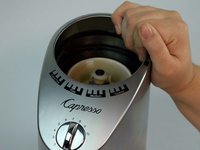
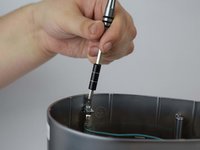
    • Twist the top plastic container to the left counterclockwise.

    • Pull upwards to remove.

  2. Capresso Infinity Bottom Conical Burr Replacement: step 2, image 1 of 3 Capresso Infinity Bottom Conical Burr Replacement: step 2, image 2 of 3 Capresso Infinity Bottom Conical Burr Replacement: step 2, image 3 of 3
    • Twist the top burr to the left counter clockwise.

    • Pull upwards to remove.

  3. Capresso Infinity Bottom Conical Burr Replacement: step 3, image 1 of 2 Capresso Infinity Bottom Conical Burr Replacement: step 3, image 2 of 2
    • Flip entire device upside down.

    • Remove two rubber coverings on the back of the device.

  4. Capresso Infinity Bottom Conical Burr Replacement: step 4, image 1 of 2 Capresso Infinity Bottom Conical Burr Replacement: step 4, image 2 of 2
    • Remove four 11.59mm T10 screws.

    • The screws will have small circular washers under them. Put them aside for reassembly.

  5. Capresso Infinity Bottom Conical Burr Replacement: step 5, image 1 of 3 Capresso Infinity Bottom Conical Burr Replacement: step 5, image 2 of 3 Capresso Infinity Bottom Conical Burr Replacement: step 5, image 3 of 3
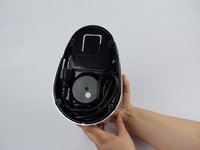
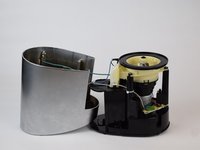
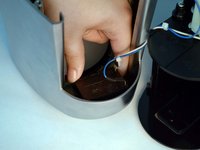
    • Lift the metal outside casing off the black base.

    • Flip the outside casing forward so you have access to the inside of it.

  6. Capresso Infinity Bottom Conical Burr Replacement: step 6, image 1 of 3 Capresso Infinity Bottom Conical Burr Replacement: step 6, image 2 of 3 Capresso Infinity Bottom Conical Burr Replacement: step 6, image 3 of 3
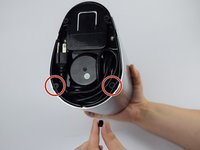
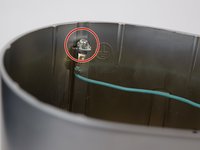
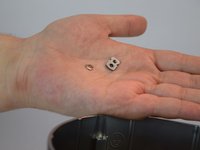
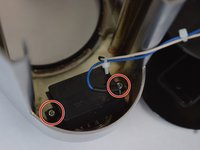
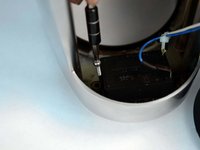
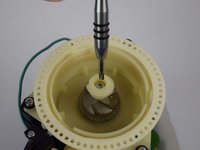
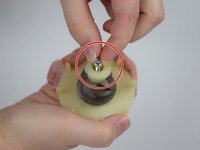
    • Remove one 11.59mm T10 screw.

    • Let the green wire fall, or place somewhere so it doesn't get in the way.

    • There will be a small metal retainer and washer, put them aside for reassembly.

  7. Capresso Infinity Bottom Conical Burr Replacement: step 7, image 1 of 3 Capresso Infinity Bottom Conical Burr Replacement: step 7, image 2 of 3 Capresso Infinity Bottom Conical Burr Replacement: step 7, image 3 of 3
    • Remove two 11.59mm T10 screws.

  8. Capresso Infinity Bottom Conical Burr Replacement: step 8, image 1 of 2 Capresso Infinity Bottom Conical Burr Replacement: step 8, image 2 of 2
    • Remove the time/on switch by pulling upwards.

  9. Capresso Infinity Bottom Conical Burr Replacement, Bottom Conical Burr: step 9, image 1 of 2 Capresso Infinity Bottom Conical Burr Replacement, Bottom Conical Burr: step 9, image 2 of 2
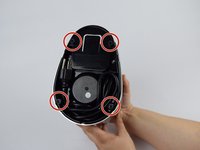
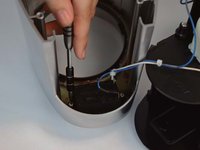
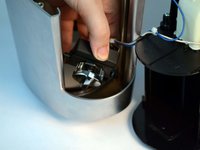
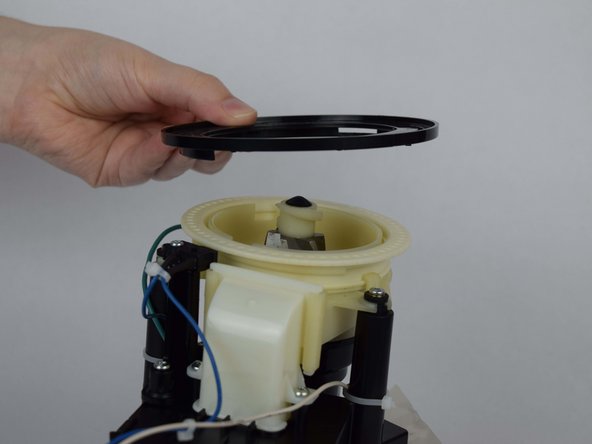
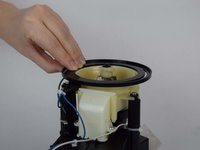
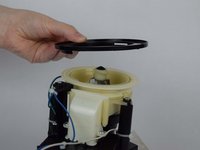
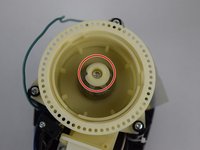
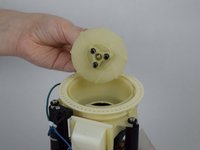
    • Grab the edge of the plastic black ring that sits on top of the device and gently pull up to release.

  10. Capresso Infinity Bottom Conical Burr Replacement: step 10, image 1 of 2 Capresso Infinity Bottom Conical Burr Replacement: step 10, image 2 of 2
    • Remove the black rubber knob atop the bottom burr by gently pulling up.

  11. Capresso Infinity Bottom Conical Burr Replacement: step 11, image 1 of 3 Capresso Infinity Bottom Conical Burr Replacement: step 11, image 2 of 3 Capresso Infinity Bottom Conical Burr Replacement: step 11, image 3 of 3
    • Partially remove one 47.20mm T20 screw.

    • The screw does not need to come out completely, it just needs to be loose enough pull the burr out of the device.

  12. Capresso Infinity Bottom Conical Burr Replacement: step 12, image 1 of 2 Capresso Infinity Bottom Conical Burr Replacement: step 12, image 2 of 2
    • Remove the bottom burr piece by pulling upwards.

    • There will be 3 springs and 3 metal balls under the springs, located underneath the burr. Put them aside for reassembly.

  13. Capresso Infinity Bottom Conical Burr Replacement: step 13, image 1 of 2 Capresso Infinity Bottom Conical Burr Replacement: step 13, image 2 of 2
    • Remove the loosened screw by pulling it upwards.

  14. Capresso Infinity Bottom Conical Burr Replacement: step 14, image 1 of 3 Capresso Infinity Bottom Conical Burr Replacement: step 14, image 2 of 3 Capresso Infinity Bottom Conical Burr Replacement: step 14, image 3 of 3
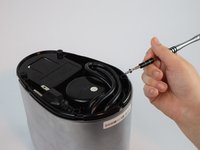
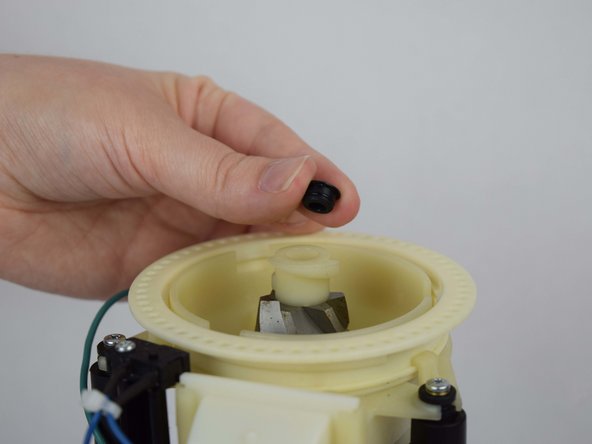
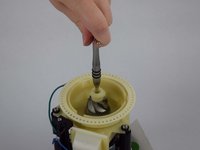
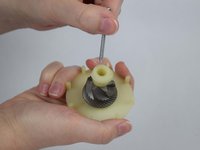
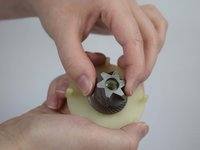
    • Grip the plastic piece at the top of the conical burr and pull upwards to remove.

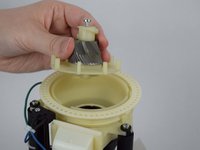
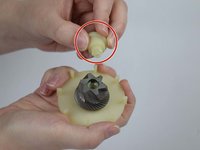
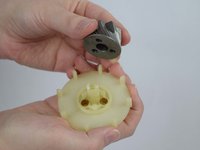
    • Grip the metal burr, and pull upwards to slide it off the plastic base.

  15. Capresso Infinity Bottom Conical Burr Replacement, Spring and Bearing Positions: step 15, image 1 of 1
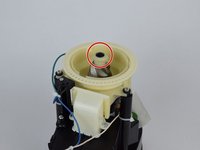
    • This is the correct position of bearings and springs when the screw and bottom burr are removed.

Conclusion

To reassemble your device, follow these instructions in reverse order.

7 other people completed this guide.

Nina Mackin

Member since: 10/09/18

528 Reputation

2 Guides authored

Team

USF Tampa, Team S1-G1, Leahy Fall 2018 Member of USF Tampa, Team S1-G1, Leahy Fall 2018

USFT-LEAHY-F18S1G1

4 Members

5 Guides authored

11 Comments

Step 5. In my machine there are 5 taps im bottom that has to be released with a screwdriver, before outer cap can be liftet up.

Step 9, It is essential to mark the location of black plastic ring in regards to white plastic part with holes AND in regards to ex. white square plastic part before removing part. Othervise you can’t assemble or you could destroy the burrs when you adjust the grinder to very fine grinds

dorthe - Reply

Hi is it possible to remove the top burr? If yes how?

Thanks

Raj haraniya - Reply

Great description of how to remove the bottom burr. Would be even greater if a new burr was available, which it is not.

Craven Morehead - Reply

burrs were found for sale on ebay. they come in a matched set. i got a set for 30 dollars. also it seems the upper burr has to be center punched out of the plastic housing it is in but i am just making an educated guess.

gt76us - Reply

wow - Appreciate the instructions but…….screw this….$85 for a new whole new Capresso Infinity Conical Grinder….. https://www.amazon.com/gp/product/B0000A...

bradley shefmire - Reply

Add Comment

View Statistics:

Past 24 Hours: 6

Past 7 Days: 37

Past 30 Days: 160

All Time: 10,117