
Canon Powershot SD550 Shutter Button Replacement

What you need

  1. Canon Powershot SD550 Shutter Button Replacement, Outer Case: step 1, image 1 of 1
    • Remove the battery and SD card from the camera.

  2. Canon Powershot SD550 Shutter Button Replacement: step 2, image 1 of 1
    • Remove the three 3.8 mm screws from the underside of the camera.

    • Each of the screws is slightly different, so it is important that you note the original location of each screw.

  3. Canon Powershot SD550 Shutter Button Replacement: step 3, image 1 of 3 Canon Powershot SD550 Shutter Button Replacement: step 3, image 2 of 3 Canon Powershot SD550 Shutter Button Replacement: step 3, image 3 of 3
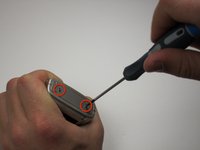
    • Remove the 3.2 mm screw from the right side of the camera.

    • Remove the 2.2 mm screw from the right side of the camera.

    • One of these screws is hidden under the USB port cover.

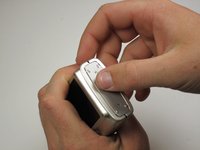
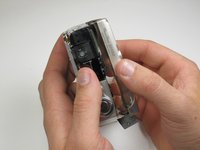
    • Lift the side panel off.

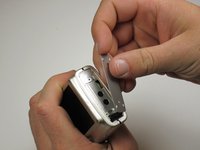
    • Remove the 1.8 mm screw from underneath the side panel.

  4. Canon Powershot SD550 Shutter Button Replacement: step 4, image 1 of 3 Canon Powershot SD550 Shutter Button Replacement: step 4, image 2 of 3 Canon Powershot SD550 Shutter Button Replacement: step 4, image 3 of 3
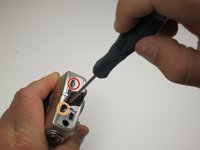
    • Remove the two 2.2 mm screws from the left side of the camera.

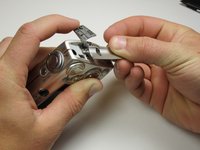
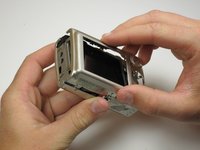
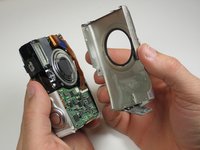
    • Lift the plate from the camera.

  5. Canon Powershot SD550 Shutter Button Replacement: step 5, image 1 of 3 Canon Powershot SD550 Shutter Button Replacement: step 5, image 2 of 3 Canon Powershot SD550 Shutter Button Replacement: step 5, image 3 of 3
    • Gently lift the rear of the case to remove it from the camera.

  6. Canon Powershot SD550 Shutter Button Replacement: step 6, image 1 of 3 Canon Powershot SD550 Shutter Button Replacement: step 6, image 2 of 3 Canon Powershot SD550 Shutter Button Replacement: step 6, image 3 of 3
    • Remove the front of the camera body.

    • Be sure to keep track of the rubber ring.

  7. Canon Powershot SD550 Shutter Button Replacement, Shutter Button: step 7, image 1 of 2 Canon Powershot SD550 Shutter Button Replacement, Shutter Button: step 7, image 2 of 2
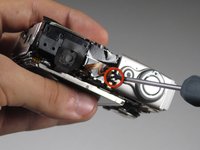
    • Next, unscrew the .115 inch screw fastening the shutter button to the camera.

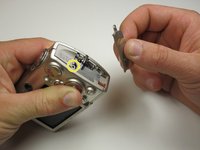
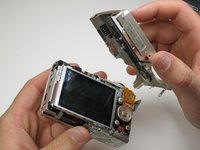
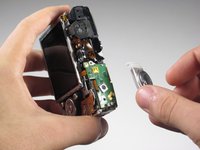
    • Now lift the button away from the camera, exposing the button board.

    • You have successfully removed the shutter button.

Conclusion

To reassemble your device, follow these instructions in reverse order.

Ken Michael

Member since: 04/17/11

1 Reputation

1 Guide authored

Team

Cal Poly, Team 18-23, Garner Spring 2011 Member of Cal Poly, Team 18-23, Garner Spring 2011

CPSU-GARNER-S11S18G23

5 Members

7 Guides authored

0 Comments

Add Comment

View Statistics:

Past 24 Hours: 0

Past 7 Days: 3

Past 30 Days: 9

All Time: 1,510