
Canon Powershot ELPH 100 HS LCD Display Replacement

What you need

  1. Canon Powershot ELPH 100 HS LCD Display Replacement, Battery: step 1, image 1 of 3 Canon Powershot ELPH 100 HS LCD Display Replacement, Battery: step 1, image 2 of 3 Canon Powershot ELPH 100 HS LCD Display Replacement, Battery: step 1, image 3 of 3
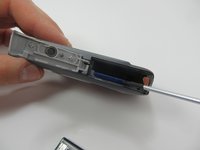
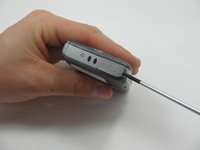
    • Locate the battery cover on the bottom of your camera.

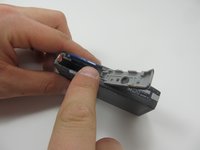
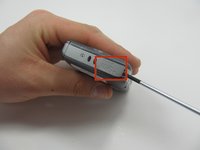
    • Slide the tab to the right to open the battery cover.

  2. Canon Powershot ELPH 100 HS LCD Display Replacement: step 2, image 1 of 2 Canon Powershot ELPH 100 HS LCD Display Replacement: step 2, image 2 of 2
    • Flip the battery cover open.

    • Using your fingers, slide the battery out of the camera.

    • This was not the original battery that came the camera, so yours may look different.

  3. Canon Powershot ELPH 100 HS LCD Display Replacement, Memory Card: step 3, image 1 of 3 Canon Powershot ELPH 100 HS LCD Display Replacement, Memory Card: step 3, image 2 of 3 Canon Powershot ELPH 100 HS LCD Display Replacement, Memory Card: step 3, image 3 of 3
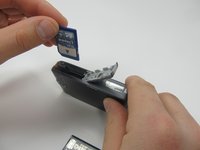
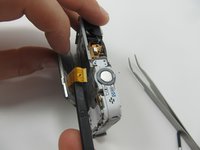
    • Push down on the memory card until it clicks and releases.

    • Pull up on the memory card to remove it.

  4. Canon Powershot ELPH 100 HS LCD Display Replacement, Outer Case: step 4, image 1 of 1
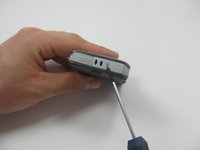
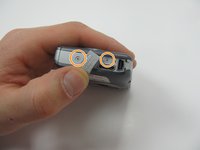
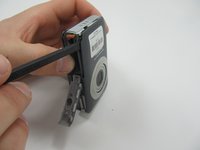
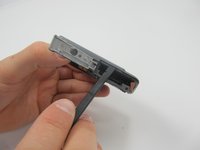
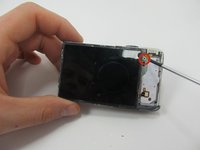
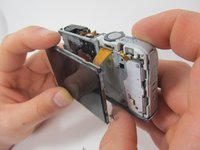
    • Using the Phillips #00 screwdriver, remove the two 3.1mm screws from the bottom of the camera.

    • Keep track of all the screws that are being taken out from the outer case.

    • The display screen of the camera should be facing towards you.

  5. Canon Powershot ELPH 100 HS LCD Display Replacement: step 5, image 1 of 1
    • Ensure that the screen is facing you, and then rotate it till you see the screws on the side of the camera.

    • Use the Phillips #00 screwdriver to remove the two 3.1 mm screws.

  6. Canon Powershot ELPH 100 HS LCD Display Replacement: step 6, image 1 of 2 Canon Powershot ELPH 100 HS LCD Display Replacement: step 6, image 2 of 2
    • With the screen still facing you, rotate the camera 180 degrees.

    • The side with the charging port should now be facing up.

  7. Canon Powershot ELPH 100 HS LCD Display Replacement: step 7, image 1 of 2 Canon Powershot ELPH 100 HS LCD Display Replacement: step 7, image 2 of 2
    • Use the Philips #00 screwdriver to pry open the charging port cover.

    • Once you pry open the charging port cover, rotate the cover so that you have access to the screw underneath. Which is seen in the next image.

    • Remove both 3.1 mm screws using the Phillips #00 screwdriver.

    • The image still shows the screw from step 3 in place.

  8. Canon Powershot ELPH 100 HS LCD Display Replacement: step 8, image 1 of 2 Canon Powershot ELPH 100 HS LCD Display Replacement: step 8, image 2 of 2
    • Turn the camera so the bottom is once again facing up.

    • With the battery door still open, use a spudger to remove the cover from the front of the camera.

    • Carefully go around all of the edges until the cover is released.

  9. Canon Powershot ELPH 100 HS LCD Display Replacement: step 9, image 1 of 1
    • Once the entire front cover has been released carefully pull it off.

    • Be careful not to break the tabs that hold it in place.

  10. Canon Powershot ELPH 100 HS LCD Display Replacement: step 10, image 1 of 3 Canon Powershot ELPH 100 HS LCD Display Replacement: step 10, image 2 of 3 Canon Powershot ELPH 100 HS LCD Display Replacement: step 10, image 3 of 3
    • Just like Step 4-6 , carefully use the Spudger to remove the back cover.

    • Go along all the borders of the back cover so that it releases from the camera safely.

    • Be careful not to break the tabs.

  11. Canon Powershot ELPH 100 HS LCD Display Replacement, LCD Display: step 11, image 1 of 2 Canon Powershot ELPH 100 HS LCD Display Replacement, LCD Display: step 11, image 2 of 2
    • Remove the 3.1mm screw on the top-right side of the LCD display screen.

  12. Canon Powershot ELPH 100 HS LCD Display Replacement: step 12, image 1 of 1
    • Use the spudger to carefully separate the screen from the frame.

  13. Canon Powershot ELPH 100 HS LCD Display Replacement: step 13, image 1 of 2 Canon Powershot ELPH 100 HS LCD Display Replacement: step 13, image 2 of 2
    • Use the spudger to lift up the latch on the zero insertion force connector (ZIF).

    • Slide the now free ribbon cable from the connector.

  14. Canon Powershot ELPH 100 HS LCD Display Replacement: step 14, image 1 of 2 Canon Powershot ELPH 100 HS LCD Display Replacement: step 14, image 2 of 2
    • Holding the display screen, gently pull the ribbon cable out through the frame of the camera.

  15. Canon Powershot ELPH 100 HS LCD Display Replacement: step 15, image 1 of 2 Canon Powershot ELPH 100 HS LCD Display Replacement: step 15, image 2 of 2
    • Using tweezers, carefully remove the ribbon cable from the connector shown.

  16. Canon Powershot ELPH 100 HS LCD Display Replacement: step 16, image 1 of 1
    • The display screen should now be free.

Conclusion

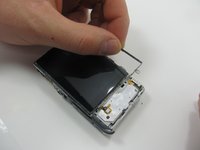
To reassemble your device, follow these instructions in reverse order.

6 other people completed this guide.

Jacob

Member since: 03/17/15

561 Reputation

3 Guides authored

Team

0 Comments

Add Comment

View Statistics:

Past 24 Hours: 0

Past 7 Days: 7

Past 30 Days: 57

All Time: 3,364