
Canon PowerShot SD850 IS Housing Replacement

Archived Guide
This guide is retained solely for historical purposes. Use the updated version of the guide to perform your repair.

What you need

  1. Canon PowerShot SD850 IS Housing Replacement, Housing: step 1, image 1 of 3 Canon PowerShot SD850 IS Housing Replacement, Housing: step 1, image 2 of 3 Canon PowerShot SD850 IS Housing Replacement, Housing: step 1, image 3 of 3
    • To avoid severe electric shock do not remove or tamper with internal camera flash components. An electrical capacitor is attached to the flash that can discharge if contact is made.

    • Remove the two side screws, indicated by the red circles, using a Phillips #00 screwdriver.

    • Remove the screw in the battery port, indicated by the blue circle, again using a Phillips #00 screwdriver.

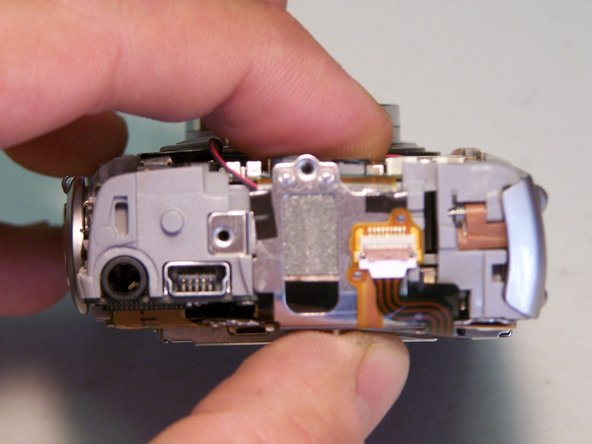
    • Remove the front face by gently peeling the housing away from the camera.

  2. Canon PowerShot SD850 IS Housing Replacement: step 2, image 1 of 3 Canon PowerShot SD850 IS Housing Replacement: step 2, image 2 of 3 Canon PowerShot SD850 IS Housing Replacement: step 2, image 3 of 3
    • Remove the back face by using a spudger to lift the tab highlighted in yellow

    • Pivot the back face clockwise as seen in the second photo.

  3. Canon PowerShot SD850 IS Housing Replacement: step 3, image 1 of 2 Canon PowerShot SD850 IS Housing Replacement: step 3, image 2 of 2
    • Remove the A/V port cover [no tools are necessary]

Conclusion

To reassemble your device, follow these instructions in reverse order.

iDeleted

Member since: 07/07/10

2,101 Reputation

39 Guides authored

0 Comments

Add Comment

View Statistics:

Past 24 Hours: 0

Past 7 Days: 0

Past 30 Days: 0

All Time: 841