Free Shipping on Domestic Orders $75+

Canon PowerShot SD1200 IS Function Button Board Replacement

What you need

    1. Canon PowerShot SD1200 IS Function Button Board Replacement, Front and Rear Covers: step 1, image 1 of 1
      • Remove the battery.

      Ask FixBot

      Add Comment

    2. Canon PowerShot SD1200 IS Function Button Board Replacement: step 2, image 1 of 3 Canon PowerShot SD1200 IS Function Button Board Replacement: step 2, image 2 of 3 Canon PowerShot SD1200 IS Function Button Board Replacement: step 2, image 3 of 3
      • Remove the two screws from the side of the camera casing with the strap. (4mm Phillips 00)

      • Remove the two screws from the bottom of the camera. (4mm Phillips 00)

      • Remove the two screws from the right side of the camera opposite the strap. (2mm Phillips 00)

      Ask FixBot

      Add Comment

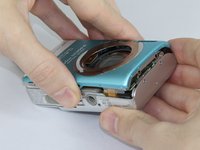
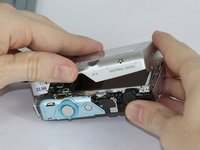
    3. Canon PowerShot SD1200 IS Function Button Board Replacement: step 3, image 1 of 2 Canon PowerShot SD1200 IS Function Button Board Replacement: step 3, image 2 of 2
      • Pull off the front cover.

      • If the top of the cover sticks, use gentle downward pressure on the retention clips above the lens to release.

      • Remove the back cover.

      Ask FixBot

      Add Comment

    1. Canon PowerShot SD1200 IS Function Button Board Replacement, Function Buttons: step 4, image 1 of 1
      • Use the spudger to lift the tab on the Zero Insertion Force (ZIF) connector located at the top of the function button board.

      • Be sure you are prying up on the hinged retaining flap, not the connector itself.

      • Slide out the ribbon cable from the connector.

      Ask FixBot

      Add Comment

    2. Canon PowerShot SD1200 IS Function Button Board Replacement: step 5, image 1 of 1
      • Remove the top screw from the function button board. (3.5mm Phillips 00)

      • Remove the bottom screw from the function button board. (2.5mm Phillips 00)

      Ask FixBot

      Add Comment

    3. Canon PowerShot SD1200 IS Function Button Board Replacement: step 6, image 1 of 1
      • Lift out the function button board.

      Ask FixBot

      Add Comment

Conclusion

To reassemble your device, follow these instructions in reverse order.

Cancel: I did not complete this guide.

Jeff Casper

Member since: 09/15/16

897 Reputation

7 Guides authored

Team

USF Tampa, Team 17-5, Blackwell Fall 2016 Member of USF Tampa, Team 17-5, Blackwell Fall 2016

USFT-BLACKWELL-F16S17G5

3 Members

35 Guides authored

0 Guide Comments

Add Comment

View Statistics:

Past 24 Hours: 0

Past 7 Days: 5

Past 30 Days: 19

All Time: 573