
Canon PowerShot SD1000 Lens Replacement

What you need

  1. Canon PowerShot SD1000 Lens Replacement, Back Panel: step 1, image 1 of 2 Canon PowerShot SD1000 Lens Replacement, Back Panel: step 1, image 2 of 2
    • Remove the two 2.9 mm screws from the side panel closest to the camera lens.

  2. Canon PowerShot SD1000 Lens Replacement: step 2, image 1 of 1
    • Remove the two 2.9 mm screws from the camera bottom panel.

  3. Canon PowerShot SD1000 Lens Replacement: step 3, image 1 of 1
    • Remove the two 2.9 mm screws from the side panel farthest from the lens.

  4. Canon PowerShot SD1000 Lens Replacement: step 4, image 1 of 1
    • Pull the back panel away from the camera body, starting at the end with the function buttons.

  5. Canon PowerShot SD1000 Lens Replacement: step 5, image 1 of 1
    • Remove the small cover panel and the attached wrist strap mount.

  6. Canon PowerShot SD1000 Lens Replacement, Front Case: step 6, image 1 of 1
    • Remove the front cover by gently pulling it away from the camera body.

  7. Canon PowerShot SD1000 Lens Replacement: step 7, image 1 of 1
    • Place the front cover, back cover, and wrist strap mount in a safe place until you are ready for reassembly.

  8. Canon PowerShot SD1000 Lens Replacement, LCD Screen: step 8, image 1 of 1
    • Remove the two 2.4 mm screws located at the top of the LCD panel.

  9. Canon PowerShot SD1000 Lens Replacement: step 9, image 1 of 2 Canon PowerShot SD1000 Lens Replacement: step 9, image 2 of 2
    • Pull up the metal frame surrounding the LCD screen starting at the side of the camera.

  10. Canon PowerShot SD1000 Lens Replacement: step 10, image 1 of 1
    • Push the metal frame away from the metal tab using the spudger to detach the frame.

    • Rotate the metal frame upwards.

    • The metal framing should be attached by a metal tab towards the bottom of the camera, near the function buttons.

  11. Canon PowerShot SD1000 Lens Replacement: step 11, image 1 of 2 Canon PowerShot SD1000 Lens Replacement: step 11, image 2 of 2
    • Carefully lift the metal frame from the camera.

    • Remove the black LCD screen, leaving the thin lens pieces in place.

    • BE CAREFUL; both components are attached by an orange connector ribbon and cannot be removed yet.

  12. Canon PowerShot SD1000 Lens Replacement: step 12, image 1 of 3 Canon PowerShot SD1000 Lens Replacement: step 12, image 2 of 3 Canon PowerShot SD1000 Lens Replacement: step 12, image 3 of 3
    • Carefully pull on the orange connector ribbon to disconnect the LCD screen.

    • The LCD screen can be pulled out of the frame before disconnecting its connector ribbon.

    • Tweezers are helpful to disconnect the ribbon.

  13. Canon PowerShot SD1000 Lens Replacement, Flash Unit: step 13, image 1 of 2 Canon PowerShot SD1000 Lens Replacement, Flash Unit: step 13, image 2 of 2
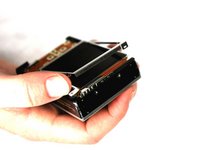
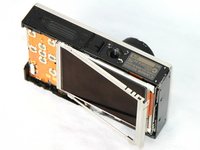
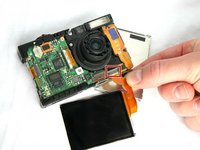
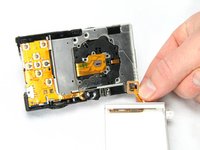
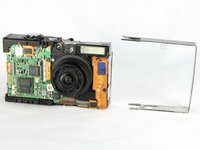
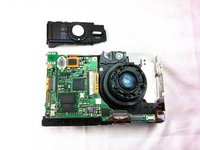
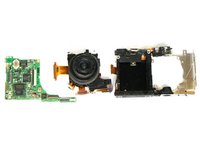
    • Slide the metal frame off of the camera on the side that is closest to the flash mechanism.

  14. Canon PowerShot SD1000 Lens Replacement: step 14, image 1 of 1
    • Use a Phillips #00 screwdriver to remove the 2.4 mm screw that secures the flash assembly.

  15. Canon PowerShot SD1000 Lens Replacement: step 15, image 1 of 1
    • Use the spudger to gently and carefully disconnect the flash assembly ribbon from the black connector lock.

  16. Canon PowerShot SD1000 Lens Replacement: step 16, image 1 of 2 Canon PowerShot SD1000 Lens Replacement: step 16, image 2 of 2
    • Pull the flash assembly forward out of the camera to remove it.

    • BE CAREFUL when handling the flash assembly. Touching the capacitor (the black cylinder attached to the flash assembly) could shock you.

  17. Canon PowerShot SD1000 Lens Replacement, Lens: step 17, image 1 of 1
    • Remove the 2.90mm screw from the lens, near the motherboard.

  18. Canon PowerShot SD1000 Lens Replacement: step 18, image 1 of 2 Canon PowerShot SD1000 Lens Replacement: step 18, image 2 of 2
    • Using the spudger remove the shutter button by prying the small tab on the front side of the camera.

  19. Canon PowerShot SD1000 Lens Replacement: step 19, image 1 of 2 Canon PowerShot SD1000 Lens Replacement: step 19, image 2 of 2
    • With a spudger disconnect the orange connector ribbon as shown.

    • Disconnect the orange connector ribbon that is located under the now removed shutter button.

  20. Canon PowerShot SD1000 Lens Replacement: step 20, image 1 of 1
    • Remove the two 2.90 mm screws from the motherboard.

  21. Canon PowerShot SD1000 Lens Replacement: step 21, image 1 of 1
    • With Tweezers detach the bottom orange ribbon.

  22. Canon PowerShot SD1000 Lens Replacement: step 22, image 1 of 1
    • Remove the screws shown. Start with the outside 6 (3-2.90mm & 3-2.40mm) screws on the metal frame. Then remove the 6 (2.40mm) screws on the back of the lens piece

  23. Canon PowerShot SD1000 Lens Replacement: step 23, image 1 of 1
    • With spudger gently remove the Viewfinder Window that is directly above the lens.

  24. Canon PowerShot SD1000 Lens Replacement: step 24, image 1 of 3 Canon PowerShot SD1000 Lens Replacement: step 24, image 2 of 3 Canon PowerShot SD1000 Lens Replacement: step 24, image 3 of 3
    • Detach the mother board with lens from body of camera.

    • Carefully remove the lens from the motherboard. Use tweezers to remove any of the 4 connecting ribbons from the lens.

    • Your lens has been removed from the motherboard and bottom framing.

Conclusion

To reassemble your device, follow these instructions in reverse order.

4 other people completed this guide.

Phillip Phung

Member since: 01/19/12

624 Reputation

9 Guides authored

Team

Cal Poly, Team 8-18, Maness Winter 2012 Member of Cal Poly, Team 8-18, Maness Winter 2012

CPSU-MANESS-W12S8G18

4 Members

12 Guides authored

0 Comments

Add Comment

View Statistics:

Past 24 Hours: 2

Past 7 Days: 12

Past 30 Days: 48

All Time: 4,535