Introduction
In this guide, we will be showing you how to remove the flash dial in order to replace it.
What you need
-
-
Remove the five 2mm Phillips #000 screws that are under the screen of the camera.
 Ask FixBot
-
-
-
Remove the two 3mm Phillips #000 screws under the AV-out digital flap.
-
Remove the two 3 mm Phillips #000 screws from the side of the camera.
-
-
-
Remove the two 3 mm Phillips #000 screws on the side of camera with the flash toggle.
-
-
-
-
Remove the four 4 mm Phillips #000 screws from the plate on the bottom of the camera.
-
-
-
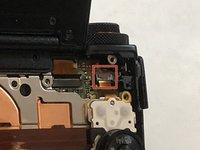
Using the nylon spudger, gently lift the ZIF tab.
-
Disconnect the ribbon cable that connects the dial to the motherboard.
-
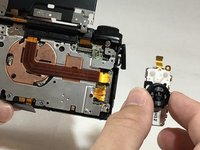
Remove the dial from the device.
-


To reassemble your device, follow these instructions in reverse order.
Team

Eastern Washington University, Team S1-G3, Carnegie Spring 2018 Member of Eastern Washington University, Team S1-G3, Carnegie Spring 2018
EWU-CARNEGIE-S18S1G3
4 Members
6 Guides authored
1 Guide Comment
Good guide. If you need to repair the jog dial, check this video for an excellent guide: https://www.youtube.com/watch?v=amuCb5ko...