
Canon EOS 30 Top Panel Replacement

Sterling Vinson and 13 other contributors
Last updated on May 22, 2018
Views: 4.2K
View statistics:
- Past 24 Hours:
- 3
- Past 7 Days:
- 17
- Past 30 Days:
- 116
- All Time:
- 4,190
Comments: 1
1 comment on steps.
Completed: 1 2
1 person has marked this guide "completed." Will you be next?
2 people have marked this guide "completed." Including you — great job!
Favorites: 1 2
1 person has favorited (and subscribed to) this guide. Will you be next?
2 people have favorited (and subscribed to) this guide — including you!
Featured Guide
This guide has been found to be exceptionally cool by the iFixit staff.
Introduction
Go to step 1 ↓The top panel can be safely separated from the camera body, but it will remain attached by several wires and a ribbon cable. Separating the top panel allows access to several important components.
What you need
Tools

-
-
-
Remove the two 4.8 mm black screws above the lens on the front of the camera.
 Ask FixBot
-
-
-
Remove the 4.3 mm black screw under the lens ring, and the 4.8 mm black screw under the camera.
-
-
-
-
-
-
Remove the four 4.3 mm black screws near the bottom corners of the eyepiece at the back of the camera.
-


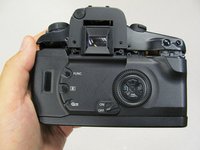
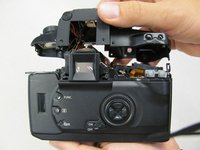
To reassemble your device, follow these instructions in reverse order.
Cancel: I did not complete this guide.
One other person completed this guide.
Team

Cal Poly, Team 8-8, Regan Spring 2011 Member of Cal Poly, Team 8-8, Regan Spring 2011
CPSU-REGAN-S11S8G8
5 Members
132 Guides authored
