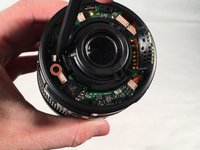
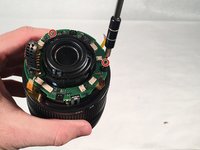
Canon EF-S 18-135mm f/3.5-5.6 IS STM Main Board Replacement

What you need

  1. Canon EF-S 18-135mm f/3.5-5.6 IS STM Main Board Replacement, Main PCB Board: step 1, image 1 of 3 Canon EF-S 18-135mm f/3.5-5.6 IS STM Main Board Replacement, Main PCB Board: step 1, image 2 of 3 Canon EF-S 18-135mm f/3.5-5.6 IS STM Main Board Replacement, Main PCB Board: step 1, image 3 of 3
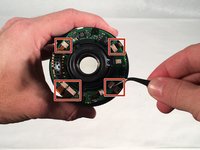
    • First, detach the lens by pressing and holding the release button highlighted in the picture.

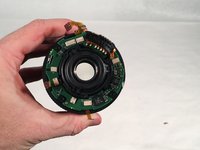
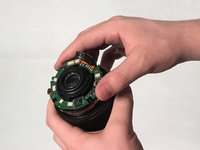
    • Next, grab the lens and rotate it counter-clockwise when looking at the camera.

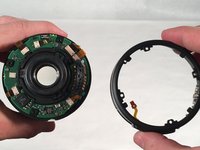
    • Finally, when the camera stops rotating, pull the lens away from the camera.

  2. Canon EF-S 18-135mm f/3.5-5.6 IS STM Main Board Replacement: step 2, image 1 of 2 Canon EF-S 18-135mm f/3.5-5.6 IS STM Main Board Replacement: step 2, image 2 of 2
    • Remove the four 5.5mm JIS #000 screws for the lens mount ring (silver ring).

    • Remove the two 4mm JIS #000 screws mounting the main board connector.

    • This guide involves removing a lot of very small screws so be sure to have a magnet board to keep track of them.

  3. Canon EF-S 18-135mm f/3.5-5.6 IS STM Main Board Replacement: step 3, image 1 of 2 Canon EF-S 18-135mm f/3.5-5.6 IS STM Main Board Replacement: step 3, image 2 of 2
    • Using a spudger, pull the connector loose from the barrel switch ring assembly.

    • Set barrel switch ring assembly to the side.

  4. Canon EF-S 18-135mm f/3.5-5.6 IS STM Main Board Replacement: step 4, image 1 of 2 Canon EF-S 18-135mm f/3.5-5.6 IS STM Main Board Replacement: step 4, image 2 of 2
    • This step involves handling sensitive electronics. Avoid static discharge.

    • Using a spudger, pull the five connectors out of their housing.

    • Use very gentle pressure when pulling connectors out of the lens main board, as they tend to break easily.

  5. Canon EF-S 18-135mm f/3.5-5.6 IS STM Main Board Replacement: step 5, image 1 of 3 Canon EF-S 18-135mm f/3.5-5.6 IS STM Main Board Replacement: step 5, image 2 of 3 Canon EF-S 18-135mm f/3.5-5.6 IS STM Main Board Replacement: step 5, image 3 of 3
    • Remove the two 4mm JIS #000 main board mounting screws.

    • Remove the main board from the lens with your hand.

    • The main board is now successfully removed from the lens.

Conclusion

To reassemble your device, follow these instructions in reverse order.

One other person completed this guide.

Paul

Member since: 03/12/18

912 Reputation

3 Guides authored

0 Guide Comments

Add Comment

View Statistics:

Past 24 Hours: 1

Past 7 Days: 8

Past 30 Days: 32

All Time: 3,008