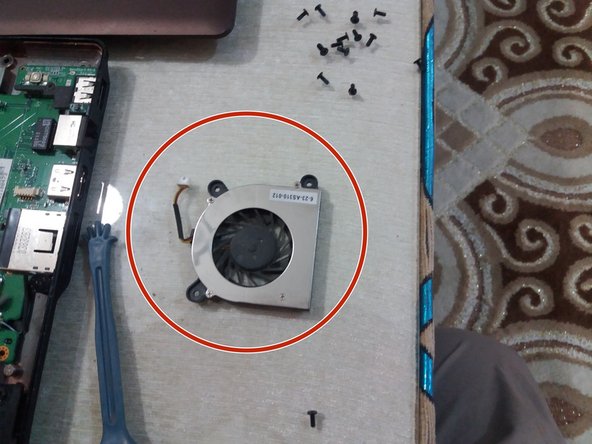
How to clean the CONDOR L130I3E fan

Video Overview

  1. How to clean the CONDOR L130I3E fan, How to clean the CONDOR L130I3E fan: step 1, image 1 of 3 How to clean the CONDOR L130I3E fan, How to clean the CONDOR L130I3E fan: step 1, image 2 of 3 How to clean the CONDOR L130I3E fan, How to clean the CONDOR L130I3E fan: step 1, image 3 of 3
    • First of all, make sure your device is switched off and unplugged.

    • Remove the battery by pulling the two screws in the direction indicated by the pins.

    • Pull the battery up.

  2. How to clean the CONDOR L130I3E fan: step 2, image 1 of 3 How to clean the CONDOR L130I3E fan: step 2, image 2 of 3 How to clean the CONDOR L130I3E fan: step 2, image 3 of 3
    • To remove the hard drive, unplug its screws in this cover.

    • Pull the hard drive in the direction indicated to remove it.

    • Then we remove the hard drive from its place with ease.

  3. How to clean the CONDOR L130I3E fan: step 3, image 1 of 3 How to clean the CONDOR L130I3E fan: step 3, image 2 of 3 How to clean the CONDOR L130I3E fan: step 3, image 3 of 3
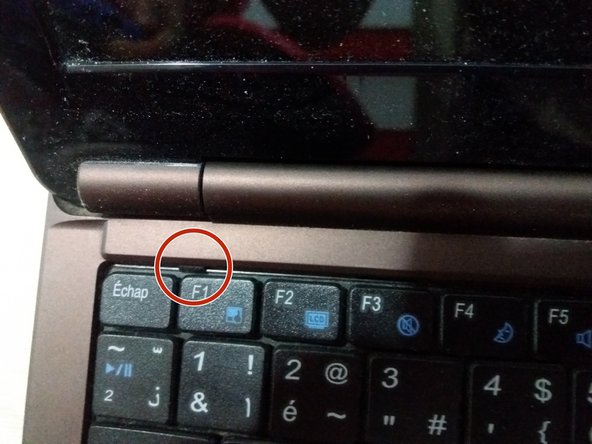
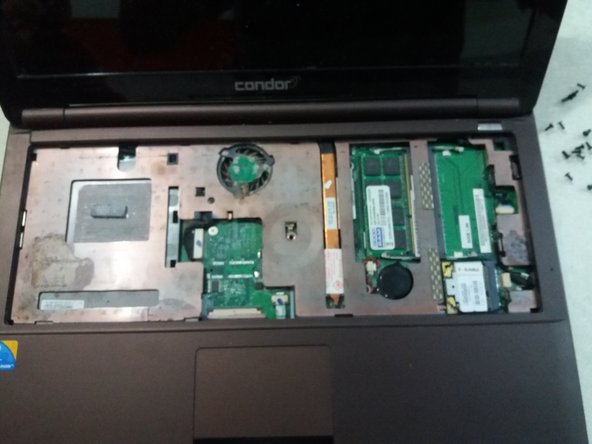
    • To access the motherboard, you must first remove the keyboard because underneath it screws should be removed to separate the base of the chassis from the top of the keyboard.

    • With a flat screwdriver we remove the keyboard by pressing the red-pointed component and pushing the keyboard up to release it.

  4. How to clean the CONDOR L130I3E fan: step 4, image 1 of 2 How to clean the CONDOR L130I3E fan: step 4, image 2 of 2
    • Remove the keyboard connector from the motherboard

    • Keyboard is now removed successfully

  5. How to clean the CONDOR L130I3E fan: step 5, image 1 of 3 How to clean the CONDOR L130I3E fan: step 5, image 2 of 3 How to clean the CONDOR L130I3E fan: step 5, image 3 of 3
    • Remove the top cover and remove the processor cooling fan.

    • Unscrew the screws indicated in red to remove the cooling fan.

    • Remove the fan.

  6. How to clean the CONDOR L130I3E fan: step 6, image 1 of 1
    • We now clean and remove the dust and sediments that hinder fan function and increase processor heat.

Conclusion

To reassemble your device, follow these instructions in reverse order.

6 other people completed this guide.

Special thanks to these translators:

fr en

100%

These translators are helping us fix the world! Want to contribute?
Start translating ›

AMOUR nasreddine

Member since: 11/20/17

1,128 Reputation

8 Guides authored

0 Comments

Add Comment

View Statistics:

Past 24 Hours: 1

Past 7 Days: 2

Past 30 Days: 14

All Time: 850