Introduction
This guide will show you how to replace your CASIO CDP-230R keys, move them to remove anything jamming your keys, or to move them to clean them.
What you need
-
-
Flip the keyboard upside down, with the keys on a flat surface.
-
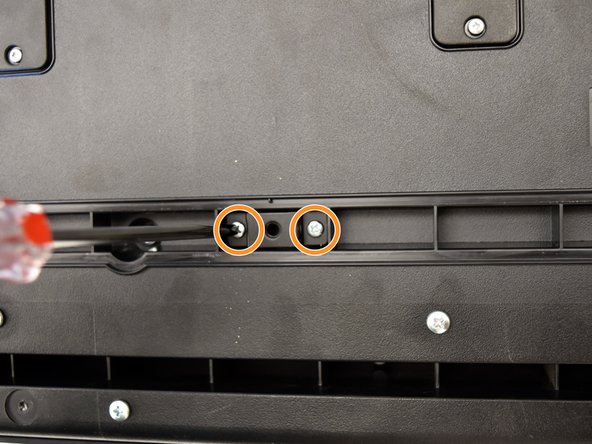
Remove the three black 14mm Japanese Industrial Standard (J) head screws using a J1 screwdriver on the top half of the outermost side panel.
-
-
-
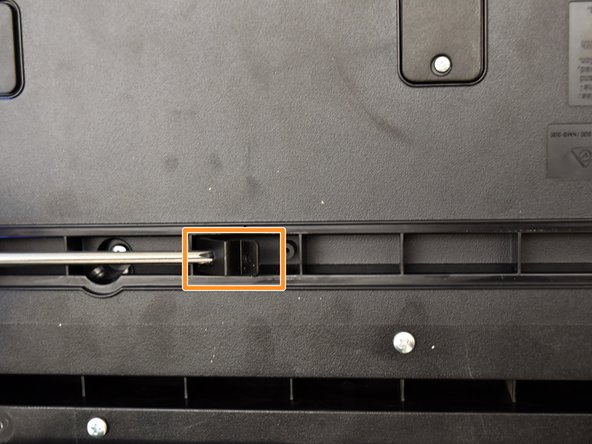
Remove the innermost side panel by pinching the top and bottom of the panel and pulling the panel off with both hands.
In my model CDP230, upon removing the inner most side panel, 2 screw brackets will come loose each side. It will fall somewhere behind - you will need these when closing once again the panels. It has its own alcove but because the keyboard is now on its back (flipped), it will naturally fall out. What I did was to place the keyboard in its natural upright position when closing the inner and outer panel. And placing this screw bracket at closing the inner bracket.
-
-
-
-
Place a hand on the front panel and speakers and carefully flip the keyboard over with the keys facing up.
-
Grab the center of the front panel with two hands and lift to remove panel.
-
Grab the speakers from the sides and lift to remove. Once you have done this for the first speaker, repeat with the second speaker.
It seems impossible to take the front panel out unless I break it. How did you do it?
I’m having the same issue. Did you ever figure out how to remove the front panel? Thanks
My experience 1st time doing it was terrible because of the double sided adhesive tape applied by the factory. So with gentle traction and plenty of patience it did finally give way. The second time around it was much easier.
-
-
-
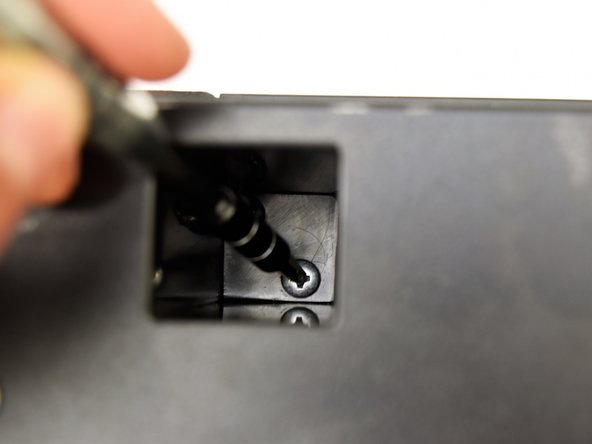
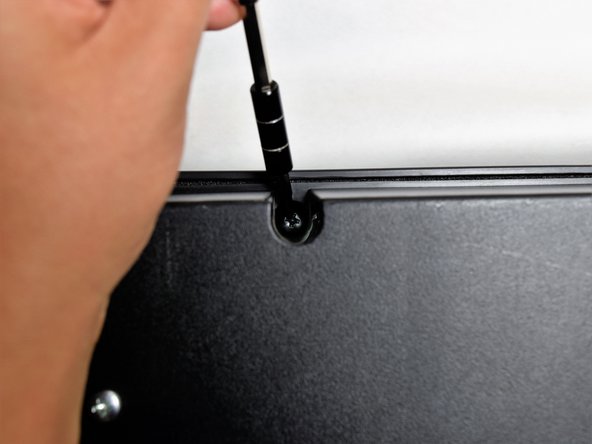
Locate the three screws behind the keys (left, center, and right).
-
Remove these 10mm J screws using a J1 screwdriver.
-
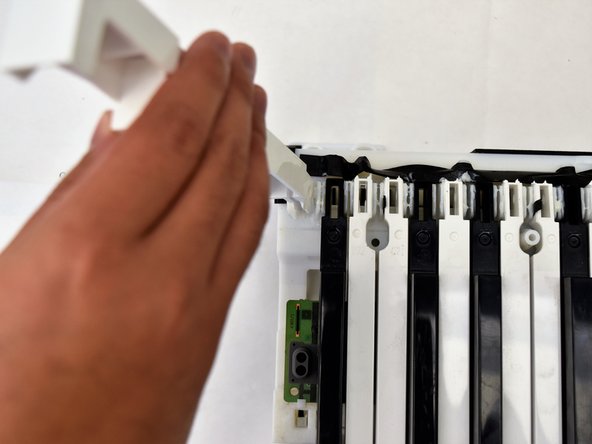
Grasp the white ribbon lined with foam and pull up to remove from the main circuit board.
-
-
-
Flip the keyboard so the keys are laying on a flat surface.
-
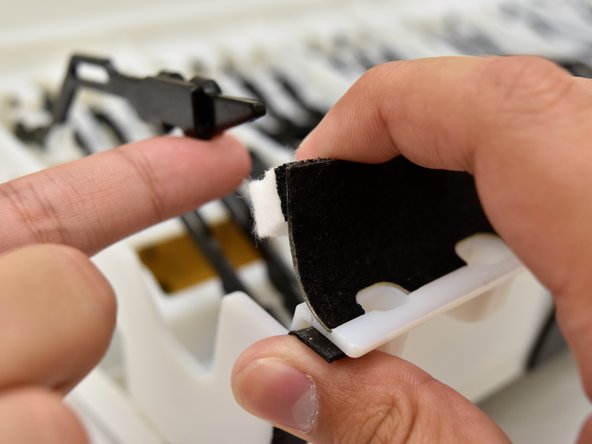
Pull up on the black and white felt to dislodge the black shank.
-
Push up on the white key while pulling the felt up to reposition the black shank underneath the felt.
Excellent ! blow - by - blow details ( until CASIO ultimately provides it )
To keep our investment going … least until a slicker version comes out
With awesome features , we might not be able to live without .
Thank you very much. The instructions did take me all the way through to replace several ruptured black and white hammer caps. However, no pointers given here on cap replacement. Sharing for prosperity sake.
Cap replacement is an easy affair. After removing the broken rubber pieces, remove excess grease to ease replacement. You should temporarily cover any holes with small piece of paper just in case the replacement cap slips from your finger and disappears. Identify correctly the B - black cap and W - white ones from you spare caps. The curved surface should be upward and the smaller opening slit should be facing inwards. Insert it using an above to below movement while holding the metal hammer steady. Don’t forget to reapply some grease upon completion.
A reflection. A professional keyboard repairman did suggest a complete replacement of all the hammer caps as they tend to break / rupture approximately the same time. So I had to do this keyboard surgery twice over a period of less than 5 months.
-


To reassemble your device, follow step 13 and then the rest of the instructions in reverse order.
To reassemble your device, follow step 13 and then the rest of the instructions in reverse order.
Cancel: I did not complete this guide.
13 other people completed this guide.
Team

Cal Poly, Team S4-G2, Livingston Fall 2017 Member of Cal Poly, Team S4-G2, Livingston Fall 2017
CPSU-LIVINGSTON-F17S4G2
4 Members
6 Guides authored
11 Comments
Thankyou very much - I have a CDP-200R that I had to pull apart - yours was the only post I could find that helped me decode what it took!
Me too, I have 200R need to replace the keys, but afraid to dismantle , now you save us all.thank you
Searched everywhere on how to fix my Casio CDP-220RBK and this was all I could find that actually helped! Awesome and very helpful guide!!!
Thanks a lot. This manual is very detailed, and the only one I've found in the whole Internet.
Hello,
One of my kids lifted a black key from my piano. It won't come down fully and doesn't play when pressed. It's also harder to press, with more resistance.
Will I be able to put it back in place by following these instructions?
Many thanks.
Superb,
Felt like a genius managed to fix a dodgy key with a bit of rubbing alcohol and compressed air using this method.
I just had issue removing the key, On the 220RBK You have to lift the key up, then remove the shank from behind the felt as you later demonstrate. So a bit more fidly, but that wasn’t to hard to figure out on my own. Maybe worth a note on the guide?
Thanks for the super guide
I just posted a reference to this website at the Casio Music Forums user group.
replacement parts list is all that’s missing ( thanks for opening the curtain , areli & company ) ;
Does this work with a casio cdp s150? I can't seem to lift the keys up
We have this model and the pitch is bending intermittently on it’s own. Do you think disconnecting the bending ‘wheel’ would stop this or is it more likely to be a faulty chip?
Thank you for any help!
Ryan - Reply