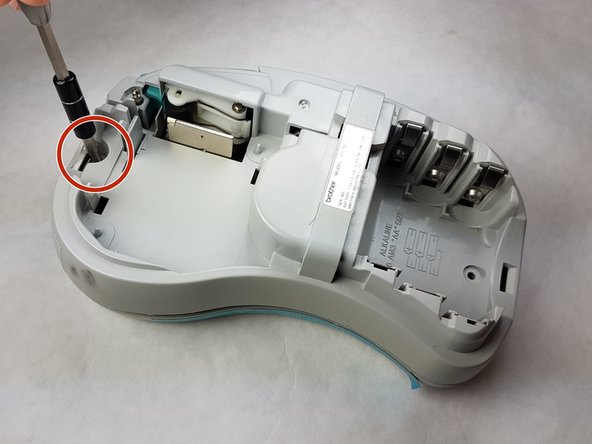
Brother PT-110 Print Roller Lever Replacement

What you need

  1. Brother PT-110 Print Roller Lever Replacement, Batteries: step 1, image 1 of 2 Brother PT-110 Print Roller Lever Replacement, Batteries: step 1, image 2 of 2
    • Push on the side of the cover, and remove it.

  2. Brother PT-110 Print Roller Lever Replacement: step 2, image 1 of 1
    • Remove the batteries.

  3. Brother PT-110 Print Roller Lever Replacement, Back Plate: step 3, image 1 of 2 Brother PT-110 Print Roller Lever Replacement, Back Plate: step 3, image 2 of 2
    • Unscrew the two 9 mm Phillips #1 screws from the top and bottom.

    • Total: 2 x Screws

  4. Brother PT-110 Print Roller Lever Replacement: step 4, image 1 of 1
    • First: To separate the top cover from the body, insert a spudger between the two halves.

    • Gently twist the spudger until the two halves separate. Do this in multiple spots around the perimeter of the cover to distribute the pressure.

    • DO NOT PULL HALVES APART. There are wired connections inside that must be disconnected before halves can be fully separated.

  5. Brother PT-110 Print Roller Lever Replacement: step 5, image 1 of 1
    • Gently separate the two covers, ensuring wires are not taut.

  6. Brother PT-110 Print Roller Lever Replacement: step 6, image 1 of 1
    • Gently grasp the ribbon wire and top cover, then gently pull the ribbon wire out of its connection.

  7. Brother PT-110 Print Roller Lever Replacement: step 7, image 1 of 2 Brother PT-110 Print Roller Lever Replacement: step 7, image 2 of 2
    • Carefully pinch the top of the connector.

    • Pull perpendicular to the device until the wire is disconnected.

    • It may require more force than expected to disconnect the wires.

  8. Brother PT-110 Print Roller Lever Replacement: step 8, image 1 of 3 Brother PT-110 Print Roller Lever Replacement: step 8, image 2 of 3 Brother PT-110 Print Roller Lever Replacement: step 8, image 3 of 3
    • Unscrew the three 9 mm Phillips #1 screws shown.

    • Total: 3 x Screws

  9. Brother PT-110 Print Roller Lever Replacement, Print Roller Lever: step 9, image 1 of 1
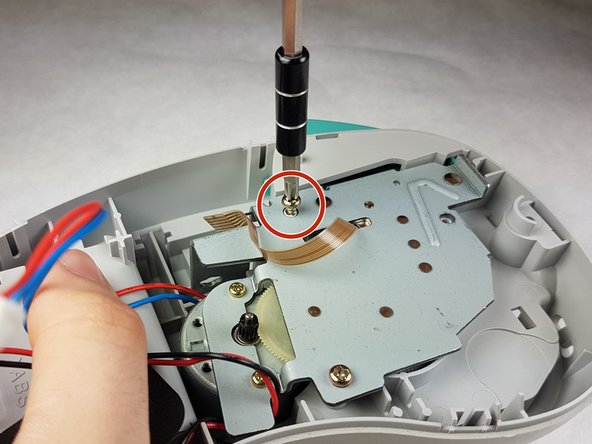
    • Using the metal spudger, swivel the pin so that the print roller lever loosens.

  10. Brother PT-110 Print Roller Lever Replacement: step 10, image 1 of 1
    • Gently pull the print roller lever out.

Conclusion

To reassemble your device, follow these instructions in reverse order.

2 other people completed this guide.

Kimberly Larsen

Member since: 09/28/16

237 Reputation

5 Guides authored

Team

IUPUI, Team 1-1, Harley Fall 2016 Member of IUPUI, Team 1-1, Harley Fall 2016

IUPUI-HARLEY-F16S1G1

3 Members

7 Guides authored

5 Comments

Hi everybody ,does anyone knows were I can by such a lever ?

TBH

Daniel Verkest - Reply

BONJOUR, (I’m French)

Same question: does anyone knows were I can by such a lever ?

Pegase M - Reply

Did anyone find a source for this part?

Erik Carlson - Reply

Unfortunately very discontinued. Until someone adds it to thingverse there's not much that can be done.

UN8026001 ROLLER HOLDER ASSY PT100/110

UN8031001 ROLLER HOLDER SPRING PT100

UN8032000 ROLLER RELEASE LEVER PT100/110

Michael Krieger - Reply

I can fix these by using plastic weld to rebuild the edging. I was totally successful.

George Pede - Reply

Add Comment

View Statistics:

Past 24 Hours: 0

Past 7 Days: 4

Past 30 Days: 28

All Time: 1,676