Introduction
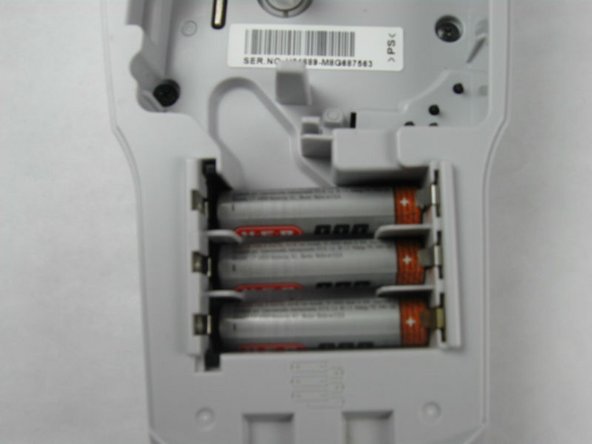
The Brother PT-1010 requires 6-AAA batteries. The batteries are organized in two layers one on top of the other. This guide will inform you on proper battery replacement.
-
-
Remove dead batteries one at a time by pulling up on the side indicated with a + symbol.
-
-
-
-
Insert the first battery with the flat side (indicated by a - symbol on the battery) facing to the left of the battery compartment.
-
Do the same thing to insert the next 2 batteries.
-
-
-
The next 3 batteries will be inserted on top of the others.
-
Insert the 4th battery with the flat side (indicated by the - symbol on the battery) facing to the right of the battery compartment.
-


To reassemble your device, follow these instructions in reverse order.
Cancel: I did not complete this guide.
One other person completed this guide.
Team

Baylor, Team 4-4, Williams Fall 2014 Member of Baylor, Team 4-4, Williams Fall 2014
BU-WILLIAMS-F14S4G4
4 Members
4 Guides authored