Introduction
This guide will aid you in replacing the clasp to fix a broken bracelet. It will walk you through how to open and close a jump ring and then how to reattach the bracelet clasp. By doing so, you will be able to reattach a bracelet clasp on most types of bracelets for little to no cost.
What you need
-
-
The clasp and metal ring (jump ring) need to be replaced.
-
Replace the jump ring first and then the clasp.
-
Be sure the correct clasp for the bracelet is present.
 Ask FixBot
-
-
-
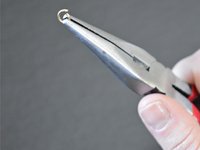
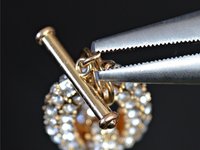
Use the needle-nose pliers to grasp the jump ring on its side, away from the break in the ring.
-
-
-
Open the jump ring with the needle-nose pliers by holding one side of the ring with the pliers and the other side with your fingers.
-
-
-
-
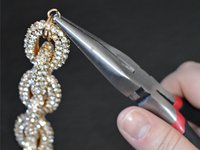
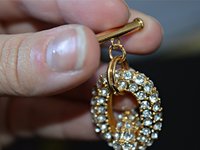
Hold the clasp in one hand and the pliers in the other.
-
Attach the new clasp to the opened jump ring being held by the needle-nose pliers by sliding the jump ring through all corresponding rings, including the clasp.
-
-
-
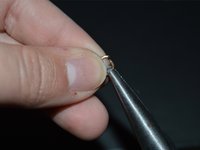
Use the needle-nose pliers to close the jump ring by squeezing the two arms of the ring together.
-
-
-
Use the needle-nose pliers to tighten the jump ring, with the jump ring perpendicular to the two arms of the pliers.
-
-
-
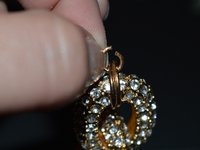
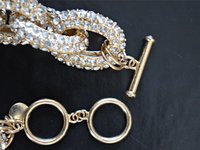
Test that the clasp and jump ring are properly attached by holding the bracelet from the clasp and suspending the rest of the bracelet.
-


To reassemble your device, follow these instructions in reverse order.
Cancel: I did not complete this guide.
5 other people completed this guide.
Team

Michigan Tech, Team 1-8, Lauer Spring 2016 Member of Michigan Tech, Team 1-8, Lauer Spring 2016
MTU-LAUER-S16S1G8
1 Member
2 Guides authored