Bose SoundLink Color Outer Casing Replacement

What you need

  1. Bose SoundLink Color Outer Casing Replacement, Outer Casing: step 1, image 1 of 2 Bose SoundLink Color Outer Casing Replacement, Outer Casing: step 1, image 2 of 2
    • Four round, plastic plugs are located on the back of the device.

    • Using a metal spudger, carefully pry up the plastic covers.

    • The covers are all glued on, so be careful not to scar the casing when prying them off. If possible, use a spudger or plastic opening tool to remove them.

  2. Bose SoundLink Color Outer Casing Replacement: step 2, image 1 of 2 Bose SoundLink Color Outer Casing Replacement: step 2, image 2 of 2
    • Remove the four 1.8 cm-long T15 Torx Security screws from the outer case.

    • Some of these use T15 "Star" 5-point Torx security screws instead of the more common 6-point ones.

  3. Bose SoundLink Color Outer Casing Replacement: step 3, image 1 of 2 Bose SoundLink Color Outer Casing Replacement: step 3, image 2 of 2
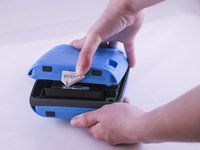
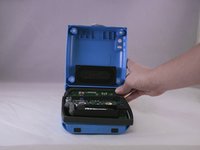
    • Carefully open up the casing.

    • The top button pad may need to be re-glued upon installing the new casing.

Conclusion

To reassemble your device, follow these instructions in reverse order.

13 other people completed this guide.

12 Comments

When I search for a 1.8 cm Torx Plus TR drill bit, I see a whole set from Amazon. Is there a particular number or head size just so I can purchase one drill bit?

jwm82 - Reply

Hey, did you find out what size screwdriver you need?

kestis155 -

yes its the number 5 torque

art -

dose anyone know where to buy the outer casing for these? i need a mint colored one.

idixon16 - Reply

I need more information on the Torx Plus bit can you provide the exact size as you used. The 1.8cm is not easy to search for. Brand and exact size number would help.

Joseph - Reply

Add Comment

View Statistics:

Past 24 Hours: 4

Past 7 Days: 23

Past 30 Days: 112

All Time: 29,181