
Bose Frames Alto Battery Removal

Prerequisite Only
This is a prerequisite-only guide! This guide is part of another procedure and isn’t meant to be used alone.

What you need

  1. Bose Frames Alto Battery Removal, Soften the Adhesive: step 1, image 1 of 1
    • Heat the left earpiece for three minutes on high with a hair dryer to soften the adhesive holding the cover. An iOpener or a heat gun on low heat can also be used.

  2. Bose Frames Alto Battery Removal, Remove the Cover: step 2, image 1 of 2 Bose Frames Alto Battery Removal, Remove the Cover: step 2, image 2 of 2
    • Insert a flat blade screwdriver between the hinge and the cover.

    • Use the hinge as a fulcrum to lever up the cover.

  3. Bose Frames Alto Battery Removal: step 3, image 1 of 3 Bose Frames Alto Battery Removal: step 3, image 2 of 3 Bose Frames Alto Battery Removal: step 3, image 3 of 3
    • Insert an opening pick next to the hinge.

    • Slice the adhesive along the edge of the cover.

    • There is an internal protrusion at this point that will stop your pick.

    • Repeat for the opposite side.

  4. Bose Frames Alto Battery Removal: step 4, image 1 of 2 Bose Frames Alto Battery Removal: step 4, image 2 of 2
    • Remove the cover.

    • Clean the old adhesive from the earpiece and the cover.

  5. Bose Frames Alto Battery Removal, Remove the Battery: step 5, image 1 of 2 Bose Frames Alto Battery Removal, Remove the Battery: step 5, image 2 of 2
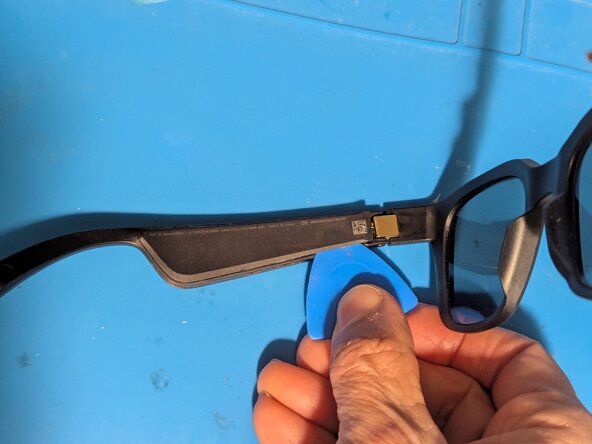
    • The battery is lightly adhered to the earpiece with double sided tape on the end next to the hinge. Pry it up with an opening pick.

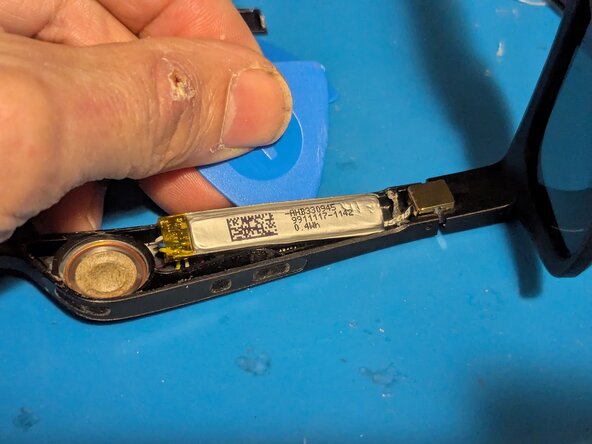
    • Turn the battery over and fold it out of the way.

  6. Bose Frames Alto Battery Removal: step 6, image 1 of 1
    • Note the positions of the wires in case your replacement battery doesn't use the same colors.

    • Yellow is the battery positive terminal (+)

    • White goes to the BMS board

    • Red is the speaker positive wire (+)

    • Black is the speaker negative wire (-)

    • Blue is battery negative (-)

Conclusion

To reassemble your device, follow these instructions in reverse order, gluing down the cover as the last step.

Jerry Wheeler

Member since: 03/21/22

83,601 Reputation

73 Guides authored

0 Guide Comments

Add Comment

View Statistics:

Past 24 Hours: 0

Past 7 Days: 17

Past 30 Days: 17

All Time: 17