Introduction
These instructions show you how to disassemble or open the coffee machine. The housing parts are not easy to remove—it takes a little patience to find the right places to unclip them with a screwdriver.
-
-
Flip up the water tank cover and unclip it.
-
First lift the top cover at the back, as shown in the photo. The screwdriver can be inserted at the yellow markings.
-
Then slide the cover backwards. When open, the hooks are clearly visible. You can also see the side wall fastenings from the inside. Use a flashlight to illuminate the interior to better understand the side wall fastenings.
 Ask FixBot
-
-
-
There are small recesses at the markings that indicate where to insert the screwdriver. If you look at the side panels from above, you can see how they are attached.
-
The two clips must be pushed aside while simultaneously sliding the side panel backwards.
-
-
-
-
Using a screwdriver or your finger, press against the clips from below and gently fold the back panel backwards.
-
Open the other clips at the bottom of the back panel with a screwdriver.
-
-
-
The heating element, this can be checked by measuring the resistance.
-
The upper temperature sensor.
-
The lower temperature sensor.
-
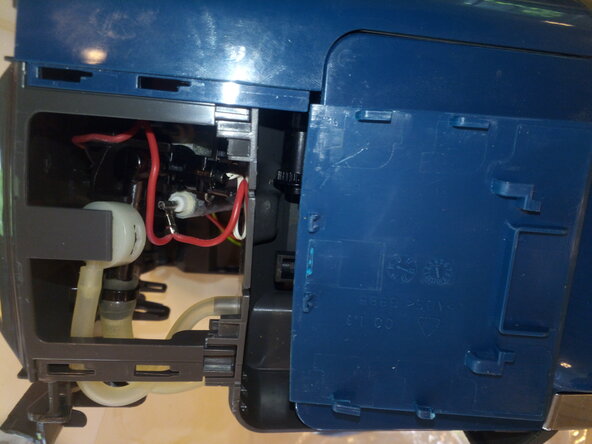
The reed / magnetic switch at the back panel for the water level. And the E410 water pump.
-
-
-
Temperature safety switch (reversible) and temperature fuse as a double component.
-
Ribbon cable to the coffee capsule scanner.
-
Sensor connectors (water level, temperature top, temperature bottom, ???)
-
Capsule replacement plate for cleaning process. The barcode is read out in the brew element. Without a capsule or the plate the machine will not operate.
-
Cut the cable ties and remove the hose. Insert a toothpick into the outlet of the pump from below – this will release the check ball. This was stuck or blocked by limescale and prevented the water from flowing.
-
If you want to check whether the heating element is so calcified that water can no longer flow through it, this hose must also be opened – as must the hose on the other side of the heating element.
-


work all steps in reverse order to reassemble the device
Cancel: I did not complete this guide.
One other person completed this guide.
Special thanks to these translators:
100%

These translators are helping us fix the world! Want to contribute?
Start translating ›

Team