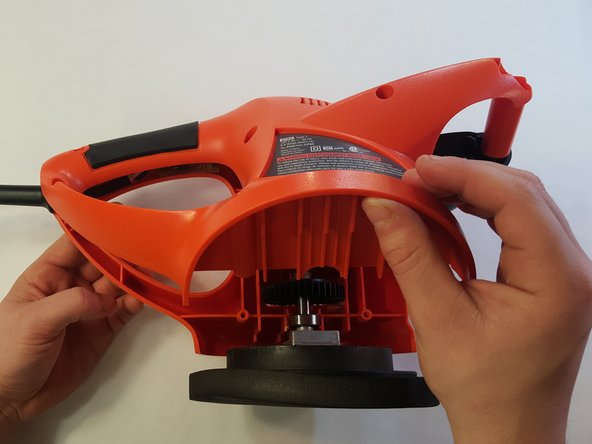
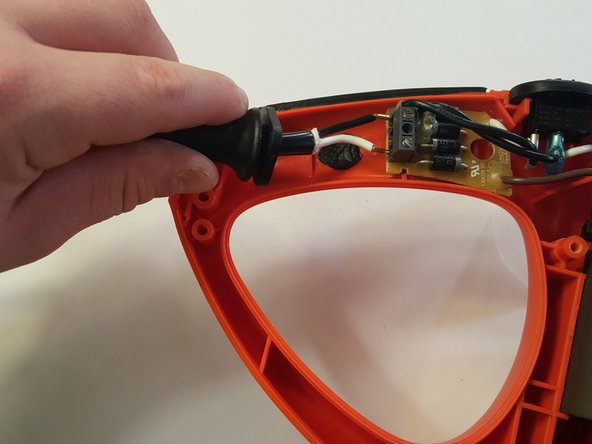
Black and Decker WP900 Power Cord Replacement

What you need

  1. Black and Decker WP900 Power Cord Replacement, Power Cord: step 1, image 1 of 1
    • Using the plastic tool, detach the handle tab as shown.

    • Make sure the device is unplugged.

  2. Black and Decker WP900 Power Cord Replacement: step 2, image 1 of 1
    • Using the Philips #1 screwdriver, unscrew all of the screws. There should be 8-30mm screws to remove.

    • Be sure to keep track of where each screw was placed in the device for later reassembly.

  3. Black and Decker WP900 Power Cord Replacement: step 3, image 1 of 3 Black and Decker WP900 Power Cord Replacement: step 3, image 2 of 3 Black and Decker WP900 Power Cord Replacement: step 3, image 3 of 3
    • Remove the back panel of the external casing, leaving all internal components resting in the front panel.

    • Remove the black handle from the main external casing.

  4. Black and Decker WP900 Power Cord Replacement: step 4, image 1 of 1
    • Loosen the power cord and control panel. Using the Phillips #1 screwdriver, remove two 22mm screws.

    • The metal bracket will detach with the two screws.

    • Using the Flathead 3/32" screwdriver, remove two 22mm screws.

  5. Black and Decker WP900 Power Cord Replacement: step 5, image 1 of 2 Black and Decker WP900 Power Cord Replacement: step 5, image 2 of 2
    • Gently pull the power cord out from the control module.

    • This is the part to be replaced. Remember to insert the black wire into the top port when installing the new cord.

Conclusion

To reassemble your device, follow these instructions in reverse order.

Cameron

Member since: 02/15/16

231 Reputation

2 Guides authored

Team

IUPUI, Team 8-8, Wilson Spring 2016 Member of IUPUI, Team 8-8, Wilson Spring 2016

IUPUI-WILSON-S16S8G8

4 Members

4 Guides authored

0 Comments

Add Comment

View Statistics:

Past 24 Hours: 0

Past 7 Days: 0

Past 30 Days: 4

All Time: 271