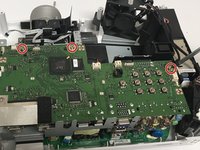
BenQ HT1075 Projector Blower Fan Replacement

What you need

  1. BenQ HT1075 Projector Blower Fan Replacement, Lamp: step 1, image 1 of 1
    • Loosen the 2.5 mm Phillips #1 screw that holds the top assembly in place using a Philips #1 (PH1) screwdriver. This will enable you to lift and slide off the top cover.

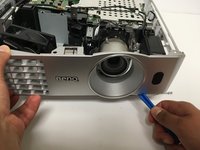
    • Fully remove the top cover in order to get to the lamp housing.

  2. BenQ HT1075 Projector Blower Fan Replacement: step 2, image 1 of 1
    • Carefully peel off the adhesive film covering the lamp housing.

  3. BenQ HT1075 Projector Blower Fan Replacement: step 3, image 1 of 1
    • Using a Phillips #1 (PH1) screwdriver, loosen and remove the single 2.5 mm Phillips #1 screw that secures the lamp housing to the projector.

  4. BenQ HT1075 Projector Blower Fan Replacement: step 4, image 1 of 1
    • Remove the lamp from the projector by pulling on the lamp handle.

    • Apply more force on the side opposite of the newly removed screw as you pull the lamp out.

  5. BenQ HT1075 Projector Blower Fan Replacement, Circuit Board: step 5, image 1 of 1
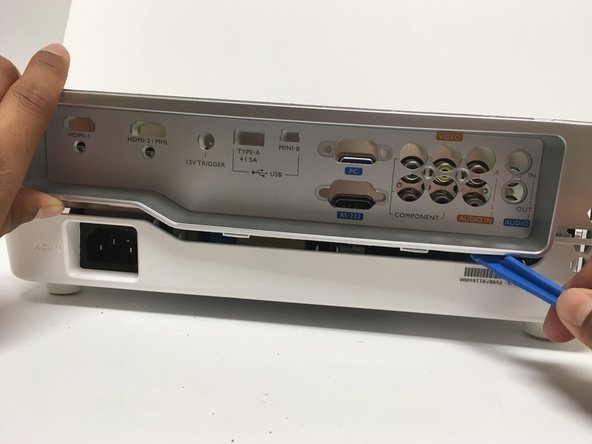
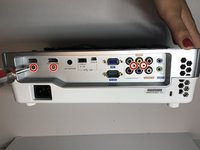
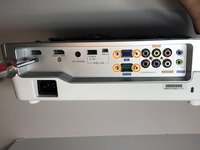
    • Turn the projector over and remove the five 9.5 mm Phillips #1 screws that hold the back cover with a Phillips #1 (PH1) screwdriver.

  6. BenQ HT1075 Projector Blower Fan Replacement, Remove the 6th screw holding the top cover: step 6, image 1 of 1
    • Flip the projector and remove the 6th and last crew.

  7. BenQ HT1075 Projector Blower Fan Replacement: step 7, image 1 of 1
    • Using an opening tool, remove the top cover by first loosening its top cover.

  8. BenQ HT1075 Projector Blower Fan Replacement: step 8, image 1 of 2 BenQ HT1075 Projector Blower Fan Replacement: step 8, image 2 of 2
    • Unplug the wire that connects the front cover to the circuit board.

    • Now use the opening tool to pry the front cover from the platform.

    • Gently pull the top cover from the rest of the frame.

  9. BenQ HT1075 Projector Blower Fan Replacement: step 9, image 1 of 2 BenQ HT1075 Projector Blower Fan Replacement: step 9, image 2 of 2
    • To prevent potential for electrical damage, disconnect any wires connected to the circuit board.

    • Using the opening tool, loosen the sides of the platform. Then gently pull them off from the projector components.

  10. BenQ HT1075 Projector Blower Fan Replacement: step 10, image 1 of 3 BenQ HT1075 Projector Blower Fan Replacement: step 10, image 2 of 3 BenQ HT1075 Projector Blower Fan Replacement: step 10, image 3 of 3
    • Remove these four 8.5 mm Phillips #1 screws using a Phillips #1 (PH1) screwdriver.

    • Afterwards, use a 5mm nut driver to remove the four remaining screws.

    • Use the opening tool to loosen the back cover then pull it off.

  11. BenQ HT1075 Projector Blower Fan Replacement: step 11, image 1 of 1
    • With a Phillips #1 (PH1) screwdriver, remove the four 6.3 mm Phillips screws that hold the metal casing on top of the circuit board.

    • Remove the metal casing.

  12. BenQ HT1075 Projector Blower Fan Replacement: step 12, image 1 of 2 BenQ HT1075 Projector Blower Fan Replacement: step 12, image 2 of 2
    • Using the Phillips #1 (PH1) screwdriver, remove the three 6.3 mm Phillips #1 screws holding down the circuit board.

    • Carefully pull the circuit board from the frame, adding force to the area where the pushbuttons are located.

  13. BenQ HT1075 Projector Blower Fan Replacement, Blower Fan: step 13, image 1 of 2 BenQ HT1075 Projector Blower Fan Replacement, Blower Fan: step 13, image 2 of 2
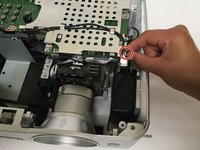
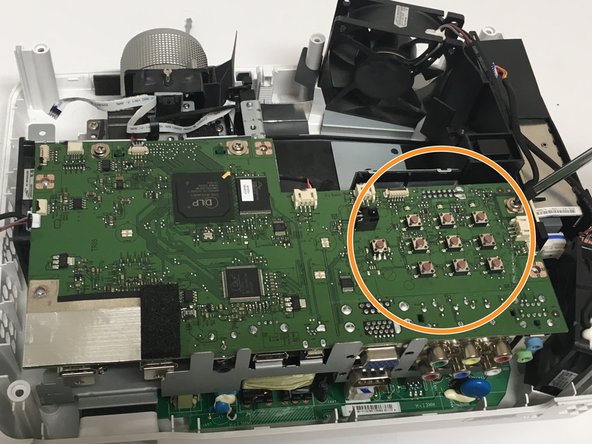
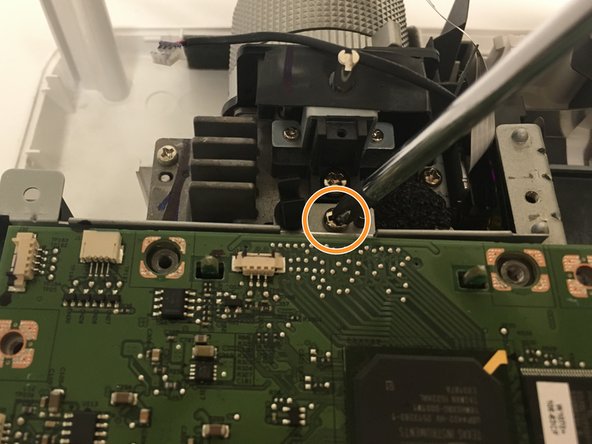
    • Unscrew the Philips #1 (PH1) screw securing the green wire located at the bottom left of the metal casing.

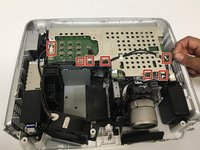
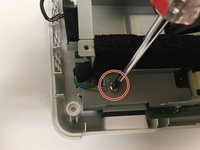
    • Remove a second Philips #1 (PH1) screw that holds down the top of the metal casing located near the back of the projector’s lens.

  14. BenQ HT1075 Projector Blower Fan Replacement: step 14, image 1 of 1
    • Remove three Philips #2 (PH2) screws that attach the metal casing to the platform.

    • Remove the metal casing by pulling it straight up.

  15. BenQ HT1075 Projector Blower Fan Replacement: step 15, image 1 of 1
    • Remove the two Philips #2 (PH2) screws that hold down the black blower fan, located at top center of the circuit board.

  16. BenQ HT1075 Projector Blower Fan Replacement: step 16, image 1 of 1
    • Remove the three Philips #1 (PH1) screws that attach the blower fan to the metal cover.

    • Gently remove the blower fan by pulling it directly upwards from the base.

Conclusion

To reassemble your device, follow these instructions in reverse order.

7 other people completed this guide.

Gabriela Remulla

Member since: 09/26/17

912 Reputation

5 Guides authored

Team

Cal Poly, Team S6-G1, Banghart Fall 2017 Member of Cal Poly, Team S6-G1, Banghart Fall 2017

CPSU-BANGHART-F17S6G1

5 Members

5 Guides authored

3 Comments

I did the repair to clear out some dust and glass from a blown lamp. After putting it back together, I get lights most likely from no power at all. Do you think the next step would to be take back apart and make sure everything is connected correctly? I can be reached at jaspercloren@gmail.com or I will check back on here.

Thank you for all your write ups, they are very nice. I may suggest to get a closer view of the screws/bolts in case someone misplaces one.

Jasper Loren - Reply

where can we buy the replacement fan? Is there a part number for finding this part?

Rekhender Dhawan - Reply

Add Comment

View Statistics:

Past 24 Hours: 2

Past 7 Days: 13

Past 30 Days: 47

All Time: 9,545