Battery Disconnection

Prerequisite Only
This guide is only intended to be used as a prerequisite for other guides. It's incomplete by itself.

What you need

  1. Battery Disconnection, Before you begin: step 1, image 1 of 3 Battery Disconnection, Before you begin: step 1, image 2 of 3 Battery Disconnection, Before you begin: step 1, image 3 of 3
    • Drain your eReader's battery as much as possible before starting your repair. Ideally, it should be fully discharged.

    • Optionally, to drain the battery faster, navigate to More → Settings → Energy saving and privacy and set Automatically go to sleep after and Automatically power off after to Never.

    • When working on or near the battery, don't use sharp metal tools to avoid puncturing and shorting the battery.

    • Unplug all cables and fully shut down your eReader.

    • Your screen should be black and say Powered off.

  2. Battery Disconnection, Insert an opening pick: step 2, image 1 of 3 Battery Disconnection, Insert an opening pick: step 2, image 2 of 3 Battery Disconnection, Insert an opening pick: step 2, image 3 of 3
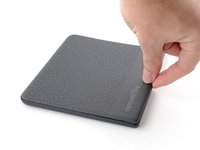
    • Flip your eReader over so the screen is facing down.

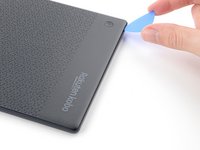
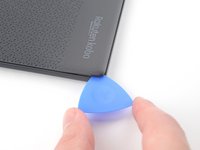
    • Angle an opening pick straight down, and insert its tip under the top right corner of the back cover, near the power button.

    • Push downward and pry up with the pick until you feel it slide between one of the clips and the frame.

    • You may have to test a few spots along the corner until the pick slides between one of the clips.

  3. Battery Disconnection, Release the right clips: step 3, image 1 of 3 Battery Disconnection, Release the right clips: step 3, image 2 of 3 Battery Disconnection, Release the right clips: step 3, image 3 of 3
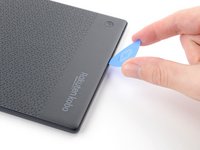
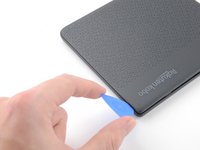
    • Slide the pick toward the bottom right corner to release the clips along the right edge.

  4. Battery Disconnection: step 4, image 1 of 2 Battery Disconnection: step 4, image 2 of 2
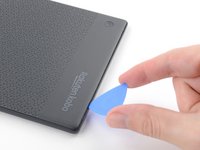
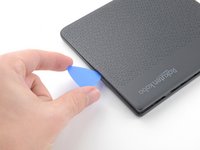
    • Angle the pick flat under the back cover and rotate it around the bottom right corner to release its clips.

    • If you're having trouble, try twisting the pick to lift the corner clips out of their slots.

  5. Battery Disconnection, Release the bottom clips: step 5, image 1 of 3 Battery Disconnection, Release the bottom clips: step 5, image 2 of 3 Battery Disconnection, Release the bottom clips: step 5, image 3 of 3
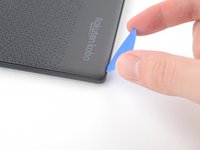
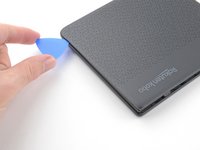
    • Slide the pick toward the bottom left corner to release the clips along the bottom edge.

  6. Battery Disconnection, Remove the back cover: step 6, image 1 of 3 Battery Disconnection, Remove the back cover: step 6, image 2 of 3 Battery Disconnection, Remove the back cover: step 6, image 3 of 3
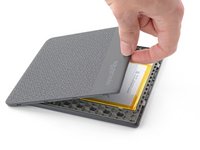
    • At this point, you should be able to grip the back cover and release its remaining clips. If not, slide a pick under the perimeter of the back cover until you can grip an edge.

    • Grip the right edge of the back cover and lift it away from the eReader to release the remaining clips.

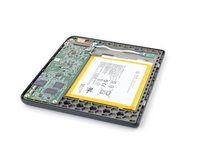
    • Remove the back cover.

    • During reassembly, align the back cover over the eReader and press along the perimeter until all its clips snap back into place.

  7. Battery Disconnection, Coating information: step 7, image 1 of 3 Battery Disconnection, Coating information: step 7, image 2 of 3 Battery Disconnection, Coating information: step 7, image 3 of 3
    • The entire surface of the eReader's internals is covered in a thin, plastic-like waterproof coating. Keep the following in mind as you continue disassembly:

    • While this won't hurt your device, removing the coating compromises the device to potential water damage.

    • The coating is brittle and can flake into many small pieces. Heating the coating helps, but working with it is still a time-consuming process.

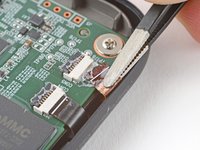
    • Depending on your repair, you might have to remove the coating from ZIF connectors and their cables.

  8. Battery Disconnection, Disconnect the battery: step 8, image 1 of 2 Battery Disconnection, Disconnect the battery: step 8, image 2 of 2
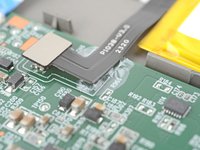
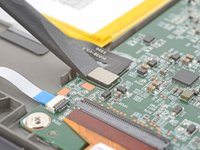
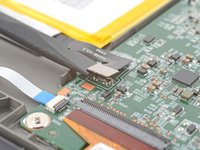
    • Use a spudger to pry up and disconnect the battery press connector.

    • Don't pry against the motherboard, as you risk breaking small, surface-mounted components.

    • Your E-ink screen will continue to say Powered off even after disconnection—this is normal!

Conclusion

To reassemble your device, follow these instructions in reverse order.

Alex Diaz-Kokaisl

Member since: 01/16/22

167,912 Reputation

769 Guides authored

Team

iFixit Member of iFixit

Staff

120 Members

20,835 Guides authored

0 Guide Comments

Add Comment

View Statistics:

Past 24 Hours: 2

Past 7 Days: 2

Past 30 Days: 4

All Time: 94