Shop the Holiday Gift Guide
Free Shipping on Domestic Orders $75+

Battery Disconnect

Views: 213

View statistics:

Past 24 Hours:
2
Past 7 Days:
8
Past 30 Days:
23
All Time:
213
Comments: 0

No one has left comments on this guide. Will you be first?

Go to guide comments
Completed: 0

No one has marked this guide "completed." Will you be the first?

Favorites: 0

No one has favorited (and subscribed to) this guide. Will you be the first?

Time Required: No estimate
Difficulty: Moderate
Prerequisite Only

This is a prerequisite-only guide! This guide is part of another procedure and isn’t meant to be used alone.

Battery Disconnect

Introduction

Go to step 1 ↓

Use this guide to disconnect the battery in your Razer Blade 15 Advanced Model (Early 2020) laptop. The battery should be disconnected before all major repairs.

What you need

Tools

    1. Battery Disconnect, Prepare your laptop for disassembly: step 1, image 1 of 2 Battery Disconnect, Prepare your laptop for disassembly: step 1, image 2 of 2
      • Allow your laptop's battery to drain below 25% before starting this repair—a charged battery may catch fire if damaged.

      • Unplug all cables, fully shut down your laptop, and close the lid.

      Ask FixBot

      Add Comment

    1. Battery Disconnect, Unfasten the back cover: step 2, image 1 of 2 Battery Disconnect, Unfasten the back cover: step 2, image 2 of 2
      • Use a T5 Torx driver to remove the ten 3.8 mm‑long screws securing the back cover.

      Ask FixBot

      Add Comment

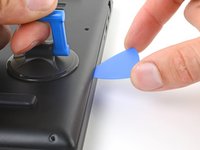
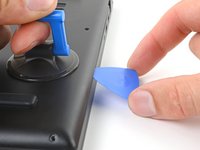
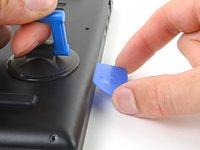
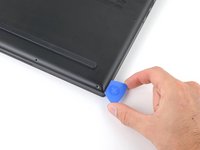
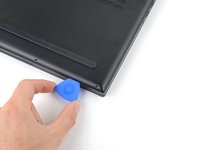
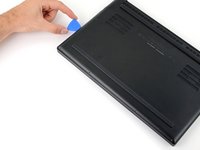
    2. Battery Disconnect, Insert an opening pick: step 3, image 1 of 3 Battery Disconnect, Insert an opening pick: step 3, image 2 of 3 Battery Disconnect, Insert an opening pick: step 3, image 3 of 3
      • Depending on the age and condition of your laptop, the back cover may come off sooner than this guide instructs. If it feels loose, remove it at any time.

      • Apply a suction handle to the middle of the back cover's right edge, between the lower rubber foot and the middle screws.

      • Pull up on the suction handle to create a small gap between the back cover and the frame.

      • Insert an opening pick into the gap.

      Ask FixBot

      Add Comment

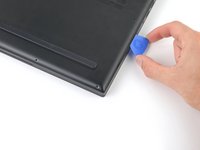
    3. Battery Disconnect, Angle the opening pick: step 4, image 1 of 3 Battery Disconnect, Angle the opening pick: step 4, image 2 of 3 Battery Disconnect, Angle the opening pick: step 4, image 3 of 3
      • Angle your opening pick upward, away from the frame. Keep it angled upward as long as it's between the back cover and the frame.

      Ask FixBot

      Add Comment

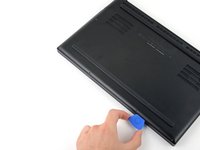
    4. Battery Disconnect, Free the bottom right corner: step 5, image 1 of 3 Battery Disconnect, Free the bottom right corner: step 5, image 2 of 3 Battery Disconnect, Free the bottom right corner: step 5, image 3 of 3
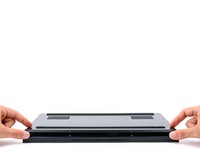
      • Slide your opening pick around the bottom right corner of the back cover to free it from the frame.

      Ask FixBot

      Add Comment

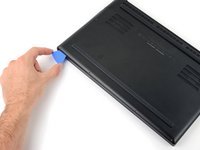
    5. Battery Disconnect, Free the front edge: step 6, image 1 of 3 Battery Disconnect, Free the front edge: step 6, image 2 of 3 Battery Disconnect, Free the front edge: step 6, image 3 of 3
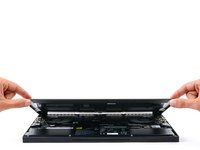
      • Slide your opening pick along the front edge and around the front left corner of the back cover to free it from the frame completely.

      Ask FixBot

      Add Comment

    6. Battery Disconnect, Remove the back cover: step 7, image 1 of 3 Battery Disconnect, Remove the back cover: step 7, image 2 of 3 Battery Disconnect, Remove the back cover: step 7, image 3 of 3
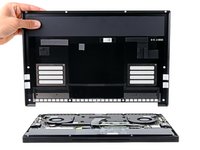
      • Remove the back cover.

      • Lay the back cover down on its rubber feet to avoid damaging the thermal pads.

      Ask FixBot

      Add Comment

    1. Battery Disconnect, Disconnect the battery: step 8, image 1 of 3 Battery Disconnect, Disconnect the battery: step 8, image 2 of 3 Battery Disconnect, Disconnect the battery: step 8, image 3 of 3
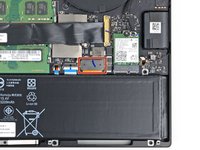
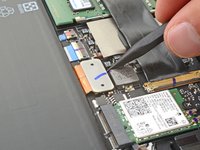
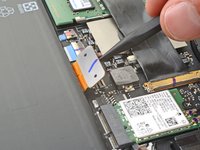
      • Insert the point of a spudger under the middle of the battery connector's long edge.

      • Lift and disconnect the battery press connector from its socket on the motherboard.

      • This will require some force. Don't pry against any resistors or chips.

      • To re-attach press connectors like this one, carefully align and press down on one side until it clicks into place, then repeat on the other side. Don't press down in the middle. If the connector is misaligned, the pins can bend and cause permanent damage.

      Ask FixBot

      Add Comment

Conclusion

To reassemble your device, follow these instructions in reverse order.

Cancel: I did not complete this guide.

Spencer Day

Member since: 09/14/22

210,425 Reputation

1,265 Guides authored

Team

iFixit Member of iFixit

Staff

119 Members

72,954 Guides authored

0 Guide Comments

Add Comment

View Statistics:

Past 24 Hours: 2

Past 7 Days: 8

Past 30 Days: 23

All Time: 213