
Free Shipping on Domestic Orders $75+

Battery Disconnect

Prerequisite Only
This is a prerequisite-only guide! This guide is part of another procedure and isn’t meant to be used alone.

What you need

  1. Battery Disconnect, Prepare your laptop for disassembly: step 1, image 1 of 2 Battery Disconnect, Prepare your laptop for disassembly: step 1, image 2 of 2
    • Allow your laptop's battery to drain below 25% before starting this repair—a charged battery may catch fire if damaged.

    • Unplug all cables and fully shut down your laptop.

  2. Battery Disconnect, Unfasten the back cover: step 2, image 1 of 2 Battery Disconnect, Unfasten the back cover: step 2, image 2 of 2
    • Use a Phillips screwdriver to remove the ten screws securing the back cover:

    • Six 7.6 mm-long screws

    • Four 4.7 mm-long screws

  3. Battery Disconnect, Insert an opening pick: step 3, image 1 of 3 Battery Disconnect, Insert an opening pick: step 3, image 2 of 3 Battery Disconnect, Insert an opening pick: step 3, image 3 of 3
    • Plastic clips secure the back cover to the frame. You'll hear and feel the clips release.

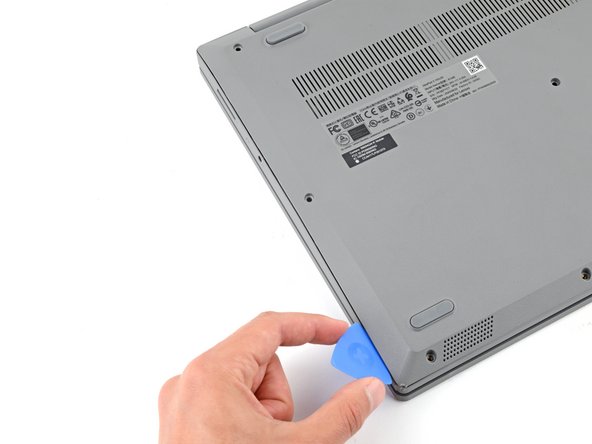
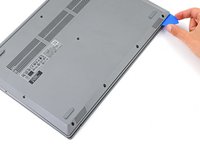
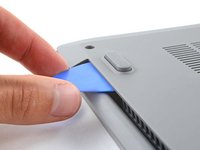
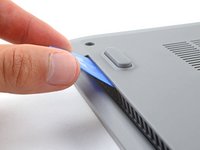
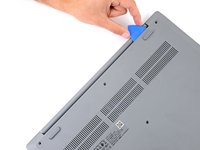
    • Insert the flat side of an opening pick between the top left corner of the back cover and frame.

    • Angle the pick down to about 45 degrees.

  4. Battery Disconnect, Release the left clips: step 4, image 1 of 3 Battery Disconnect, Release the left clips: step 4, image 2 of 3 Battery Disconnect, Release the left clips: step 4, image 3 of 3
    • Keep the opening pick angled down at about 45 degrees while sliding it along the front and side edges to help release the clips.

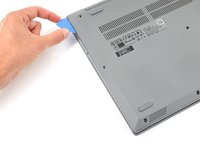
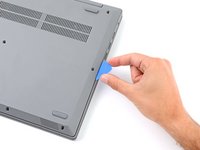
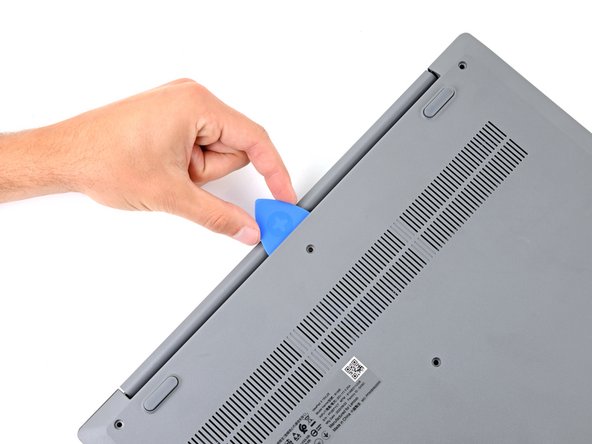
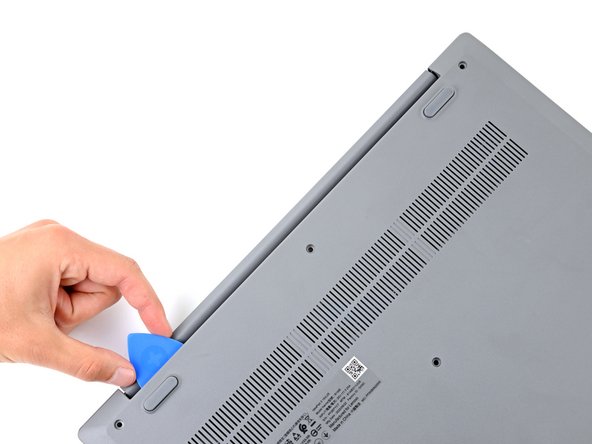
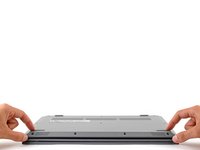
    • Slide the pick to the bottom left corner of the laptop to release the left clips.

  5. Battery Disconnect, Release the bottom clips: step 5, image 1 of 3 Battery Disconnect, Release the bottom clips: step 5, image 2 of 3 Battery Disconnect, Release the bottom clips: step 5, image 3 of 3
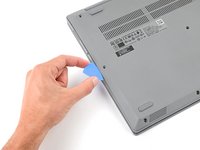
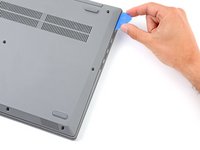
    • Slide the opening pick to the bottom right corner to release the bottom clips.

  6. Battery Disconnect, Release the right clips: step 6, image 1 of 3 Battery Disconnect, Release the right clips: step 6, image 2 of 3 Battery Disconnect, Release the right clips: step 6, image 3 of 3
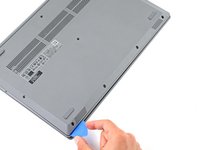
    • Slide the opening pick to the top right corner to release the right clips.

  7. Battery Disconnect, Insert an opening pick: step 7, image 1 of 2 Battery Disconnect, Insert an opening pick: step 7, image 2 of 2
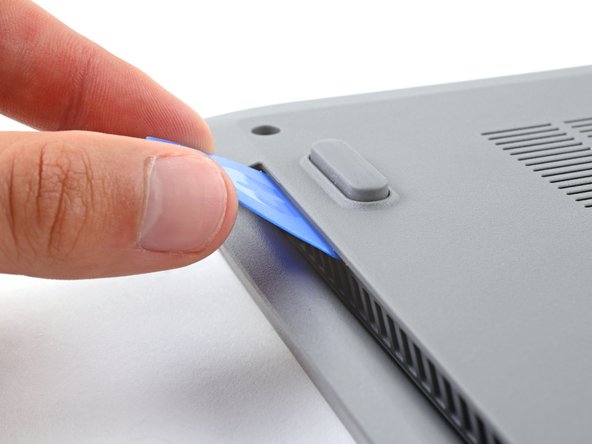
    • Insert the flat end of an opening pick between the back cover and frame, to the left of the right hinge.

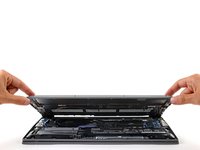
    • Pry the back cover up with the pick to release the top right clips.

    • Leave the pick inserted next to the right hinge.

  8. Battery Disconnect, Release the top clips: step 8, image 1 of 3 Battery Disconnect, Release the top clips: step 8, image 2 of 3 Battery Disconnect, Release the top clips: step 8, image 3 of 3
    • Angle the pick up to about 45 degrees.

    • Slide the opening pick to the top left corner to release the remaining clips.

  9. Battery Disconnect, Remove the back cover: step 9, image 1 of 3 Battery Disconnect, Remove the back cover: step 9, image 2 of 3 Battery Disconnect, Remove the back cover: step 9, image 3 of 3
    • Remove the back cover.

    • During reassembly, lay the back cover on the frame and press firmly around the perimeter to engage all the clips.

  10. Battery Disconnect, Disconnect the battery: step 10, image 1 of 3 Battery Disconnect, Disconnect the battery: step 10, image 2 of 3 Battery Disconnect, Disconnect the battery: step 10, image 3 of 3
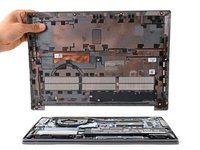
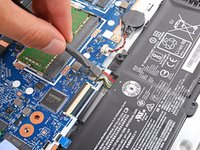
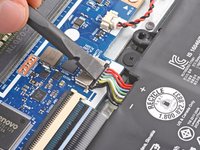
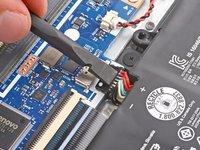
    • Use the flat end of a spudger to gently push the battery connector out of its socket on the motherboard.

Conclusion

To reassemble your device, follow these instructions in reverse order.

Spencer Day

Member since: 09/14/22

163,418 Reputation

1,043 Guides authored

Team

iFixit Member of iFixit

Staff

124 Members

24,235 Guides authored

0 Guide Comments

Add Comment

View Statistics:

Past 24 Hours: 0

Past 7 Days: 1

Past 30 Days: 1

All Time: 28