Shop the Holiday Gift Guide
Free Shipping on Domestic Orders $75+

Battery Blocking

Views: 288

View statistics:

Past 24 Hours:
1
Past 7 Days:
6
Past 30 Days:
22
All Time:
288
Comments: 7

7 comments on steps.

Completed: 0

No one has marked this guide "completed." Will you be the first?

Favorites: 0

No one has favorited (and subscribed to) this guide. Will you be the first?

Time Required: No estimate
Difficulty: Moderate
Prerequisite Only

This is a prerequisite-only guide! This guide is part of another procedure and isn’t meant to be used alone.

Battery Blocking

Introduction

Go to step 1 ↓

This is a prerequisite-only guide! This guide is part of another procedure and is not meant to be used alone.

What you need

Tools

    1. Battery Blocking, Disconnect the battery: step 1, image 1 of 2 Battery Blocking, Disconnect the battery: step 1, image 2 of 2
      Tool used on this step:
      FixMat
      $36.95
      Buy
      • Use a Phillips screwdriver to remove the 1.8 mm screw securing the battery connector to the logic board.

      • Throughout this repair, keep track of each screw and make sure it goes back exactly where it came from.

      Ask FixBot

      Add Comment

    2. Battery Blocking, Battery connector information: step 2, image 1 of 3 Battery Blocking, Battery connector information: step 2, image 2 of 3 Battery Blocking, Battery connector information: step 2, image 3 of 3
      • These photos show what the battery connector looks like underneath the logic board. Use these photos as a reference while you safely disconnect the battery.

      • Notice that the battery connector has cantilever springs on the logic board that press against the battery contact pads. Since both the logic board and battery are glued down, you'll need to slide something thin and flexible between the contact points to disconnect the battery.

      Ask FixBot

      Add Comment

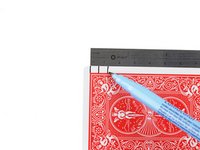
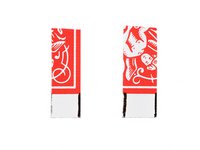
    3. Battery Blocking, Create a battery blocker: step 3, image 1 of 3 Battery Blocking, Create a battery blocker: step 3, image 2 of 3 Battery Blocking, Create a battery blocker: step 3, image 3 of 3
      • Cut two 6 mm wide strips from a playing card or cardstock to use as a battery blocker.

      • The strips should be about 4 cm long so you can easily grip them.

      Ask FixBot

      Add Comment

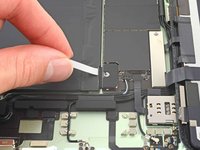
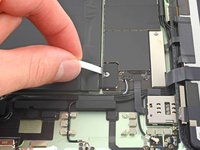
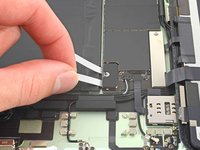
    4. Battery Blocking, Insert the card strips: step 4, image 1 of 3 Battery Blocking, Insert the card strips: step 4, image 2 of 3 Battery Blocking, Insert the card strips: step 4, image 3 of 3
      • Insert the card strips on each side of the battery connector until they stop.

      Ask FixBot

      Add Comment

Conclusion

To reassemble your device, follow these instructions in reverse order.

Cancel: I did not complete this guide.

Chayton Ritter

Member since: 08/21/20

28,391 Reputation

105 Guides authored

Team

Guide Team Member of Guide Team

Staff

10 Members

62,189 Guides authored

0 Guide Comments

Add Comment

View Statistics:

Past 24 Hours: 1

Past 7 Days: 6

Past 30 Days: 22

All Time: 288