Free Shipping on Domestic Orders $75+

Back Cover Screw Access

Prerequisite Only
This is a prerequisite-only guide! This guide is part of another procedure and isn’t meant to be used alone.

What you need

    1. Back Cover Screw Access, Prepare your controller for disassembly: step 1, image 1 of 2 Back Cover Screw Access, Prepare your controller for disassembly: step 1, image 2 of 2
      • Unplug all cables from your controller before starting.

      • Completely power off your controller.

      • Due to the controller’s odd shape, it can be helpful to stabilize it as you work. To prevent damage, consider laying it on a soft surface like a cloth or towel.

      Ask FixBot

      Add Comment

    1. Back Cover Screw Access, Remove the battery cover: step 2, image 1 of 2 Back Cover Screw Access, Remove the battery cover: step 2, image 2 of 2
      • Weak magnets and two clips along the bottom edge secure the battery cover to the controller.

      • Slide the battery cover away from the controller to remove it.

      Ask FixBot

      Add Comment

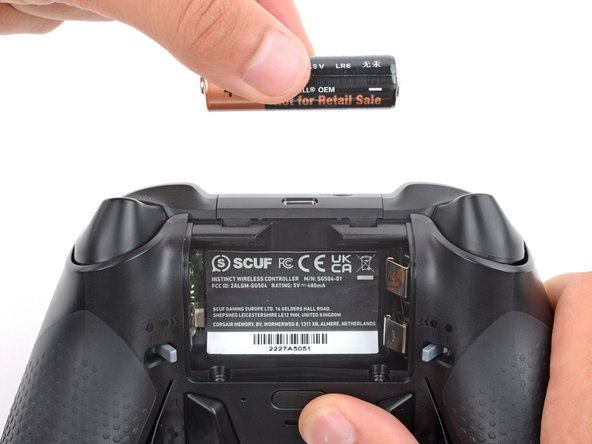
    1. Back Cover Screw Access, Remove the batteries: step 3, image 1 of 3 Back Cover Screw Access, Remove the batteries: step 3, image 2 of 3 Back Cover Screw Access, Remove the batteries: step 3, image 3 of 3
      • If your batteries are starting to corrode, clean the contacts and replace the batteries.

      • Use your fingers to remove the batteries.

      • During reassembly, insert the batteries so their positive (+) and negative (–) ends match up with the markings on the battery contacts.

      Ask FixBot

      Add Comment

    1. Back Cover Screw Access, Heat the battery sticker: step 4, image 1 of 2 Back Cover Screw Access, Heat the battery sticker: step 4, image 2 of 2
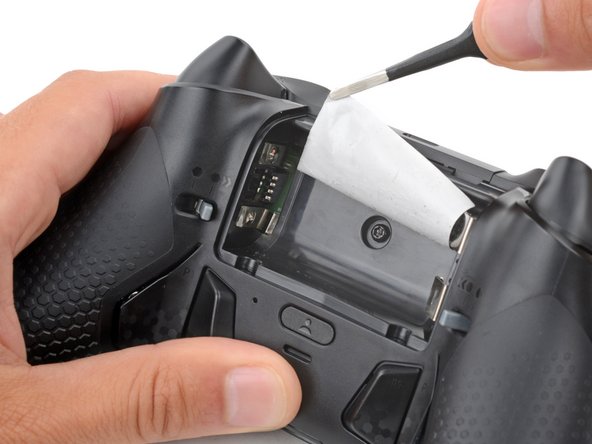
      • The sticker in the battery recess hides a back cover screw.

      • If you don't care about damaging the sticker, you can puncture through the center and skip the next step.

      • Use a hair dryer to heat the sticker and soften the adhesive securing it.

      • The sticker can be peeled without heating, but you risk tearing it.

      Ask FixBot

      Add Comment

    2. Back Cover Screw Access, Peel up the battery sticker: step 5, image 1 of 3 Back Cover Screw Access, Peel up the battery sticker: step 5, image 2 of 3 Back Cover Screw Access, Peel up the battery sticker: step 5, image 3 of 3
      Tool used on this step:
      Tweezers
      $4.99
      Buy
      • Use the point of a spudger to push up a corner of the sticker until you can grab it with a pair of blunt nose tweezers.

      • Use your tweezers to peel up the sticker until the back cover screw is accessible.

      Ask FixBot

      Add Comment

Conclusion

To reassemble your device, follow these instructions in reverse order.

Cancel: I did not complete this guide.

Spencer Day

Member since: 09/14/22

205,851 Reputation

1,267 Guides authored

Team

iFixit Member of iFixit

Staff

122 Members

72,401 Guides authored

0 Guide Comments

Add Comment

View Statistics:

Past 24 Hours: 0

Past 7 Days: 3

Past 30 Days: 6

All Time: 122