Introduction
This will show you how to remove the back cover of the Dell Inspiron 11-3162. This is the starting point of all our guides here, and is necessary to reach the components of your laptop.
What you need
-
-
Tool used on this step:Tweezers$4.99
-
Use tweezers to pry and remove the center screw cover on the back cover.
 Ask FixBot
-
-
-
Use a Phillips screwdriver to unscrew the nine 6.8 mm screws securing the back cover.
-
-
-
-
Use a spudger to pry around the base edges of the back cover to loosen it from the laptop.
-
-
-
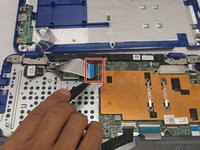
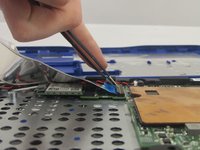
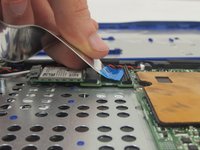
Unlock the wide ZIF connector securing the flex cable.
-
Pull the ribbon cable outwards to disconnect the back cover from the motherboard.
-
-


To reassemble your device, follow these instructions in reverse order.
Cancel: I did not complete this guide.
One other person completed this guide.

Team

Eastern Washington University, Team 1-2, Crane Fall 2016 Member of Eastern Washington University, Team 1-2, Crane Fall 2016
EWU-CRANE-F16S1G2
3 Members
72 Guides authored
