
BLU Studio G Antenna Replacement

What you need

  1. Careful: steps 1-8 are sourced from a guide that's marked as in-progress.

    BLU Studio G Antenna Replacement, Motherboard Prerequisite: step 1, image 1 of 3 BLU Studio G Antenna Replacement, Motherboard Prerequisite: step 1, image 2 of 3 BLU Studio G Antenna Replacement, Motherboard Prerequisite: step 1, image 3 of 3
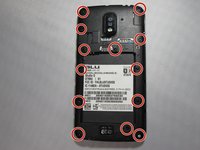
    • To remove the back cover, turn the device over, locate the safety indented notch on the bottom left corner as the screen is facing down.

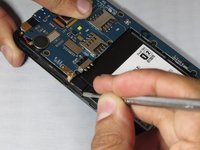
    • Using your finger (or spudger), prop upwards to detach the back cover properly from the rest of the device.

  2. BLU Studio G Antenna Replacement: step 2, image 1 of 2 BLU Studio G Antenna Replacement: step 2, image 2 of 2
    • Locate the notch at the bottom of the battery for safe removal.

    • Carefully lift battery from the notch making sure not to puncture the battery rubber casting.

  3. BLU Studio G Antenna Replacement: step 3, image 1 of 2 BLU Studio G Antenna Replacement: step 3, image 2 of 2
    • Unscrew the 13 Phillips #0 screws from the back of the phone.

  4. BLU Studio G Antenna Replacement: step 4, image 1 of 1
    • To remove the back panel, slide the metal spudger into 3 notches on left and right side outside edges of the device.

    • With some slow but strong pressure insert and dislodge the panel from the rest of the device. These are tough but small clips that hold together the back panel.

  5. BLU Studio G Antenna Replacement: step 5, image 1 of 2 BLU Studio G Antenna Replacement: step 5, image 2 of 2
    • Remove all 8 3.175 mm screws that secure the motherboard in place.

    • Remove by turning counter clockwise using a Phillips #0 bit with the correct screwdriver using medium/ firm pressure, assuring that you don't strip the screws.

    • Set aside

  6. BLU Studio G Antenna Replacement: step 6, image 1 of 3 BLU Studio G Antenna Replacement: step 6, image 2 of 3 BLU Studio G Antenna Replacement: step 6, image 3 of 3
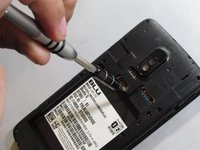
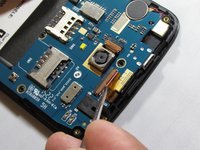
    • Locate the two connector clamps on the motherboard.

    • Carefully place the tip of a precision tweezer or metal spudger under the short light brown plastic clamp. This will release the connectors.

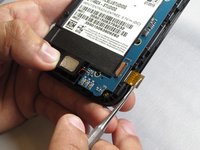
    • Gently pull out the connectors from the clamp inserts by pulling slowly away from of device using precision tweezers.

  7. BLU Studio G Antenna Replacement: step 7, image 1 of 1
    • Locate the speaker on the bottom of the device and slowly pry upwards and to the right as its wired to the motherboard.

  8. BLU Studio G Antenna Replacement: step 8, image 1 of 3 BLU Studio G Antenna Replacement: step 8, image 2 of 3 BLU Studio G Antenna Replacement: step 8, image 3 of 3
    • Locate the volume button strip on the left side of the device and slowly pry outwards from one end to the other from the device.

    • Carefully pull over the motherboard.

  9. BLU Studio G Antenna Replacement, Antenna: step 9, image 1 of 1
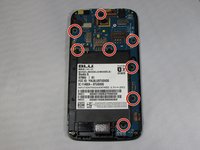
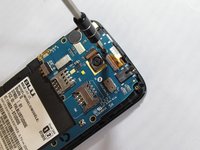
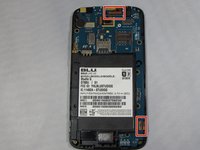
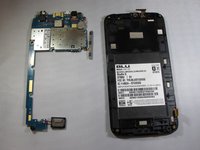
    • The antennae will be soldered directly to the motherboard which will be replaced.

Conclusion

To reassemble your device, follow these instructions in reverse order.

0 Comments

Add Comment

View Statistics:

Past 24 Hours: 1

Past 7 Days: 1

Past 30 Days: 4

All Time: 599