
Audio Technica ATH-AD500 Right Headphone Cable Replacement

What you need

  1. Audio Technica ATH-AD500 Right Headphone Cable Replacement, Speaker Assembly: step 1, image 1 of 1
    • Remove the ear pads by peeling them away from the grill.

  2. Audio Technica ATH-AD500 Right Headphone Cable Replacement: step 2, image 1 of 1
    • Remove all four 1cm screws on the inside of the headphone using a #1 Phillips head.

  3. Audio Technica ATH-AD500 Right Headphone Cable Replacement: step 3, image 1 of 1
    • Remove the speaker from the grill by pulling it out.

    • Remove the speaker carefully so you do not rip the wires out.

  4. Audio Technica ATH-AD500 Right Headphone Cable Replacement, Right Headphone Cable: step 4, image 1 of 2 Audio Technica ATH-AD500 Right Headphone Cable Replacement, Right Headphone Cable: step 4, image 2 of 2
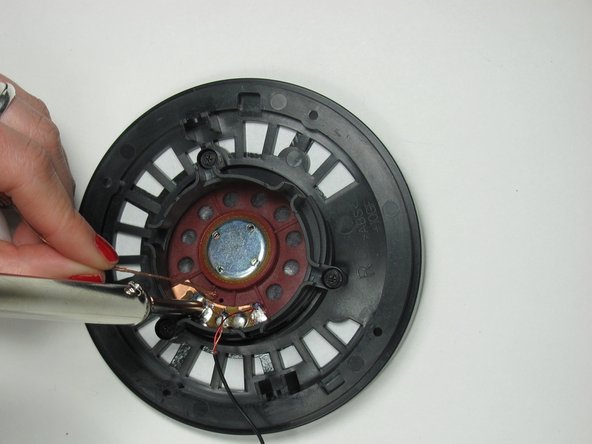
    • Remove the wires by de-soldering both the red and yellow wires using the soldering iron and desoldering wick. If you need assistance, reference How To Solder and Desolder Connections.

    • The areas where you soldered will be hot so let the soldered joints cool for before handling again.

  5. Audio Technica ATH-AD500 Right Headphone Cable Replacement: step 5, image 1 of 2 Audio Technica ATH-AD500 Right Headphone Cable Replacement: step 5, image 2 of 2
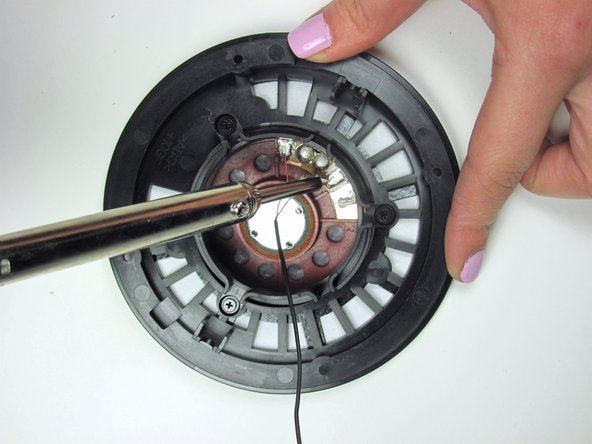
    • Connect the the new red and yellow wires by re-soldering the wires using the soldering iron. If you need assistance, reference How To Solder and Desolder Connections.

    • The areas where you soldered will be hot so let the soldered joints cool for before handling again.

Melanie Reis

Member since: 01/11/13

227 Reputation

5 Guides authored

Team

Cal Poly, Team 17-19, Forte Winter 2013 Member of Cal Poly, Team 17-19, Forte Winter 2013

CPSU-FORTE-W13S17G19

6 Members

17 Guides authored

View Statistics:

Past 24 Hours: 3

Past 7 Days: 15

Past 30 Days: 33

All Time: 4,549