Asus ZenBook Flip UX360C Speaker Replacement

What you need

  1. Asus ZenBook Flip UX360C Speaker Replacement, Rubber Feet: step 1, image 1 of 3 Asus ZenBook Flip UX360C Speaker Replacement, Rubber Feet: step 1, image 2 of 3 Asus ZenBook Flip UX360C Speaker Replacement, Rubber Feet: step 1, image 3 of 3
    • Turn laptop over.

    • Use the metal spudger to pry rubber feet off in the four corners of laptop.

  2. Asus ZenBook Flip UX360C Speaker Replacement, Speaker: step 2, image 1 of 1
    • Attach an ESD wristband to your wrist and clip the grounding clamp to a grounded metal object.

  3. Asus ZenBook Flip UX360C Speaker Replacement: step 3, image 1 of 1
    • Remove all eleven 5 mm, Phillips #1 screws on the back cover.

  4. Asus ZenBook Flip UX360C Speaker Replacement: step 4, image 1 of 1
    • Use a plastic opening tool to remove the keyboard panel.

  5. Asus ZenBook Flip UX360C Speaker Replacement: step 5, image 1 of 1
    • Use a plastic opening tool to disconnect the ZIF keyboard ribbon cable from the motherboard.

  6. Asus ZenBook Flip UX360C Speaker Replacement: step 6, image 1 of 3 Asus ZenBook Flip UX360C Speaker Replacement: step 6, image 2 of 3 Asus ZenBook Flip UX360C Speaker Replacement: step 6, image 3 of 3
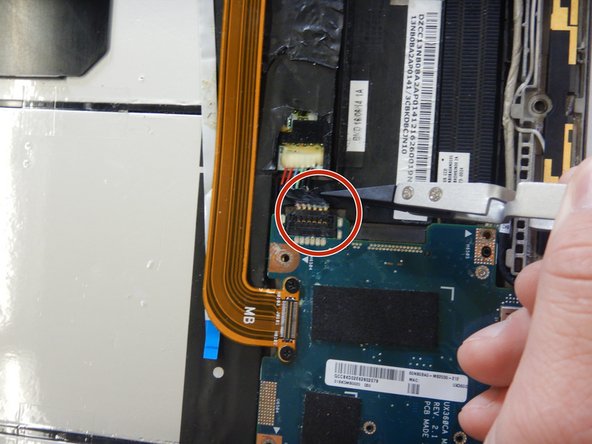
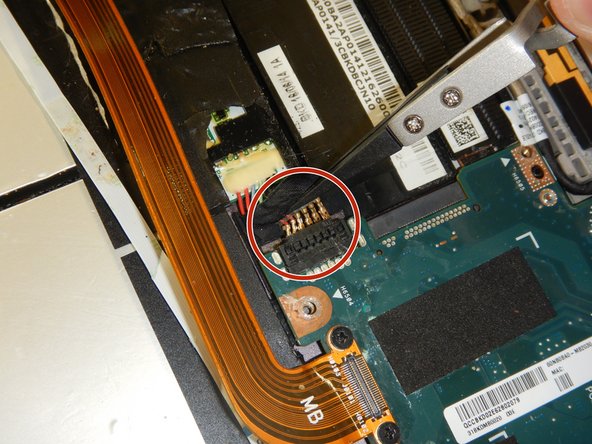
    • Use nylon-tipped tweezeres to detach the battery connection.

  7. Asus ZenBook Flip UX360C Speaker Replacement: step 7, image 1 of 1
    • Remove all ten Phillips #1 battery retaining screws.

  8. Asus ZenBook Flip UX360C Speaker Replacement: step 8, image 1 of 1
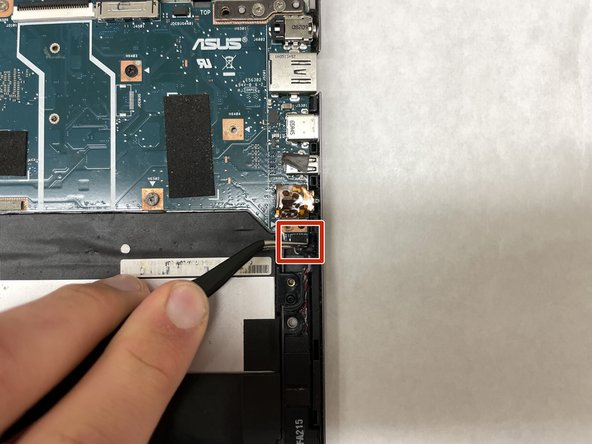
    • Using tweezers, carefully remove the connector connecting the speakers to the motherboard.

  9. Asus ZenBook Flip UX360C Speaker Replacement: step 9, image 1 of 3 Asus ZenBook Flip UX360C Speaker Replacement: step 9, image 2 of 3 Asus ZenBook Flip UX360C Speaker Replacement: step 9, image 3 of 3
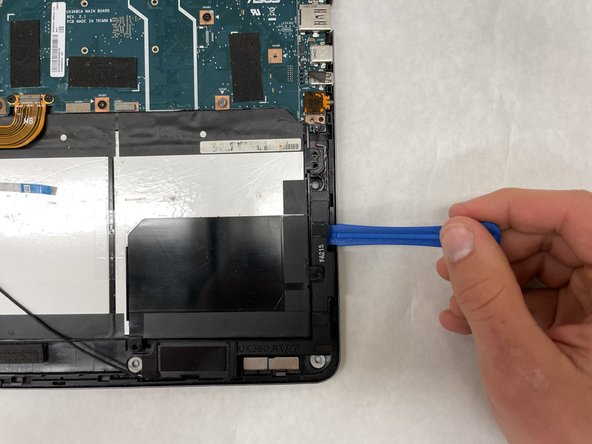
    • Use your fingers or another object to slightly raise the bottom edge of the battery. The battery does not need to be fully removed to replace the speakers.

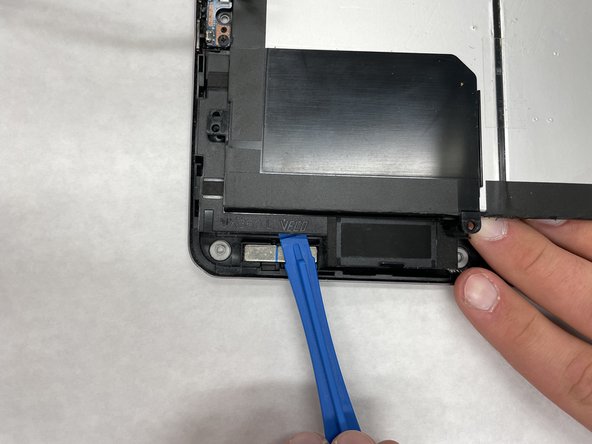
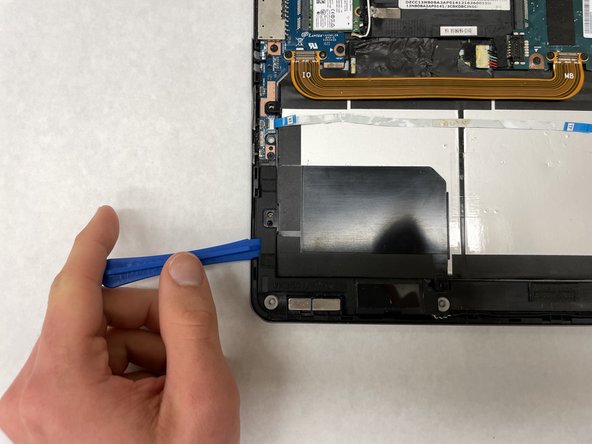
    • Use a nylon spudger or an opening tool to carefully pry the speaker from the chassis.

    • The speaker is held down with a mild adhesive. Work your way around the border to fully remove the speaker.

  10. Asus ZenBook Flip UX360C Speaker Replacement: step 10, image 1 of 2 Asus ZenBook Flip UX360C Speaker Replacement: step 10, image 2 of 2
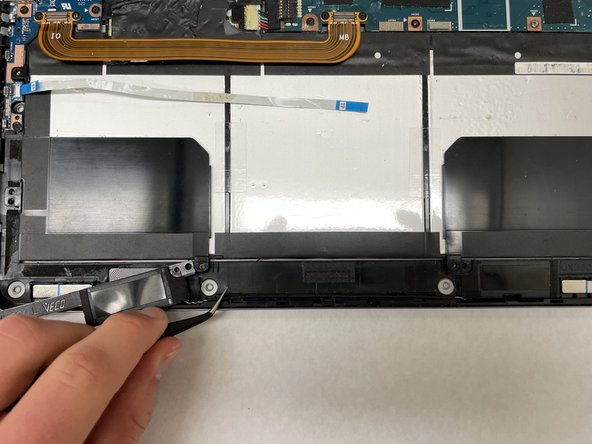
    • Use tweezers to carefully unseat the cable connecting the left and right speakers.

  11. Asus ZenBook Flip UX360C Speaker Replacement: step 11, image 1 of 3 Asus ZenBook Flip UX360C Speaker Replacement: step 11, image 2 of 3 Asus ZenBook Flip UX360C Speaker Replacement: step 11, image 3 of 3
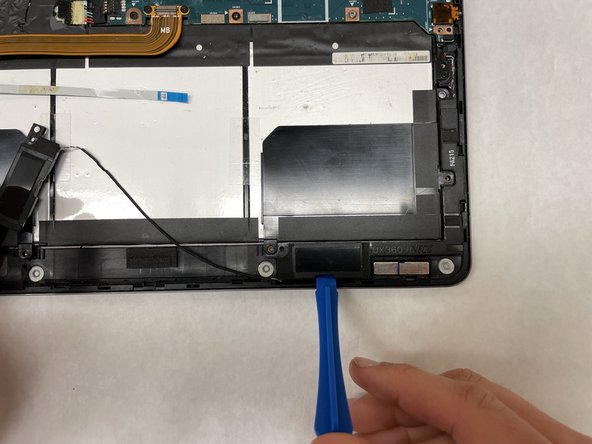
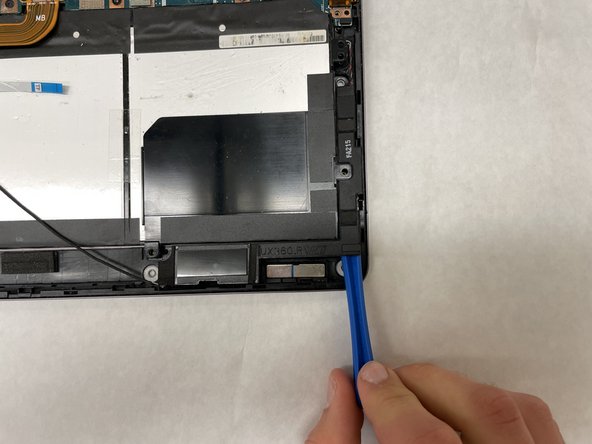
    • Use a nylon spudger or an opening tool to carefully pry the speaker from the chassis.

    • The speaker is held down with a mild adhesive. Work your way around the border to fully remove the speaker.

Conclusion

To reassemble your device, follow these instructions in reverse order.

Kristopher Bright

Member since: 03/30/22

397 Reputation

3 Guides authored

Team

IUPUI, Team 1-4, Harley Spring 2022 Member of IUPUI, Team 1-4, Harley Spring 2022

IUPUI-HARLEY-S22S1G4

3 Members

3 Guides authored

0 Comments

Add Comment

View Statistics:

Past 24 Hours: 0

Past 7 Days: 2

Past 30 Days: 15

All Time: 481