What you need
-
-
Using the Phillips 1 screwdriver, remove the laptop's back panel.
-
The parts you see underneath that panel are called the laptop's "internals".
-
-
-
-
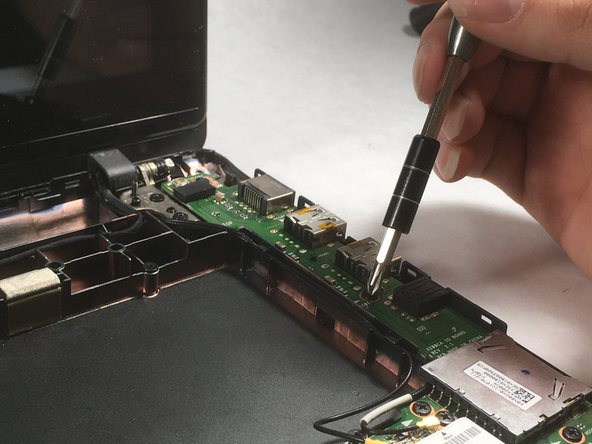
Using the Phillips 1 screwdriver, remove the six screws that hold the audio board in place.
-
Hint: the sixth screw may not be readily visible. It can be found in the bottom left corner of the audio board, under a small black flap.
-
With the screws removed, the audio board can be easily lifted out.
-


To reassemble your device, follow these instructions in reverse order.
To reassemble your device, follow these instructions in reverse order.
Team

UMass Dartmouth, Team S1-G2, Simcock Fall 2017 Member of UMass Dartmouth, Team S1-G2, Simcock Fall 2017
UMASSD-SIMCOCK-F17S1G2
3 Members
5 Guides authored