Free Shipping on Domestic Orders $75+

Asus VivoBook 14" F412DA RAM Replacement/Upgrade

Views: 29K

View statistics:

Past 24 Hours:
10
Past 7 Days:
54
Past 30 Days:
285
All Time:
28,875
Comments: 11

1 comment on steps, 10 guide comments.

Go to guide comments
Completed: 12

12 people have marked this guide "completed." Will you be next?

Favorites: 0

No one has favorited (and subscribed to) this guide. Will you be the first?

Time Required: 5 - 30 minutes
Difficulty: Easy
Bullets!

Better coordination with markups and the color/type of bullets will help make this guide more clear!

Community-Contributed Guide

An awesome member of our community made this guide. It was not created by iFixit staff.

Asus VivoBook 14" F412DA RAM  Replacement/Upgrade

Introduction

Go to step 1 ↓

This guide shows you how to replace (or upgrade) the RAM in an Asus Vivobook 14" F412DA.

What you need

Tools

    1. Asus VivoBook 14" F412DA RAM  Replacement/Upgrade, Remove the screws: step 1, image 1 of 1
      Tool used on this step:
      Anti-Static Wrist Strap
      $7.95
      Buy
      • Start by removing the marked screws:

      • Remove the four 6mm screws

      • Remove the two 8mm screws

      • Remove the four 9mm screws

      • These screws are different lengths, remember which order you removed them. Putting the wrong size screw in the wrong hole can cause damage.

      • The screw in the center is covered by a sticker that must be removed.

      • It is recommended to wear an anti-static wrist strap for this procedure.

      • Before you begin, make sure the new RAM is compatible. The RAM should be SODIMM DDR4 memory. Only up to a 16 GB modules are supported (for a total of 20GB)

      Ask FixBot

      Add Comment

    2. Asus VivoBook 14" F412DA RAM  Replacement/Upgrade, Remove the bottom: step 2, image 1 of 3 Asus VivoBook 14" F412DA RAM  Replacement/Upgrade, Remove the bottom: step 2, image 2 of 3 Asus VivoBook 14" F412DA RAM  Replacement/Upgrade, Remove the bottom: step 2, image 3 of 3
      • Using a opening tool, pry and lift at the edge of the bottom until you feel it open.

      Ask FixBot

      Add Comment

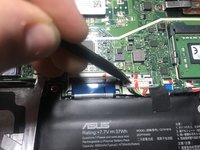
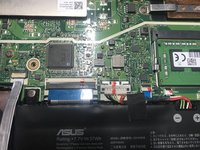
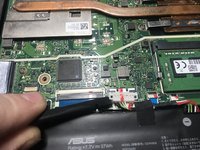
    3. Asus VivoBook 14" F412DA RAM  Replacement/Upgrade, Release battery connector: step 3, image 1 of 3 Asus VivoBook 14" F412DA RAM  Replacement/Upgrade, Release battery connector: step 3, image 2 of 3 Asus VivoBook 14" F412DA RAM  Replacement/Upgrade, Release battery connector: step 3, image 3 of 3
      • Using a fingernail or spudger move back the retaining clip holding the battery connector in place.

      • Be gentle releasing the connector, it's very fragile.

      Ask FixBot

      Add Comment

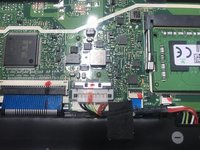
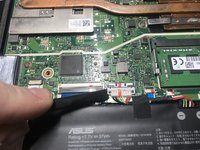
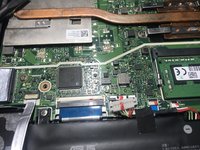
    4. Asus VivoBook 14" F412DA RAM  Replacement/Upgrade, Disconnect the battery: step 4, image 1 of 3 Asus VivoBook 14" F412DA RAM  Replacement/Upgrade, Disconnect the battery: step 4, image 2 of 3 Asus VivoBook 14" F412DA RAM  Replacement/Upgrade, Disconnect the battery: step 4, image 3 of 3
      • Put a spudger under the battery connector and twist, the connector should lift off.

      • Be sure to use a plastic spudger as to not risk damaging the motherboard or puncturing the battery.

      Ask FixBot

      Add Comment

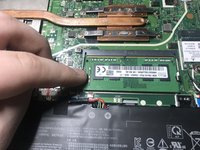
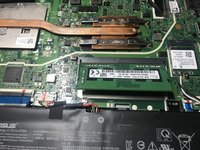
    5. Asus VivoBook 14" F412DA RAM  Replacement/Upgrade, Remove the RAM module: step 5, image 1 of 3 Asus VivoBook 14" F412DA RAM  Replacement/Upgrade, Remove the RAM module: step 5, image 2 of 3 Asus VivoBook 14" F412DA RAM  Replacement/Upgrade, Remove the RAM module: step 5, image 3 of 3
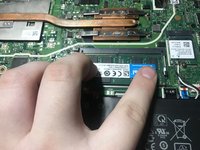
      • First, push down the clips at the side of the memory. Once you have, the memory module should pop up. You can now remove the memory module.

      • It is recommended to wear an anti-static wrist strap for this procedure.

      Ask FixBot

      Add Comment

    6. Asus VivoBook 14" F412DA RAM  Replacement/Upgrade, Inserting the New RAM: step 6, image 1 of 2 Asus VivoBook 14" F412DA RAM  Replacement/Upgrade, Inserting the New RAM: step 6, image 2 of 2
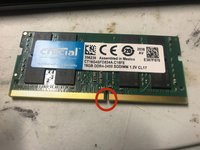
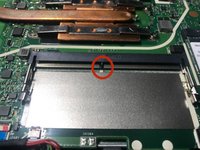
      • Line up the notch on the new memory module with the notch on the slot and insert the module at an angle.

      • Make sure the new RAM is compatible. The RAM should be SODIMM DDR4 memory. Only up to 16 GB modules are supported (for a total of 20GB)

      • It is recommended to wear an anti-static wrist strap for this procedure.

      Ask FixBot

      Add Comment

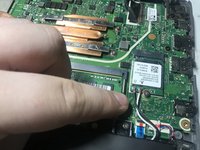
    7. Asus VivoBook 14" F412DA RAM  Replacement/Upgrade, Inserting the New RAM: step 7, image 1 of 2 Asus VivoBook 14" F412DA RAM  Replacement/Upgrade, Inserting the New RAM: step 7, image 2 of 2
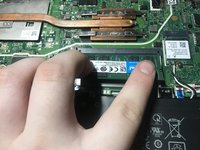
      • Once the RAM is inserted, gently push down on the module until you hear a click.

      • It is recommended to wear an anti-static wrist strap for this procedure.

      Ask FixBot

      Add Comment

Conclusion

To reassemble your device, follow these steps in reverse order.

Cancel: I did not complete this guide.

12 other people completed this guide.

Jonathan D Banwart

Member since: 04/19/21

871 Reputation

2 Guides authored

10 Guide Comments

Hi! Thank you so much for this tutorial, I was curious if you know if this is compatible for every ASUS Vivobook 14 or if there may be versions which don't support ram upgrades? I was told to look on the bottom (before taking off the cover) for a labelled spot where the RAM goes, but I don't see it. Does that definitely mean it is not compatible to add more?

Isabella Joubert - Reply Share

Hi, Thank you for your guide

how many slot for add memory?

Voravit Chamchoy - Reply Share

There is one accessible memory slots on the laptop as shown in the guide.

Jonathan D Banwart - Reply Share

I'm about to find out first hand, however, I have researched and I understand that once you safely remove the bottom cover for the laptop, there is a single slot available for a 260-pin DDR4 SODIMM ram card. My research indicates I can add 16GB of additional ram this way, for a total maximum of 20GB ram memory on this model.

Further, I also understand one can upgrade the SSD for more storage. That's my next upgrade on this laptop.

Jason D Meinhart - Reply Share

You are correct! There is one DDR4 SODIMM slot, You may add up to one 16GB stick for 20GB total. Only speeds up to 2666Mhz are supported. The SSD is upgradable although you will need a drive cloner.

Jonathan D Banwart - Reply Share

Add Comment

View Statistics:

Past 24 Hours: 10

Past 7 Days: 54

Past 30 Days: 285

All Time: 28,875