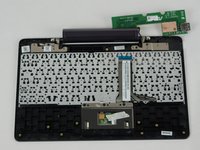
Asus Transformer Book T100TAR Keyboard Replacement

What you need

  1. Asus Transformer Book T100TAR Keyboard Replacement, Keyboard: step 1, image 1 of 2 Asus Transformer Book T100TAR Keyboard Replacement, Keyboard: step 1, image 2 of 2
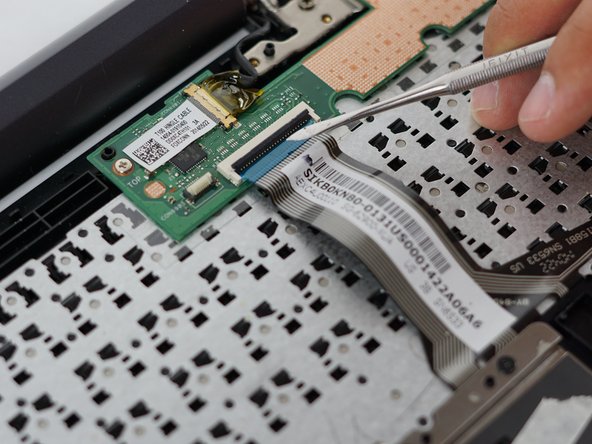
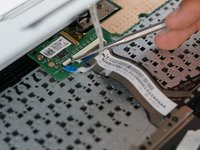
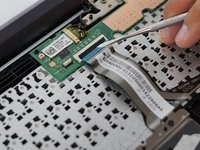
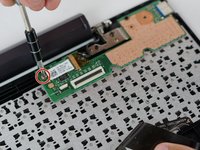
    • Detach and separate the screen from the keyboard by pressing the silver release button at the base of the tablet.

  2. Asus Transformer Book T100TAR Keyboard Replacement: step 2, image 1 of 3 Asus Transformer Book T100TAR Keyboard Replacement: step 2, image 2 of 3 Asus Transformer Book T100TAR Keyboard Replacement: step 2, image 3 of 3
    • Using a Phillips #0 screwdriver, unscrew six 4mm screws from the rear cover of the keyboard.

    • The rest of the screws for this guide will be Phillips #0 head screws.

    • Use the metal spudger to remove the rubber feet nearest to the top of the keyboard, where the connecting dock to the screen is. There are two 6mm screws under these rubber feet.

  3. Asus Transformer Book T100TAR Keyboard Replacement: step 3, image 1 of 1
    • Take the metal spudger and insert it into the seam of the rear cover casing and gently pry upwards.

    • If done correctly, you should feel the clips release.

    • Do not force the clips to release. This will cause them to break, making the screen loose. Open the rear cover gently and with caution.

  4. Asus Transformer Book T100TAR Keyboard Replacement: step 4, image 1 of 1
    • Unscrew the screws on the base plate of the keyboard dock. There should be four 4mm screws along the bottom and four 6mm screws along the top, apart from a single 4mm screw (annotated in orange)

  5. Asus Transformer Book T100TAR Keyboard Replacement: step 5, image 1 of 1
    • Very carefully remove the black tape holding the metal plate in place.

    • This tape is very sticky, so you might want to use tweezers to get it loose before peeling it off.

  6. Asus Transformer Book T100TAR Keyboard Replacement: step 6, image 1 of 2 Asus Transformer Book T100TAR Keyboard Replacement: step 6, image 2 of 2
    • Lift up the small white tab constraining the white ribbon using the nylon spudger and carefully slide it out.

    • Lift up the larger black tab constraining the black ribbon using the nylon spudger and carefully slide it out.

    • The regular black nylon spudger should be used whenever possible, especially around sensitive internal components.

  7. Asus Transformer Book T100TAR Keyboard Replacement: step 7, image 1 of 2 Asus Transformer Book T100TAR Keyboard Replacement: step 7, image 2 of 2
    • Unscrew a single 6mm screw holding the keyboard’s motherboard in place and remove it.

  8. Asus Transformer Book T100TAR Keyboard Replacement: step 8, image 1 of 2 Asus Transformer Book T100TAR Keyboard Replacement: step 8, image 2 of 2
    • Unscrew three 4mm screws holding the trackpad in place and remove the trackpad.

Conclusion

To reassemble your device, follow these instructions in reverse order.

4 other people completed this guide.

Alyssa Ballesteros

Member since: 09/07/16

683 Reputation

5 Guides authored

Team

USF Tampa, Team 6-1, Remmell Fall 2016 Member of USF Tampa, Team 6-1, Remmell Fall 2016

USFT-REMMELL-F16S6G1

4 Members

5 Guides authored

4 Comments

I need this keyboard

zaiitindia - Reply

Disculpe quiero saber si me puede desirme la numeración de sircuitro del que va Serca del USB la piesa de 5 patas o me puede mandar fotos sercana este es mi correo cruztomi296@gmail.com

Tomi cruz - Reply

I need assistance on where to buy charging port for my transformer book T100

Maanda Rathogwa - Reply

Im looking for an asus transformer book T100 charging port around Cape Town

Maanda Rathogwa - Reply

Add Comment

View Statistics:

Past 24 Hours: 0

Past 7 Days: 0

Past 30 Days: 13

All Time: 2,941