Introduction
If your Asus ROG G752V keyboard is no longer working, identify typical issues with Asus ROG G752V keyboards on our troubleshooting page. If the keyboard is needed to be replaced, this guide will walk you through the process.
Prior to beginning, ensure your Asus ROG G752V laptop is far from any dangerous materials, is no longer connected to its charger, and is powered down. Be sure to follow recommended tools and warnings included in this guide to prevent further damage to your Asus ROG G752V laptop.
What you need
-
Tool used on this step:Tweezers$4.99
-
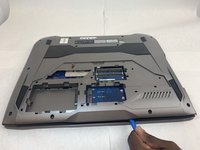
Using a pair of tweezers, remove all 11 rubber plugs off of the back cover.
 Ask FixBot
-
-
-
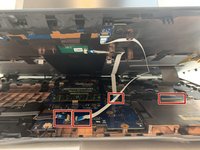
Using a Phillips #0 screwdriver, remove all twelve 5.2mm screws on the back of the laptop.
-
-
-
-
Using the Phillips #00 screwdriver, remove the six 5.2 mm screws under the service cover.
-
-
-
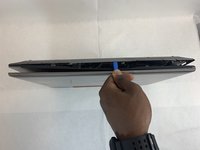
Use the iFixit opening tool to pry apart the back panel from the main body of the laptop.
-
-
-
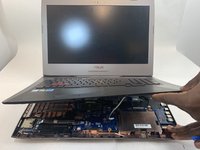
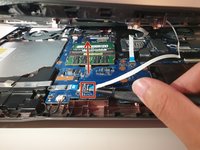
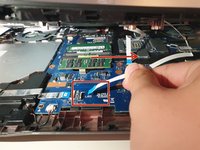
Using an ESD safe tool, detach all 3 ribbon cables. To do so, lift up the cable up and out.
-
-
-
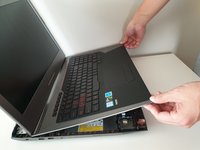
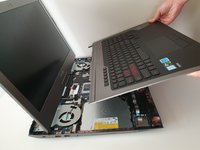
Once the cables are detached, lift the keyboard about 2 inches up and remove it from the rest of the body.
-


To reassemble your device, follow these instructions in reverse order.
Cancel: I did not complete this guide.
5 other people completed this guide.
Team

Embry-Riddle Aeronautical University, Team S2-G36, Watkins Fall 2019 Member of Embry-Riddle Aeronautical University, Team S2-G36, Watkins Fall 2019
ERAU-WATKINS-F19S2G36
4 Members
10 Guides authored
2 Guide Comments
That is not the "Keyboard" that is the entire top section or palm rest. Which also includes the touchpad and special function buttons. You should re name this as it is not accurate.
boo hoo doug