
Asus ROG G751JL-DS71 RAM Replacement

What you need

  1. Asus ROG G751JL-DS71 RAM Replacement, CD-ROM Player: step 1, image 1 of 2 Asus ROG G751JL-DS71 RAM Replacement, CD-ROM Player: step 1, image 2 of 2
    • Lift the rubber cover found on the bottom of the laptop.

    • Remove the 5.2 mm screw with a Phillips 1 Screwdriver.

  2. Asus ROG G751JL-DS71 RAM Replacement: step 2, image 1 of 3 Asus ROG G751JL-DS71 RAM Replacement: step 2, image 2 of 3 Asus ROG G751JL-DS71 RAM Replacement: step 2, image 3 of 3
    • Use the nylon spudger to remove the back center panel.

  3. Asus ROG G751JL-DS71 RAM Replacement: step 3, image 1 of 2 Asus ROG G751JL-DS71 RAM Replacement: step 3, image 2 of 2
    • Use a Phillips 1 Screwdriver to remove the 5 mm screw that is located underneath the back panel.

  4. Asus ROG G751JL-DS71 RAM Replacement: step 4, image 1 of 2 Asus ROG G751JL-DS71 RAM Replacement: step 4, image 2 of 2
    • Pull out the optical drive found on the side of the laptop.

  5. Asus ROG G751JL-DS71 RAM Replacement, Top Rear Panel: step 5, image 1 of 2 Asus ROG G751JL-DS71 RAM Replacement, Top Rear Panel: step 5, image 2 of 2
    • Use a pair of tweezers to remove the top four rubber stoppers found on the bottom of the laptop.

  6. Asus ROG G751JL-DS71 RAM Replacement: step 6, image 1 of 2 Asus ROG G751JL-DS71 RAM Replacement: step 6, image 2 of 2
    • Use a Phillips 1 Screwdriver to remove the top four 8.5 mm screws.

  7. Asus ROG G751JL-DS71 RAM Replacement: step 7, image 1 of 3 Asus ROG G751JL-DS71 RAM Replacement: step 7, image 2 of 3 Asus ROG G751JL-DS71 RAM Replacement: step 7, image 3 of 3
    • Use a nylon spudger to carefully pry the top back panel off.

    • While removing the top back panel, be careful not to break the four pin connector located underneath.

    • Disconnect the four-pin connector and remove the top back panel from the computer.

  8. Asus ROG G751JL-DS71 RAM Replacement, Keyboard: step 8, image 1 of 3 Asus ROG G751JL-DS71 RAM Replacement, Keyboard: step 8, image 2 of 3 Asus ROG G751JL-DS71 RAM Replacement, Keyboard: step 8, image 3 of 3
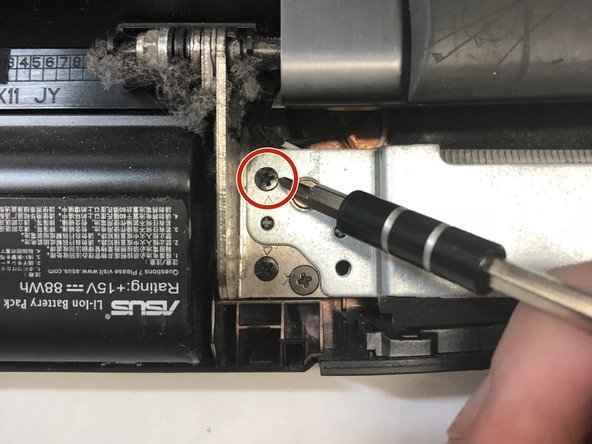
    • Use a Phillips 1 Screwdriver to remove the four 6.8 mm screws underneath the back panel.

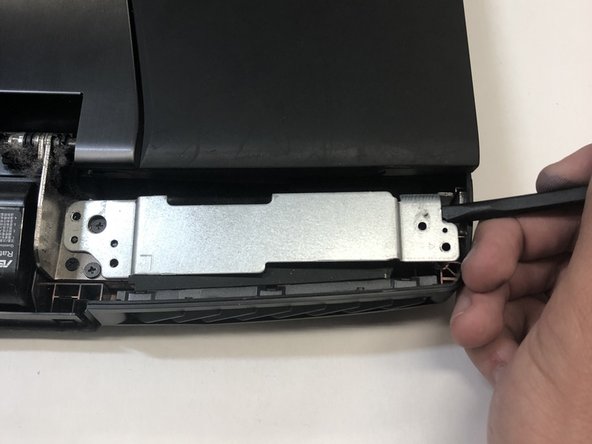
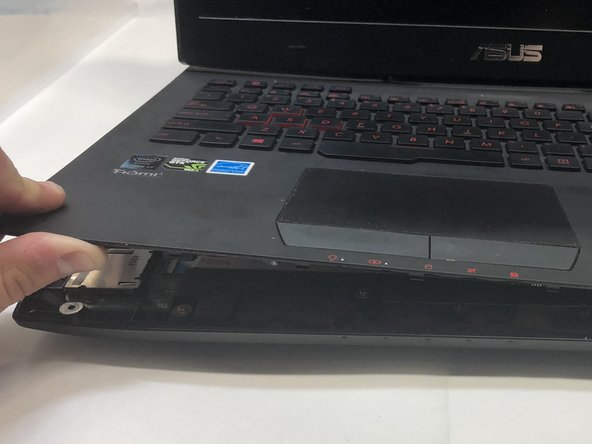
    • Lift away the metal housings from each side of the laptop.

  9. Asus ROG G751JL-DS71 RAM Replacement: step 9, image 1 of 2 Asus ROG G751JL-DS71 RAM Replacement: step 9, image 2 of 2
    • Use a Phillips 1 Screwdriver to remove the ten 5.2 mm screws holding the main panel in place.

    • Use a Phillips 1 Screwdriver to remove the four 5.2 mm screws underneath the center panel.

  10. Asus ROG G751JL-DS71 RAM Replacement: step 10, image 1 of 3 Asus ROG G751JL-DS71 RAM Replacement: step 10, image 2 of 3 Asus ROG G751JL-DS71 RAM Replacement: step 10, image 3 of 3
    • Use a plastic opening tool to pry the keyboard from the base of the laptop.

    • Lift the keyboard carefully so as to not tear or break the four ribbon connectors underneath the keyboard.

  11. Asus ROG G751JL-DS71 RAM Replacement: step 11, image 1 of 2 Asus ROG G751JL-DS71 RAM Replacement: step 11, image 2 of 2
    • Use a pair of tweezers to undo each of the four ribbon connectors.

    • The keyboard is now completely disconnected from the laptop and you can remove it.

  12. Asus ROG G751JL-DS71 RAM Replacement, RAM: step 12, image 1 of 2 Asus ROG G751JL-DS71 RAM Replacement, RAM: step 12, image 2 of 2
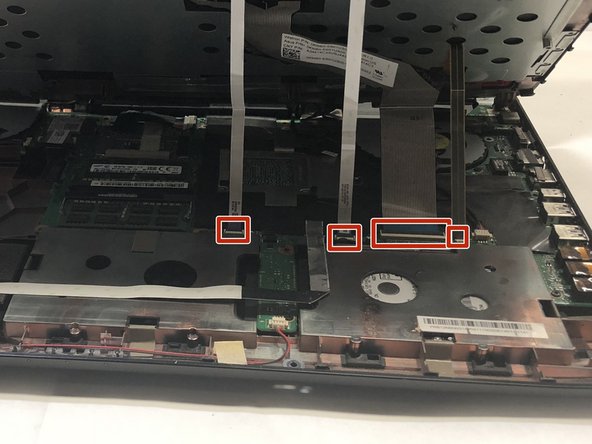
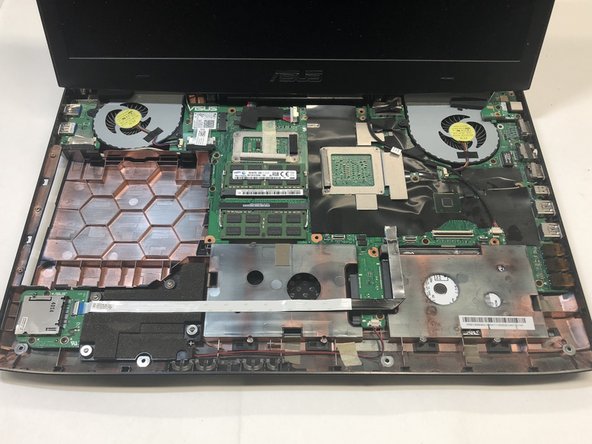
    • First locate the RAM.

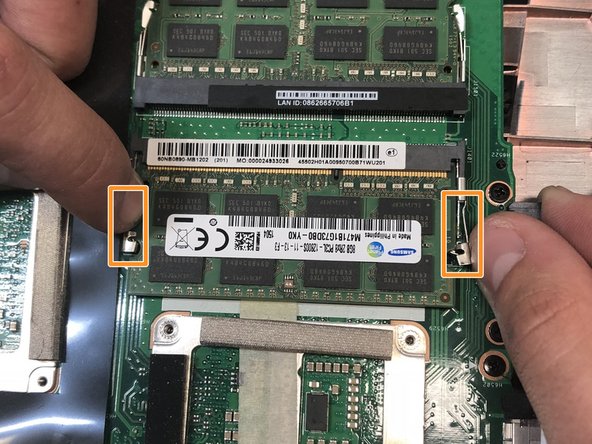
    • Then pull the tabs located on the left and right of the RAM outwards to release the RAM.

    • You can now remove the RAM and replace it.

Conclusion

To reassemble your device, follow these instructions in reverse order.

One other person completed this guide.

Gwennie Kidd

Member since: 01/22/18

147 Reputation

1 Guide authored

Team

Cal Poly, Team S16-G1, Banghart Winter 2018 Member of Cal Poly, Team S16-G1, Banghart Winter 2018

CPSU-BANGHART-W18S16G1

4 Members

22 Guides authored

0 Comments

Add Comment

View Statistics:

Past 24 Hours: 0

Past 7 Days: 3

Past 30 Days: 11

All Time: 889