
Asus N56VM Hard Disk Replacement

What you need

  1. Careful: steps 1-2 are sourced from a guide that's marked as in-progress.

    Asus N56VM Hard Disk Replacement, Remove battery: step 1, image 1 of 1
    • Remove the battery and the AC power

  2. Asus N56VM Hard Disk Replacement, Remove bottom cover: step 2, image 1 of 2 Asus N56VM Hard Disk Replacement, Remove bottom cover: step 2, image 2 of 2
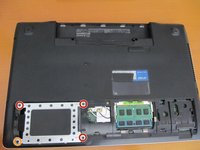
    • Remove the M2x4 screw of the bottom cover

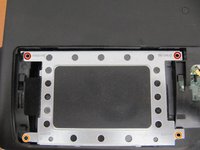
    • Remove the bottom cover by sliding it downwards

  3. Asus N56VM Hard Disk Replacement, Hard Disk: step 3, image 1 of 2 Asus N56VM Hard Disk Replacement, Hard Disk: step 3, image 2 of 2
    • Remove the screws

    • Remove the 3 M2x10 screws

    • Remove the one M2x4 screw

  4. Asus N56VM Hard Disk Replacement: step 4, image 1 of 1
    • Gently pull the hard disk to the left

Conclusion

To reassemble your device, follow these instructions in reverse order.

Stanky

Member since: 07/08/17

1,119 Reputation

6 Guides authored

0 Comments

Add Comment

View Statistics:

Past 24 Hours: 0

Past 7 Days: 3

Past 30 Days: 14

All Time: 1,129