
Asus Memo Pad ME172V - Touch Screen Replacement

What you need

Video Overview

  1. Asus Memo Pad ME172V - Touch Screen Replacement, Touch Screen replacement: step 1, image 1 of 3 Asus Memo Pad ME172V - Touch Screen Replacement, Touch Screen replacement: step 1, image 2 of 3 Asus Memo Pad ME172V - Touch Screen Replacement, Touch Screen replacement: step 1, image 3 of 3
    • Switch-off the tablet.

    • By using a plastic tool open the back / battery cover.

    Could you please advise an online display replacement supplier, other than aliexpress. As reviews for this product their are non encouraging at all..

    Thanks for your video..

    Moh Haider - Reply

  2. Asus Memo Pad ME172V - Touch Screen Replacement: step 2, image 1 of 3 Asus Memo Pad ME172V - Touch Screen Replacement: step 2, image 2 of 3 Asus Memo Pad ME172V - Touch Screen Replacement: step 2, image 3 of 3
    • Disconnect and remove the battery.

  3. Asus Memo Pad ME172V - Touch Screen Replacement: step 3, image 1 of 3 Asus Memo Pad ME172V - Touch Screen Replacement: step 3, image 2 of 3 Asus Memo Pad ME172V - Touch Screen Replacement: step 3, image 3 of 3
    • Disconnect the LCD display flex cable.

    • Disconnect the touchscreen flex cable.

    • Disconnect and remove the loudspeaker.

    • Unscrew 10x screws.

    • Now you can remove the mother board

  4. Asus Memo Pad ME172V - Touch Screen Replacement: step 4, image 1 of 3 Asus Memo Pad ME172V - Touch Screen Replacement: step 4, image 2 of 3 Asus Memo Pad ME172V - Touch Screen Replacement: step 4, image 3 of 3
    • Remove the metal LCD display shield.

  5. Asus Memo Pad ME172V - Touch Screen Replacement, Separate the LCD panel from the digitizer: step 5, image 1 of 3 Asus Memo Pad ME172V - Touch Screen Replacement, Separate the LCD panel from the digitizer: step 5, image 2 of 3 Asus Memo Pad ME172V - Touch Screen Replacement, Separate the LCD panel from the digitizer: step 5, image 3 of 3
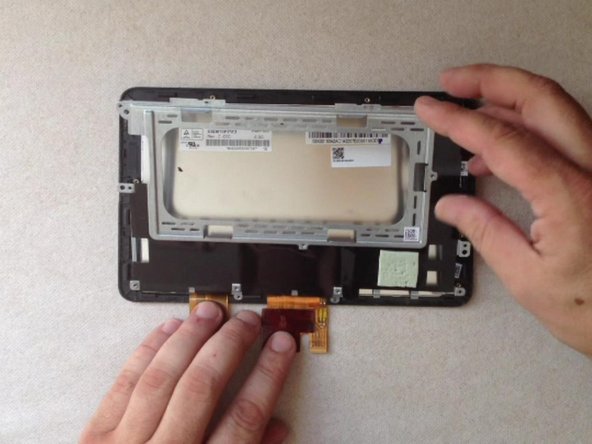
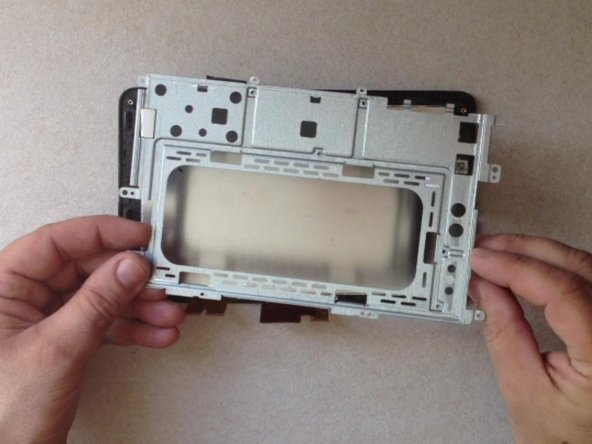
    • There are many clips holding the LCD panel to the metal frame.

    • Use a spudger to loosen the clips holding the LCD display.

  6. Asus Memo Pad ME172V - Touch Screen Replacement: step 6, image 1 of 3 Asus Memo Pad ME172V - Touch Screen Replacement: step 6, image 2 of 3 Asus Memo Pad ME172V - Touch Screen Replacement: step 6, image 3 of 3
    • Heat the touch screen.

    • Use a cutter only to start detachment the touchscreen. Then continue with a plastic tool.

  7. Asus Memo Pad ME172V - Touch Screen Replacement: step 7, image 1 of 3 Asus Memo Pad ME172V - Touch Screen Replacement: step 7, image 2 of 3 Asus Memo Pad ME172V - Touch Screen Replacement: step 7, image 3 of 3
    • After separation the touchscreen from the front bezel, remove the LCD display frame.

    • This spare part have a double sided adhesive tape. Otherwise you should place.

    • .

    • Did you do it successfully?

    • .

    • Please SUBSCRIBE to my channel ツ

Conclusion

To reassemble your device, follow these instructions in reverse order.

8 other people completed this guide.

ZFix

Member since: 12/09/13

191,368 Reputation

330 Guides authored

Team

Master Techs Member of Master Techs

Community

321 Members

1,466 Guides authored

One Comment

Is it possible to replace the bezel the way you would an iPad screen instead of going from the back? I feel like a head gun to the front would save you a lot of hassle? Please correct me if I'm wrong

Alex Tucker - Reply

Add Comment

View Statistics:

Past 24 Hours: 0

Past 7 Days: 4

Past 30 Days: 10

All Time: 23,490