Introduction
A fan replacement will be necessary in the event that your notebook is overheating. You can find out how to replace the Asus F554LA notebook's fan with this guide. You will need a plastic opening tool and a Phillips #0 screwdriver head.
What you need
-
-
Flip the notebook over and remove the 10 screws from the back plate with a #0 Phillips head screwdriver.
 Ask FixBot
-
-
-
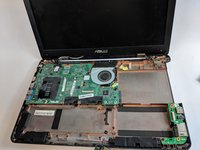
With a plastic opening tool, gently lift and remove the back cover to expose the internal components.
-
-
-
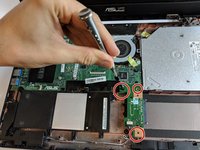
Unscrew the three 5.7 mm hard drive-motherboard connection screws with a #0 Phillips head screwdriver.
-
Remove the small rectangular hard drive-motherboard connection board.
-
-
-
-
Unscrew the four 5.7 mm battery screws with a #0 Phillips head screwdriver.
-
Remove the battery.
-
-
-
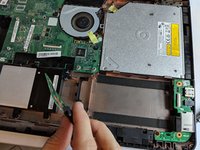
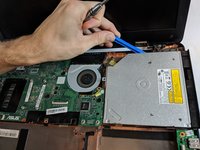
Unscrew the two 2.7 mm and one 5.7 mm CD drive screws with the Phillips #00 screwdriver.
-
With the plastic opening tool, gently pry the drive out from the metal brackets that hold it in place.
-
-
-
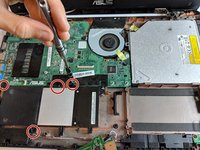
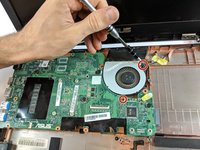
Unscrew and remove the two 5.7mm screws from the fan with the Phillips #0 Screwdriver.
-
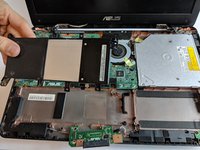
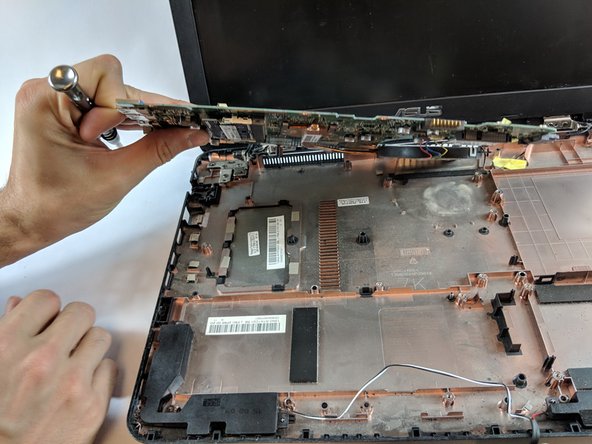
Gently lift the motherboard and fan to access the components underneath.
-
-
-
Unscrew and remove the four 0.01mm screws using the Phillips #0 Screwdriver from the heatsink.
-
-
Tool used on this step:Tweezers$4.99
-
Gently unplug power strip with fingers or tweezers to remove fan.
-
Gently pull fan from heatsink.
-
Replace fan.
-


To reassemble your device, follow these instructions in reverse order.
Team

USF Tampa, Team S1-G2, Leahy Fall 2018 Member of USF Tampa, Team S1-G2, Leahy Fall 2018
USFT-LEAHY-F18S1G2
4 Members
6 Guides authored