Asus Chromebook C202SA-YS02 Screen Replacement

What you need

  1. Asus Chromebook C202SA-YS02 Screen Replacement, Bezel: step 1, image 1 of 1
    • Using a flat blade, remove the two screw covers on the front of the bezel. They are attached by adhesive, so you may have to dig at it a little bit.

  2. Asus Chromebook C202SA-YS02 Screen Replacement: step 2, image 1 of 1
    • Unscrew and remove the two Phillips #1 4.5 mm screws that are now visible.

  3. Asus Chromebook C202SA-YS02 Screen Replacement: step 3, image 1 of 1
    • Using the plastic opening tool, carefully pry off the bezel. It will come off entirely, so be careful not to break it.

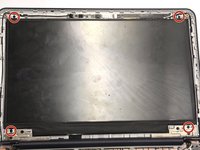
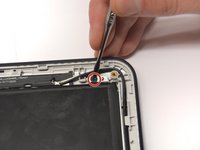
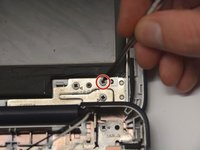
  4. Asus Chromebook C202SA-YS02 Screen Replacement, Screen: step 4, image 1 of 3 Asus Chromebook C202SA-YS02 Screen Replacement, Screen: step 4, image 2 of 3 Asus Chromebook C202SA-YS02 Screen Replacement, Screen: step 4, image 3 of 3
    • Unscrew and remove the four screws holding the screen in place.

  5. Asus Chromebook C202SA-YS02 Screen Replacement: step 5, image 1 of 1
    • Fold down screen and remove the screen connector band. You may have to use a small flat blade or a spudger, since the latch is very small.

Conclusion

To reassemble your device, follow these instructions in reverse order.

4 other people completed this guide.

Beau Hansen

Member since: 09/28/17

845 Reputation

7 Guides authored

0 Comments

Add Comment

View Statistics:

Past 24 Hours: 1

Past 7 Days: 18

Past 30 Days: 58

All Time: 3,323