
Arnova 7K G3 Rubber Feet Replacement

What you need

  1. Arnova 7K G3 Rubber Feet Replacement, Rear Cover: step 1, image 1 of 3 Arnova 7K G3 Rubber Feet Replacement, Rear Cover: step 1, image 2 of 3 Arnova 7K G3 Rubber Feet Replacement, Rear Cover: step 1, image 3 of 3
    • Remove four 5 mm Phillips #00 screws from each corner of the tablet.

  2. Arnova 7K G3 Rubber Feet Replacement: step 2, image 1 of 2 Arnova 7K G3 Rubber Feet Replacement: step 2, image 2 of 2
    • Place the iFixit opening tool in the notches between the cases and pull the covers apart.

  3. Arnova 7K G3 Rubber Feet Replacement: step 3, image 1 of 1
    • Repeat step two until 3/4 of the rear cover is unlatched.

    • Proceed to remove the rear cover by gently pulling it apart by hand.

  4. Arnova 7K G3 Rubber Feet Replacement, Rubber Feet: step 4, image 1 of 2 Arnova 7K G3 Rubber Feet Replacement, Rubber Feet: step 4, image 2 of 2
    • Locate the two lower bumpers on the back cover. These are the rubber feet.

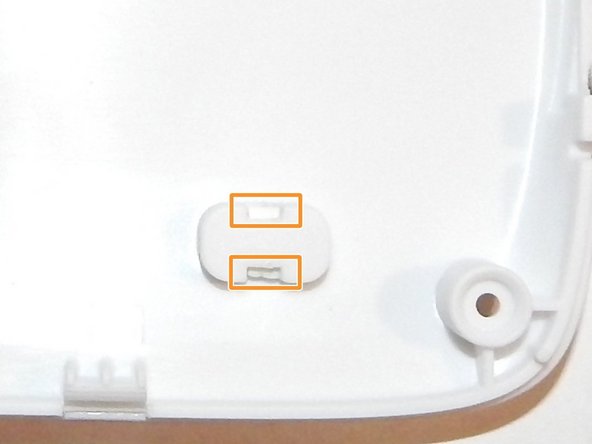
    • Flip the cover over to reveal the inside.

    • Locate the two rubber tabs, there are two for each rubber foot. They are located on the inside of the cover.

  5. Arnova 7K G3 Rubber Feet Replacement: step 5, image 1 of 1
    • Push the two tabs on each foot down using the pointed end of a spudger.

    • It may take some force to push in the tabs. Prying with the pointed end of the spudger and wiggling the tab free may be necessary.

  6. Arnova 7K G3 Rubber Feet Replacement: step 6, image 1 of 1
    • Flip the cover back over so you see the outside. Remove the rubber feet if they have not already fallen out.

Conclusion

To reassemble your device, follow these instructions in reverse order with the new rubber feet.

Tyler Sigafoose

Member since: 03/19/15

210 Reputation

2 Guides authored

Team

0 Comments

Add Comment

View Statistics:

Past 24 Hours: 0

Past 7 Days: 0

Past 30 Days: 0

All Time: 172