
Apple Powerbook 520/540 General Disassembly

What you need

  1. Apple Powerbook 520/540 General Disassembly, Case: step 1, image 1 of 2 Apple Powerbook 520/540 General Disassembly, Case: step 1, image 2 of 2
    • Turn computer over.

    • Remove battery expansion cover and battery.

  2. Apple Powerbook 520/540 General Disassembly: step 2, image 1 of 1
    • With monitor hinge at the bottom, remove the two top center screws.

  3. Apple Powerbook 520/540 General Disassembly: step 3, image 1 of 1
    • Remove top left and top right screws.

  4. Apple Powerbook 520/540 General Disassembly: step 4, image 1 of 1
    • Remove middle left and middle right screws.

  5. Apple Powerbook 520/540 General Disassembly: step 5, image 1 of 1
    • Open computer kickstands.

    • Remove screws underneath each kickstand.

  6. Apple Powerbook 520/540 General Disassembly: step 6, image 1 of 1
    • Lift keyboard from bottom and take out of shell.

  7. Apple Powerbook 520/540 General Disassembly: step 7, image 1 of 3 Apple Powerbook 520/540 General Disassembly: step 7, image 2 of 3 Apple Powerbook 520/540 General Disassembly: step 7, image 3 of 3
    • Lift the white ribbon clamps securing the keyboard ribbon cables to the motherboard. You can do this using a plastic opening tool.

    • Removing both ribbon cables from the motherboard will leave the clamps like so.

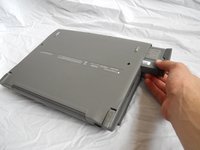
    • From here you can access the logic board, hard drive, and floppy drive.

Conclusion

To reassemble your device, follow these instructions in reverse order.

11 other people completed this guide.

Mark McNeff

Member since: 04/20/11

515 Reputation

2 Guides authored

2 Guide Comments

http://tim.id.au/laptops/apple/powerbook... (PDF)

Apple Service Source: PowerBook 500 Series

Guides for everything.

tas - Reply

Thanks been trying to fix this for a long time

Luke - Reply

Add Comment

View Statistics:

Past 24 Hours: 3

Past 7 Days: 10

Past 30 Days: 39

All Time: 7,422