
Apex Tablet 7 Camera Replacement

Steven Gutzwiller and 3 other contributors
Last updated on Jun 22, 2015
Views: 881
View statistics:
- Past 24 Hours:
- 3
- Past 7 Days:
- 22
- Past 30 Days:
- 101
- All Time:
- 881
Comments: 1
1 comment on steps.
Completed: 1 2
1 person has marked this guide "completed." Will you be next?
2 people have marked this guide "completed." Including you — great job!
Favorites: 1 2
1 person has favorited (and subscribed to) this guide. Will you be next?
2 people have favorited (and subscribed to) this guide — including you!
Needs Better Images
Better photos will improve this guide. Help out by taking, editing, or uploading new ones!
Introduction
Go to step 1 ↓This guide explains how to replace the camera for the Apex Tablet 7. Use this guide if your tablet has a damaged or malfunctioning camera. You should have a replacement camera and be prepared to remove your old camera.
What you need
Tools


-
-
-
Unscrew the two 2.70 mm Phillips #00 screws on the side of the tablet that has the buttons and the headphone jack (bottom side when holding upright).
 Ask FixBot
-
-
-
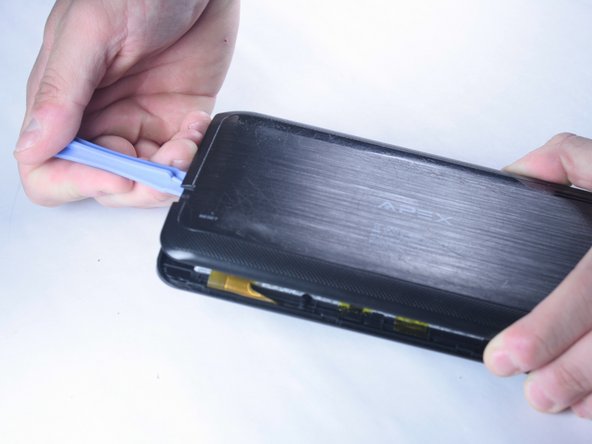
Slide a plastic opening tool in between the edge of the back panel and the the top edge of the device.
-
Run the plastic opening tool along the sides of the tablet while keeping it in the crack between the tablet and the back panel to create an opening.
-
-
-
Apply pressure using your hand to pop the back panel off slowly, taking extra care around the speaker connection.
-
-
-
The back panel should now be disconnected from the device. This provides access to the components of the device for repairing and replacing parts of the tablet.
-
-
-
-
-
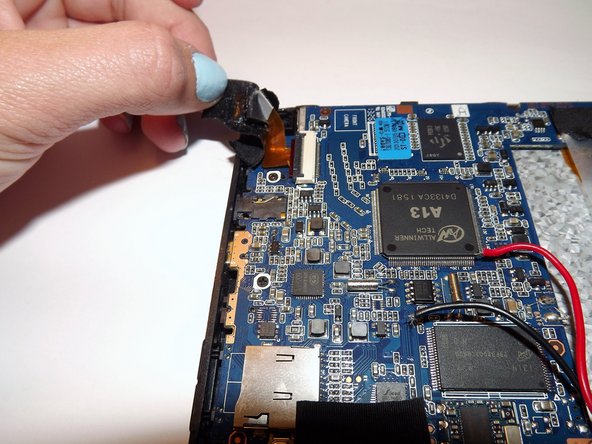
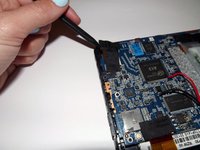
Gently remove the black tape covering the camera and circuit board. The tape will be connected to a foamy block on the back of the actual camera component.
-
-
-
-
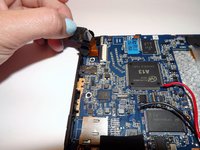
Flip the black latch over the gold cable to the upright position in order to release the cable.
-
-
-
Pull out the camera. There should not be any more connections holding it in place.
-
Reconnect the replacement camera.
-
-






To place the new part and reassemble your device, follow these instructions in reverse order.
Cancel: I did not complete this guide.
One other person completed this guide.

Team

Baylor, Team 2-2, Grigsby Spring 2015 Member of Baylor, Team 2-2, Grigsby Spring 2015
BU-GRIGSBY-S15S2G2
4 Members
60 Guides authored
