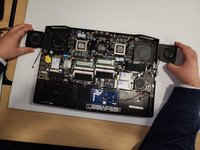
Aorus x7 v2 Fan Assembly Replacement

What you need

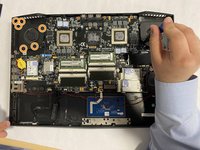
  1. Aorus x7 v2 Fan Assembly Replacement, Fan Assembly: step 1, image 1 of 3 Aorus x7 v2 Fan Assembly Replacement, Fan Assembly: step 1, image 2 of 3 Aorus x7 v2 Fan Assembly Replacement, Fan Assembly: step 1, image 3 of 3
    • Flip the laptop over.

    • Unscrew the 12 screws holding on the bottom cover.

    • Take off the bottom cover.

    • Remove the 12 screws from the heat sink.

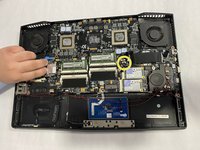
  2. Aorus x7 v2 Fan Assembly Replacement: step 2, image 1 of 3 Aorus x7 v2 Fan Assembly Replacement: step 2, image 2 of 3 Aorus x7 v2 Fan Assembly Replacement: step 2, image 3 of 3
    • Remove the heat sinks one by one.

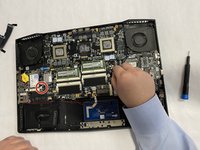
  3. Aorus x7 v2 Fan Assembly Replacement: step 3, image 1 of 3 Aorus x7 v2 Fan Assembly Replacement: step 3, image 2 of 3 Aorus x7 v2 Fan Assembly Replacement: step 3, image 3 of 3
    • Unscrew the six screws from the right fan.

    • Unscrew the six screws from the left fan.

    • Locate the connection plug for the fan to the motherboard and disconnect the left fan connector.

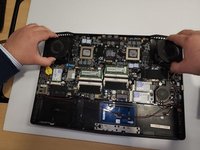
  4. Aorus x7 v2 Fan Assembly Replacement: step 4, image 1 of 3 Aorus x7 v2 Fan Assembly Replacement: step 4, image 2 of 3 Aorus x7 v2 Fan Assembly Replacement: step 4, image 3 of 3
    • Disconnect the right fan connector.

    • Carefully lift up the left and right fans.

    • Set the fans to the side before installing new fans.

Conclusion

To reassemble your device, follow these instructions in reverse order using new left and right fans.

Alexis Hernandez Jimenez

Member since: 08/25/22

572 Reputation

5 Guides authored

Team

Gateway, Team 1-4, Pee Fall 2022 Member of Gateway, Team 1-4, Pee Fall 2022

GCC-PEE-F22S1G4

3 Members

6 Guides authored

0 Comments

Add Comment

View Statistics:

Past 24 Hours: 1

Past 7 Days: 6

Past 30 Days: 19

All Time: 348