Introduction
Most replacement guides will require you to open up the Alexa to access components, so following this guide will let you access the internal components quickly and safely.
What you need
-
-
Carefully peel off the bottom pad to expose the fastening screws.
-
Take note of the location of each screw you remove. There should be three silver 1.4 T5 Torx screws on the top row, one green 1mm T5 Torx screw in the middle. On the bottom row, the second from the left is a black 1.5mm t5 Screw, while the rest are then 3 green 1mm T5 screws. They must be installed as they were removed.
-
-
-
-
After the screws are removed, grip the front panel and remove, using a plastic opening tool if necessary. This will expose the inside of the device.
-
-
-
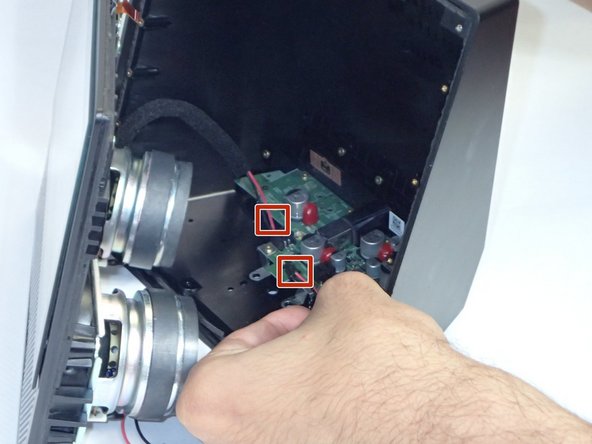
Use tweezers or your hands to carefully disconnect the red wires connecting the speakers to the power supply board.
-
Repeat this step for the other speaker, and lay the front section flat with the facing down.
-
Make sure to ground yourself against a metal object nearby (ex. a metal chair, a door frame) before you touch any circuitry. An accidental static discharge can permanently damage a circuitboard.
-


Team

University of South Florida St. Petersburg, Team S1-G3, Stowe Fall 2018 Member of University of South Florida St. Petersburg, Team S1-G3, Stowe Fall 2018
USFSP-STOWE-F18S1G3
4 Members
6 Guides authored